Tascam hi-res editor, 3tascam hi-res editor installation guide (for mac), Installing the application – Teac Hi-Res Editor Installation User Manual
Page 3
TASCAM Hi-Res Editor
TASCAM Hi-Res Editor Installation guide
3
TASCAM Hi-Res Editor installation
guide (for Mac)
8
Supported operating systems
OS X Yosemite (10.10.1 or later)
OS X Mavericks (10.9.5)
8
Supported models
Mac with Intel Core i series or Core M series processor
8
Memory
2 GB or more (at least 4 GB recommended)
8
Open disk space
At least 150 MB necessary
8
Display resolution
1024×768 (XGA) or larger (at least 1280×800 recommended)
8
Required hardware
Audio interface that supports Core Audio
Installing the application
NOTE
During installation of the TASCAM Hi-Res Editor, a warning
message such as “‘TASCAM_HiResEditor.pkg’ can’t be
opened because it was not downloaded from the Mac App
Store.” might appear. If a message like this appears, follow
the instructions in “Working with Gatekeeper” on page 4
and then proceed with the installation.
1. Download the latest the TASCAM Hi-Res Editor for the
operating system you are using from the TEAC Global Site
(http://teac-global.com/) and save it on the computer to be
used with the unit.
2. Double-click “TASCAM_HiResEditor_installer_vXXX.dmg”,
which is the saved disk image file for the TASCAM Hi-Res
Editor, and double-click “TASCAM_HiResEditor.pkg” inside
the folder that opens.
NOTE
Depending on the computer’s settings, the downloaded zip
file might not have opened automatically. In this case, open
the zip file first and then double-click the disk image file.
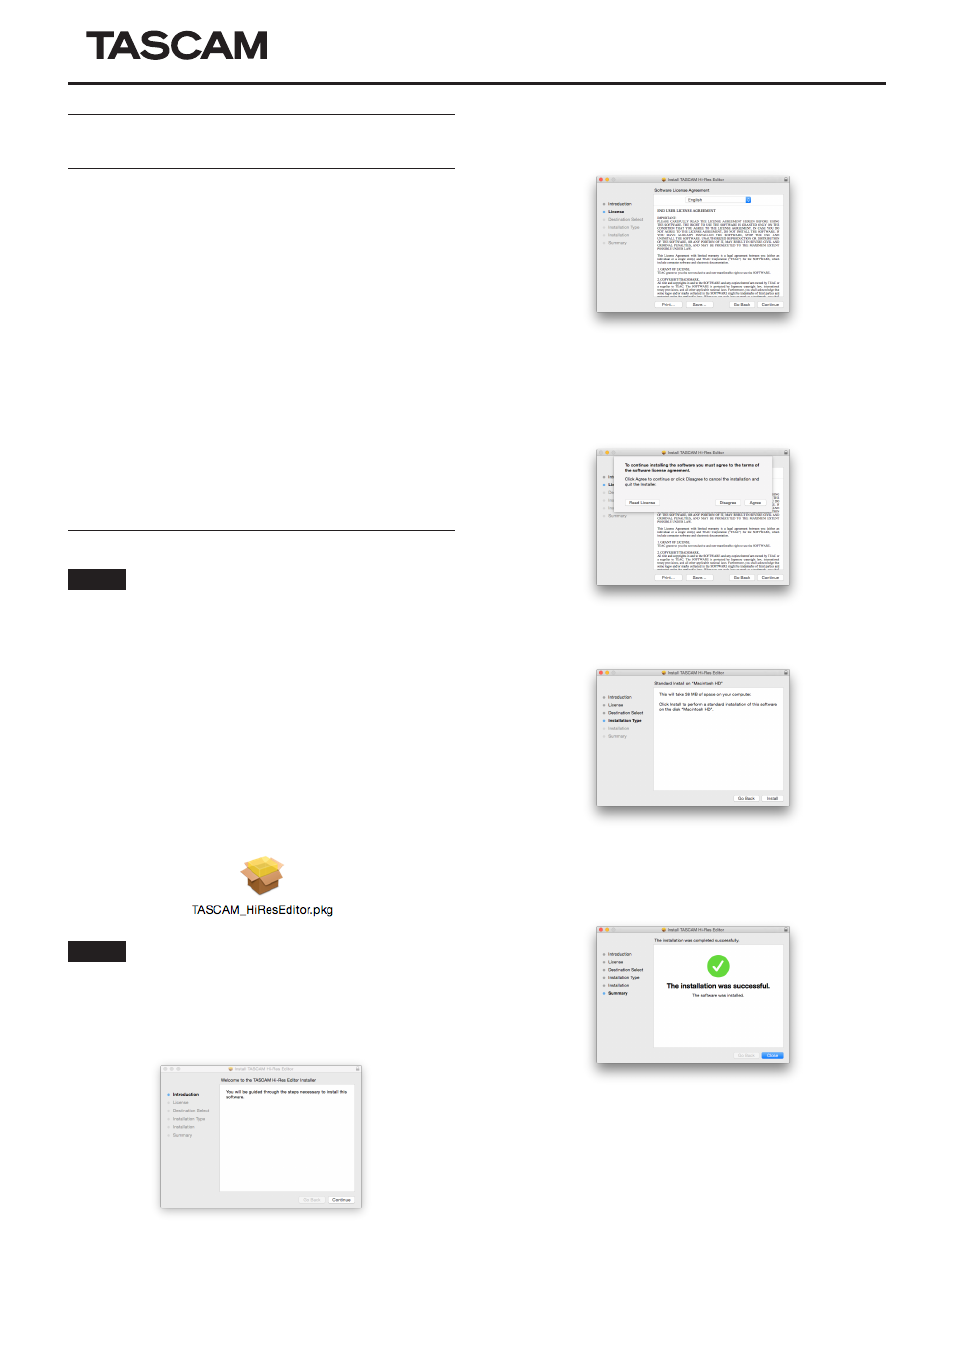
3. When the installer starts, click the “Continue” button.
4. Next, select the desired language and click the “Continue”
button.
5. Click the “Read License” button and check the contents
of the Software License Agreement. If you agree to the
contents, click “Agree”.
Then, click the “Next” button.
6. Next, click the “Install” button to start installation.
7. The following screen appears when installation has
completed.
Click the “Close” button.
The installer will close.