1 types of connections, 2 desktop or rack mount, 3 cooling – Thinklogical Q-4300 Chassis Manual User Manual
Page 7
Revision A
7
July 2011
3 Using the Q-4300 Chassis and Modules
3.1 Types of Connections
All physical connections to the product use industry-standard connectors. Non-supplied cables that may
be needed are commercially available. All interface connections are found on the rear of the unit.
3.2 Desktop or Rack Mount
You may choose to place your unit on a shelf or desktop (rubber feet included), or rack mount it using
the supplied mounting brackets (EIA 19
” rack mountable). The front panel should be visible and
unobstructed so that the front panel buttons and LCD display are accessible. All connections are made
to the rear of the chassis. The Q-4300 chassis does not need to be opened or accessed. The sturdy
metal case allows units to be stacked as needed (maximum of four units per stack, with a minimum
of two inches of clearance between stacks for adequate ventilation).
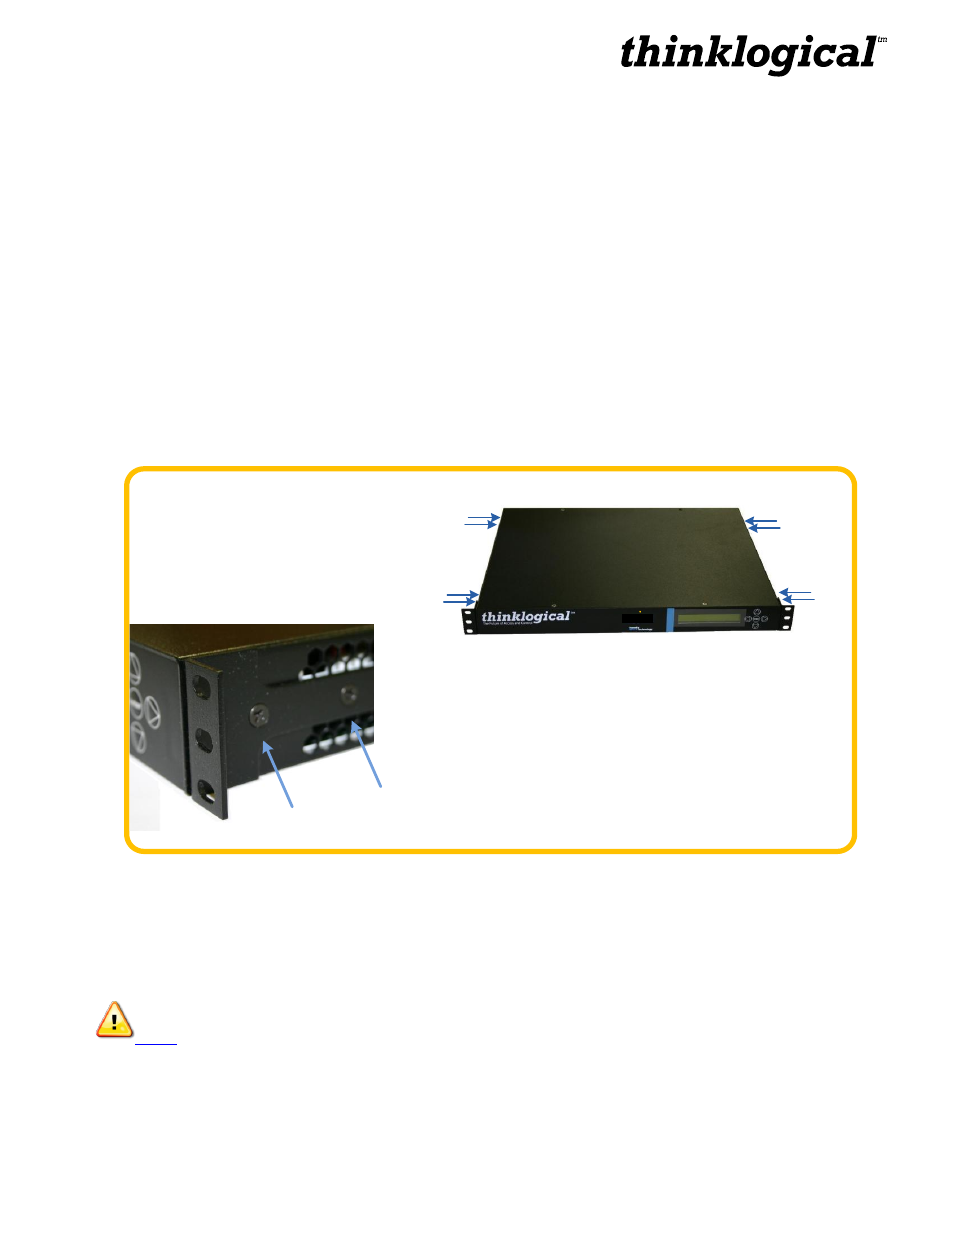
8 Mounting bracket
screws
DVI TWO DISPLAY
Velocity
kvm-28
Fiber Optic Transmitter
2 Mounting bracket screws
in four places.
RACK-MOUNT OR DESK-TOP
OPTIONS: All Thinklogical™ KVM
extenders can be mounted in a
standard EIA 19" rack or on a shelf or
desk-top.
Each mounting bracket is secured
by four screws and can be safely
removed from the transmitter or
receiver unit for desk-top mounting
after power has been removed from
the unit.
All screws should be reinstalled after
the brackets have been removed.
Mounting Bracket Removal
3.3 Cooling
The Q-4300 Extender System uses four DC fans to move air horizontally through the enclosure.
Note: Be sure to leave adequate ventilation space on both sides of the units
(2”minimum), especially if the units are being stacked