Westermo MRD-310 User Manual
Page 24
24
6623-2201
Configure the LAN interface and DHCP Server
To access the configuration page for the LAN interface and DHCP Server, select
”Interfaces” from the top level menu. A LAN interface screen similar to the one shown
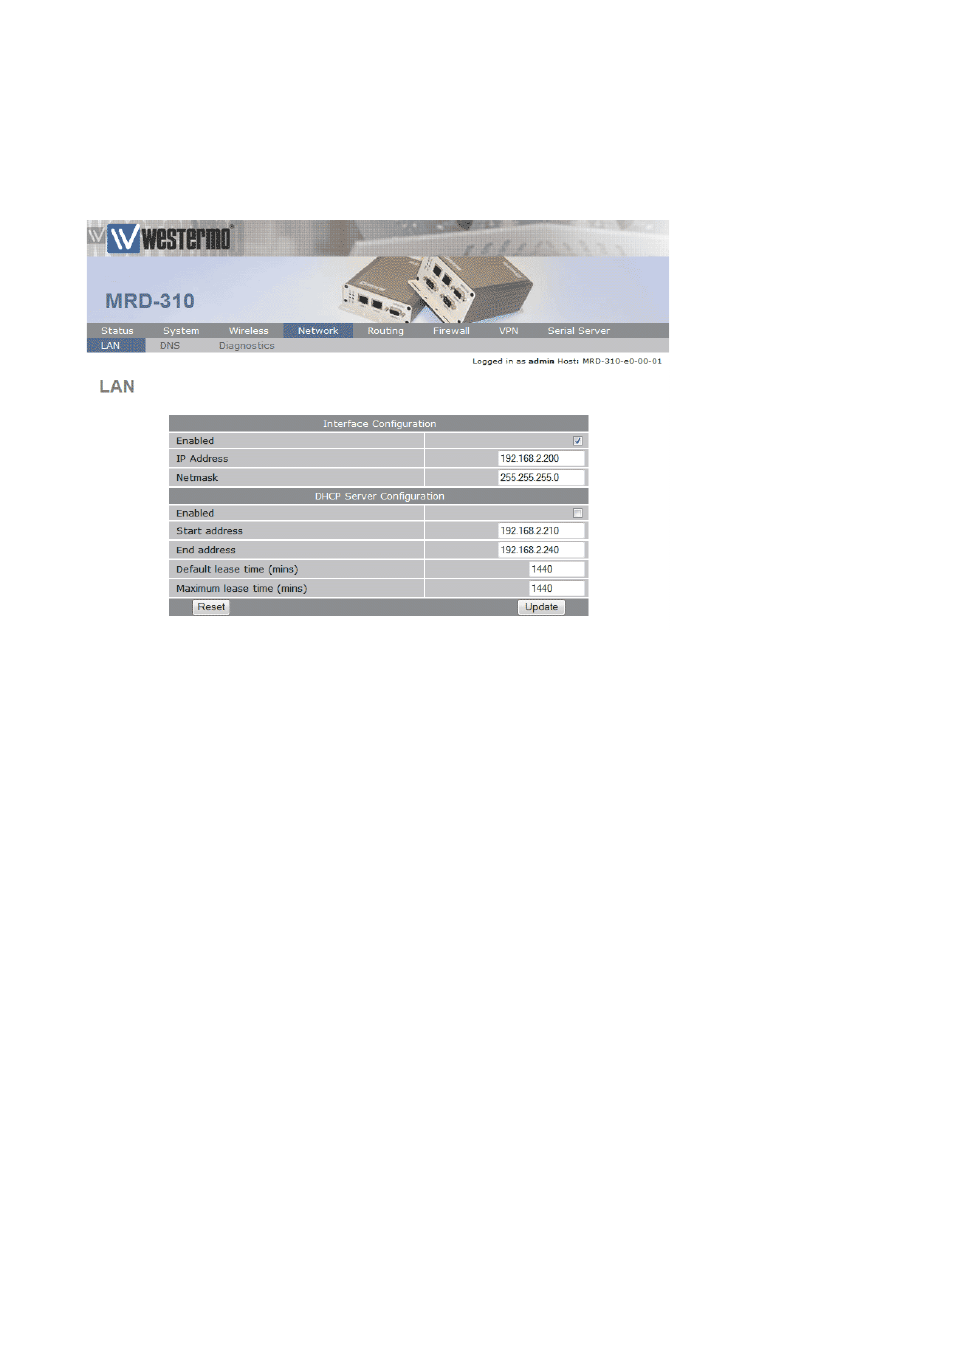
in figure 13 will be displayed.
Figure 13
Setting the IP Address
If it is desired to change the IP address of the LAN port, follow the steps below:
• Enter the new IP address and netmask in the ”Interface Configuration table”.
• Click Update to set the changes. Once the changes have been set, the IP address of the
MRD-310 will change. Enter the new address in the browser on the PC. It will be nec-
essary to login again, following the procedure described in the previous section.
Enabling DHCP
The DHCP server allows clients on the local network to be automatically allocated IP
addresses from the MRD-310. The unit will also provide the clients with network set-
tings like their default route and DNS servers. By default the DHCP server is disabled
but if enabled it will be configured to serve IP addresses in the range 192.168.2.210
through 192.168.2.240, and the Default and Maximum lease times have been set to 1440
minutes. So if these values are consistent with the network that the MRD-310 is con-
nected to, then the DHCP can be enabled by setting the Enabled field to Yes and clicking
the Update button.
If the standard settings are not applicable for the connected network, then refer to figure
13 and follow the steps below, to configure the DHCP server:
• Choose a group of available IP addresses on the local network. For example, if the IP
address of the MRD-310 is 192.168.2.200 with a netmask of 255.255.255.0, a group
chosen could be’192.168.2.100 to 192.168.2.150. This will provide 51 addresses for
clients.