Maestro configuration – ZeeVee Zvb701 (DVB-T/C) User Manual
Page 8
Page 8
|
Zvb701-EU Configuration Guide
www.zeevee.com
Maestro Configuration
Maestro is a configuration tool that you use optionally to
customize your system beyond what is allowed in the front
panel. For example, using Maestro you can assign a channel
number (logical channel) independent of the RF number and
label the channels.
Connecting with Maestro
1. Connect your computer directly to the ZeeVee modulator
using a standard Ethernet cable (not a cross-over cable) or
connect the unit and your computer to any LAN that has a
DHCP server.
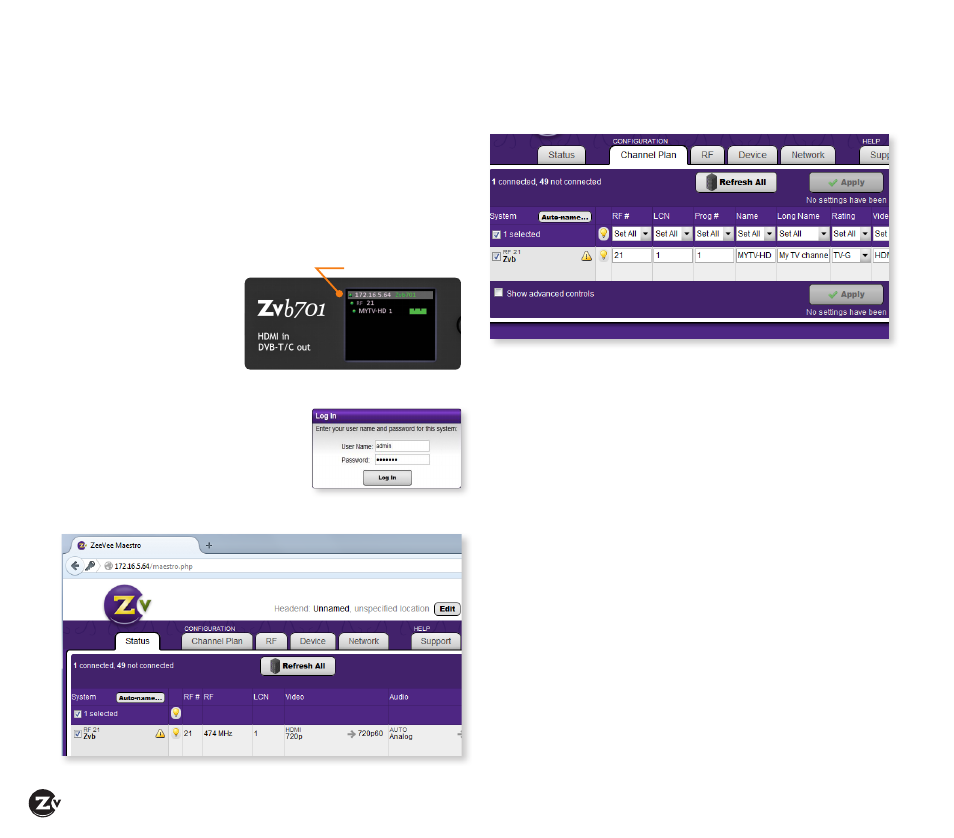
2. After a few moments,
an IP address will
appear at the top of
the front panel display.
3. Using any web browser
(Chrome or Firefox
preferred), enter the IP address to launch Maestro.
4. You will be directed to a login page.
Your user name is always “admin.”
The default password is “admin”
but you can change the password.
Login is case-sensitive.
5. After you log in, the Maestro Status tab appears. Here you
can see the general information status.
Configuring RF numbers and logical channel numbers (LCN)
1. Click on the Channel Plan tab.
2. Click in the RF # field and enter the RF number as you
choose from the CCIR Table (on page 7). Make sure you’ve
reviewed the CCIR Table Important Notes before completing
this task.
3. Click in the LCN field and enter a logical channel number.
The LCN is what the TV displays.
Note that you can choose a logical channel number that is
different from the RF#. For instance, if your RF# is 21, you
can choose 3 as your LCN.
4. Click Apply to save changes. Your unit stores configurations
so they are not lost on power-down.
5. Run Auto Scan at TV (see Tuning your channel at the HDTV,
page 5) when you have saved configuration changes.
Labeling channels with channel and content information
1. In the Channel Plan tab, click in the Name field and enter
the channel short name (up to 7 characters).
2. Click in the Long Name field and enter the long or more
descriptive channel name (up to 63 characters). The TV
displays these names and descriptions when the channel is
changed or info guide information is requested.
3. Click Apply to save changes.
IP address