ZeeVee Using Maestro (QAM) User Manual
Using maestro, Connecting to maestro, What is maestro
w w w . z e e v e e . c o m
Using Maestro
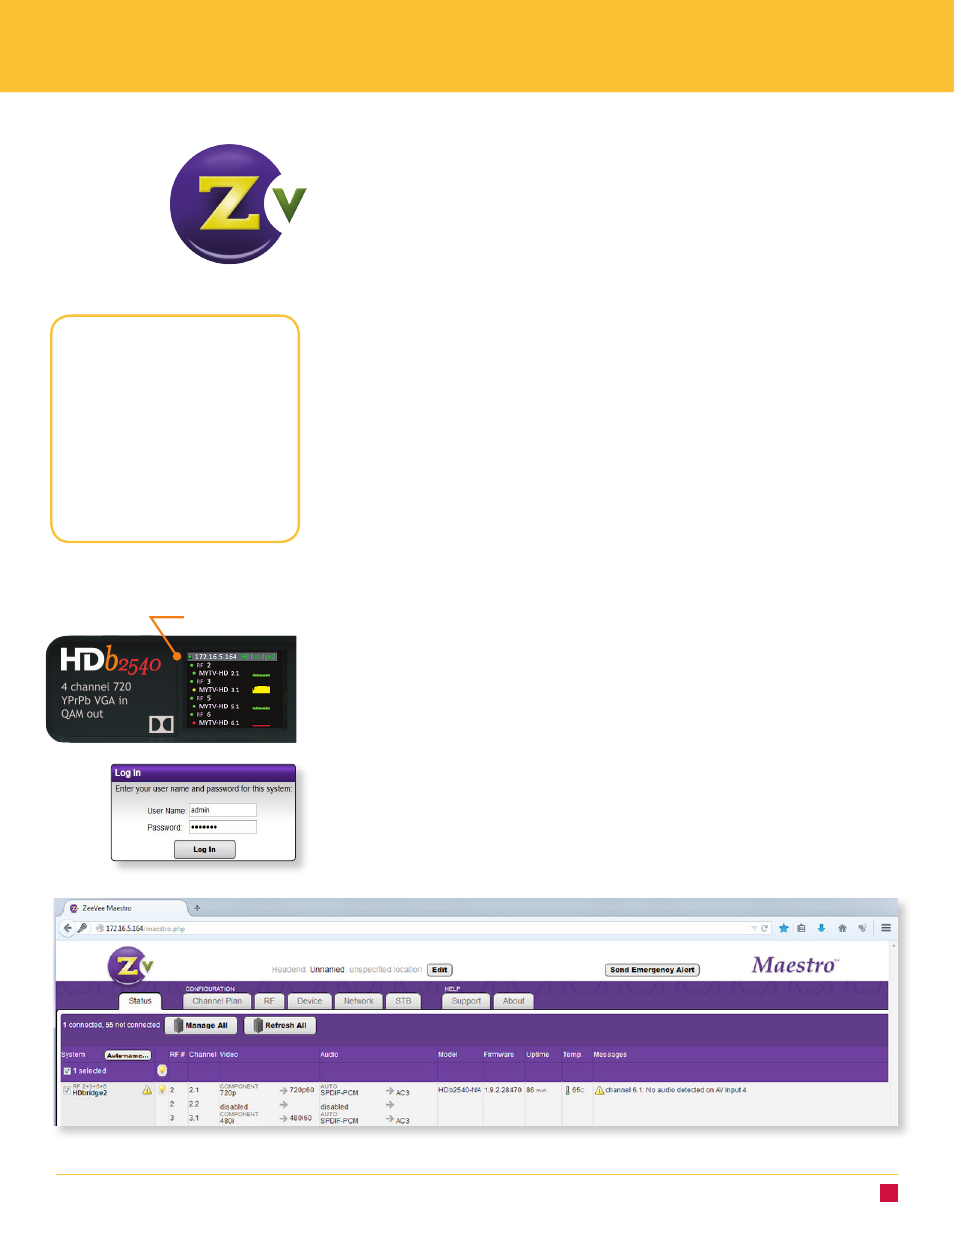
Connecting to Maestro
To use Maestro, you first need to connect to it through the computer.
1. Connect your computer directly to the ZeeVee modulator using a standard Ethernet
cable (not a cross-over cable) or connect the unit and your computer to any LAN
that has a DHCP server.
2. An IP address appears at the top of the front panel display.
3. Using any web browser (Chrome or Firefox preferred), enter the IP address to
launch Maestro.
4. You will be directed to a login page. Your user name is always “admin.” The default
password is “admin” but you can change the password. Login is case-sensitive.
5. After you log in, the Maestro Status tab appears. Here you can see the general
information about the unit.
A P P L I C A T I O N N O T E
The Maestro tool contains the
following tabs, each with its own
ways of customizing your system:
• Status tab
• Channel Plan tab
• RF tab
• Device tab
• Network tab
• STB tab
• Support tab
• About tab
IP address
What is Maestro?
Maestro is a configuration tool that you use optionally to customize your
ZeeVee system beyond what is allowed in the front panel. For example, using
Maestro you can assign a channel number (virtual channel) independent of the
RF number, label the channels and manage all ZeeVee units on your network.
You can use Maestro with ZvPro and HDbridge 2000 series units, though the
offerings and functionality may change depending on the model.
NA