Using set all and the auto-increment function – ZeeVee Using Maestro (QAM) User Manual
Page 5
N A | 5
w w w . z e e v e e . c o m
U S I N G M A E S T R O
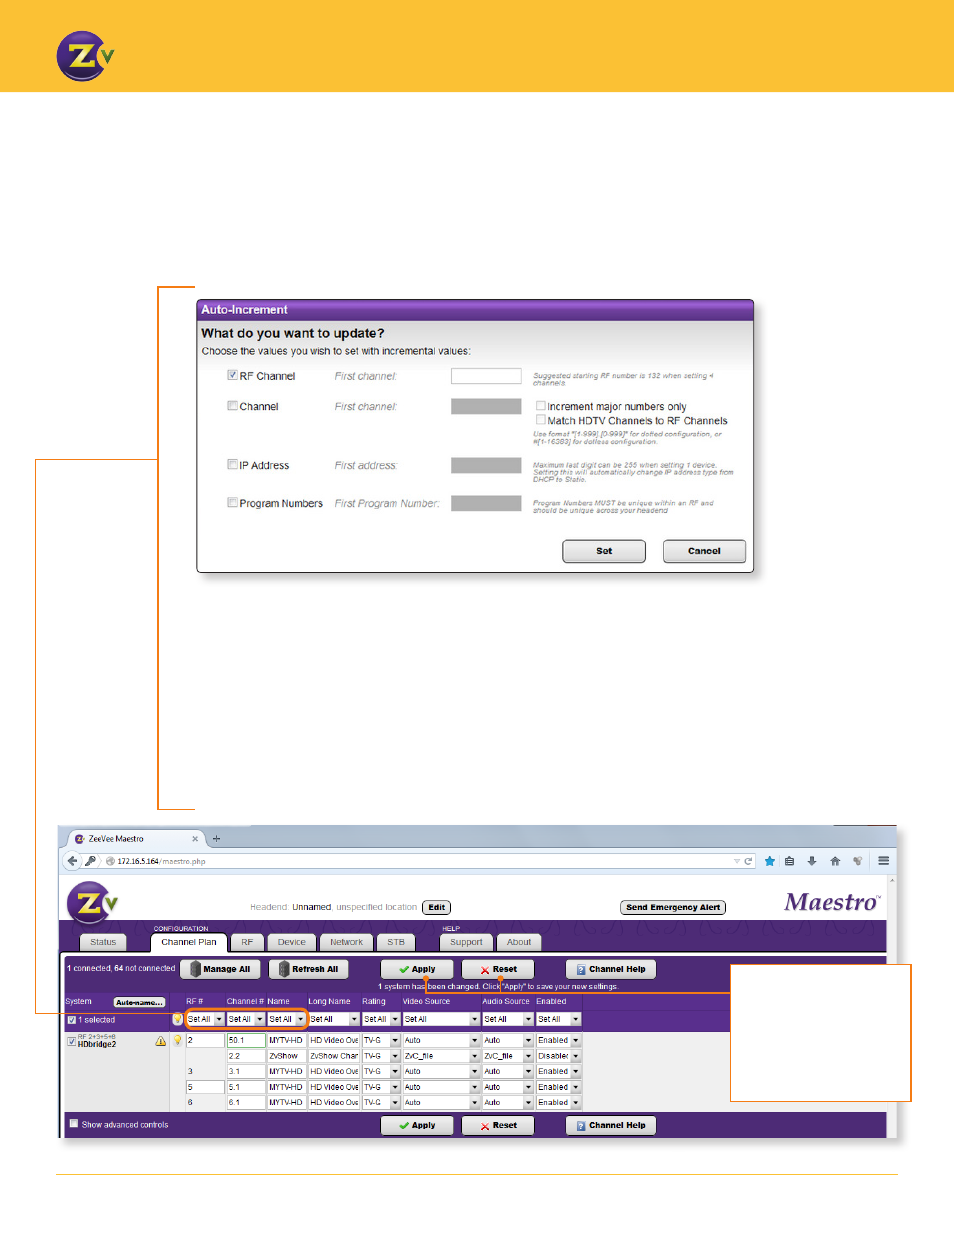
1.
Click Set All and select Auto-increment.
2. Enter the first number (RF#, Channel#, Prog# or IP address) you wish to use. Maestro then automatically
increments down and assigns all subsequent numbers or addresses.
For Channel #, enter the starting channel or select option to match the channel to the RF channel.
When Increment major numbers only is checked, only the number before the “.” will increment (the major
number, the number after “.” is the minor number). For example, enter 50.1, and the channels will increment
51.1, 52.1, and so on.
For more information on RF#/Channel# and Prog# see pages 6 and 8. For details on IP Address, see page 15.
3. Click Set and channels or IP addresses update for your review. They are not saved until you click Apply on the
Channel Plan or Network page.
Using Set All and the Auto-Increment Function
The Set All feature allows you to apply settings to all managed units. Most configuration options offer the
Set All feature so that you can change settings across multiple units.
When you choose Set All for RF#, Channel#, Prog# (Channel Plan tab) and IP address (Network tab), the
Auto-Increment function allows you to set information in a few easy steps.
Apply
– Click to save
changes.
Reset
– Click to clear
any changes that have
not been saved.