Jordan Valve Mark ED & ET Series (8) Globe Style Control Valve User Manual
Page 2
M
ark
ED
anD
ET S
EriES
8-
inch
G
lobE
S
TylE
c
onTrol
V
alVES
-2-
Replacing the Plug Stem or Load Ring
1.
Unscrew the locknuts from the stem.
2.
Loosen the packing flange nuts.
3.
Lean the bonnet over.
4.
Draw the plug and stem out of the bonnet.
5.
If valve plug is damaged it will be necessary
to replace both the valve plug and stem. If the
stem is damaged, a new valve stem can
be inserted in the original valve plug.
Replacing the Stem
1.
Remove the old groove pin
2.
Remove the old stem, and replace with new
stem.
3.
Tighten the new stem until the thread bottoms
out against the plug.
4.
Drill through the stem using the hole in the valve
plug as guide. Remove any chips or burrs and
drive in a new groove pin to lock the assembly.
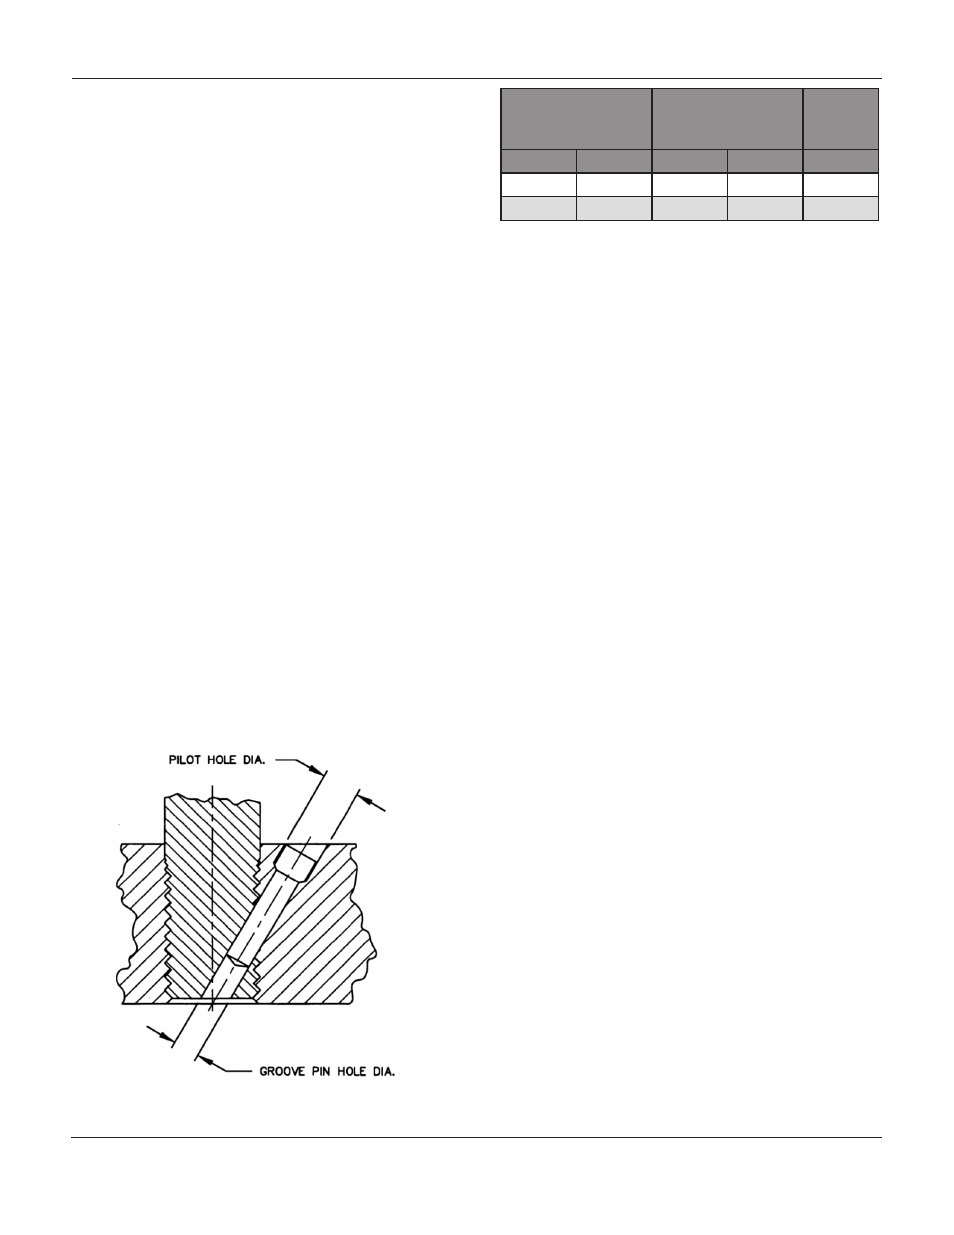
Refer to Table 1 for groove pin drill sizes.
Figure 1: Groove Pin Pilot Holes
Valve Stem
Connection (VSC)
Torque
Min/Max Values
Groove
Pin Drill
Size
Inches
mm
Lbf•Ft
N•m
Inches
3/4
19.1
237-339 175-250
3/16
1
25.4
420-481 310-355
1/4
Assembly
1.
Ensure all gasket surfaces are clean.
2.
Replace the valve plug piston ring or seal
ring with a new ring.
3.
Assembly for design:
3.1.
Mark "ED” Design Bodies:
For valve bodies using a carbon filled
TFE piston ring, at the split, slightly
spread the ring and install it over
the stem and into the piston ring
groove on the valve plug.
Graphite piston rings are supplied
as a complete ring and must be
broken into two sections. The piston
ring can be broken in half by scoring,
and then breaking over a hard
surface i.e.) edge of a table. Ensure
the broken ends are
re-matched when the
piston ring is installed in the piston
ring
groove.
3.2.
Mark "ET” Design Bodies:
Apply a lubricant to both back-up
ring and seal rings. Install the back-
up ring over the stem and
into the piston ring groove. Place
the seal ring over the top edge of the
valve plug, so that it slips into
the groove on one
side of the valve plug.
Cautiously
stretch the seal ring to
work it over the top edge of
the valve plug. Avoid jerking sharply
on the seal, as the TFE in the seal
ring needs time to cold flow during
the stretching procedure. This
stretching procedure may make the
seal ring seem loose
in the groove, however it will contract
to its original size after installation of
the
cage.
Table 1: Stem Torque and Groove Pin Drill Sizes