Casio BE-300 Transferring other types of data to CASSIOPEIA User Manual
Page 6
Advertising
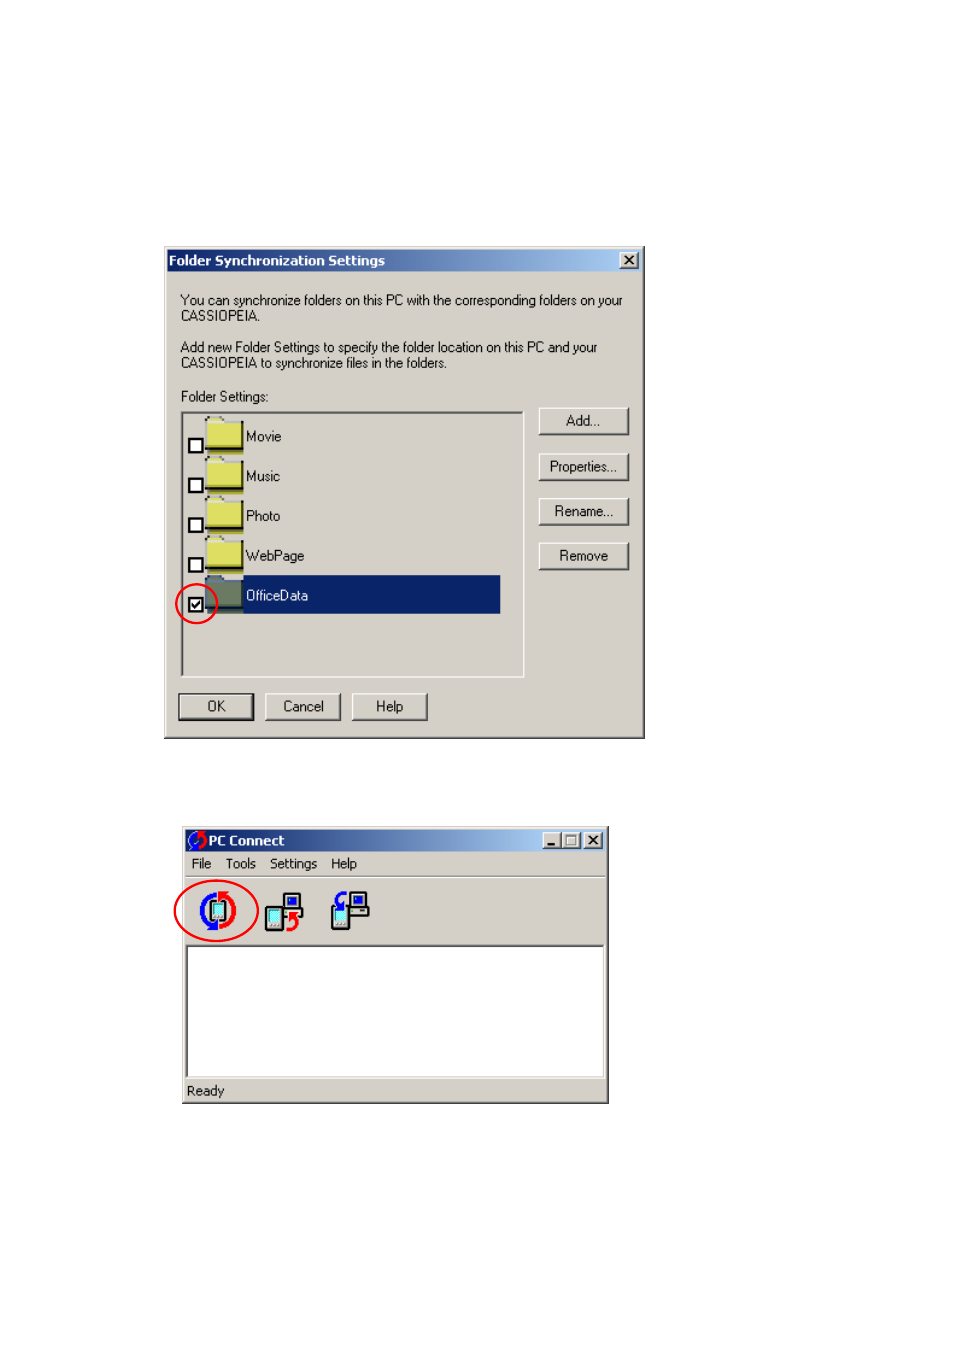
(8) The “Folder Synchronization Settings” window will reappear. Confirm that a
checkmark has been placed in the box for the folder to be synchronized, and then
click [OK]. This completes setting of the optional folder for data transfer.
(9) Click the [Synch] button (shown in the red circle below), and the folders that did not
already exist when they were set in Step 7 will be automatically created.
Advertising