Fig.8 fig.7 fig.6 – Sealey GV180WM User Manual
Page 5
Warning! Always wear safety goggles before using the blower.
Warning! Keep bystanders away from blowing debris.
Warning! Wear a dust mask if blowing creates dust that might be inhaled.
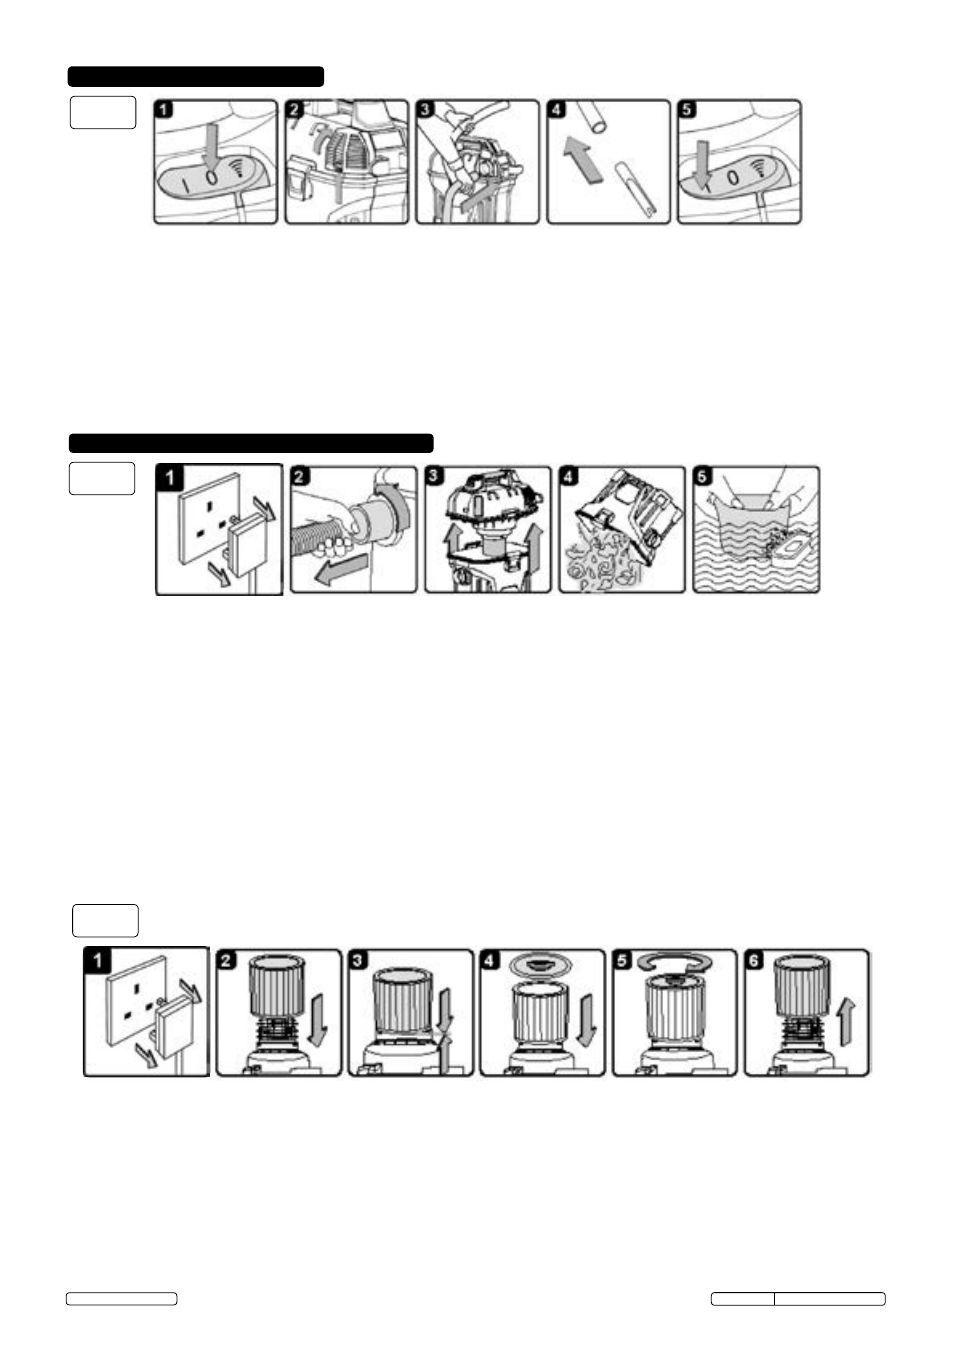
8.1.
Make sure the vacuum is switched off. (fig.6.1).
8.1.1. Make sure the container is empty before using it as a blower.
8.1.3. Lift the blower filter door button to the unlocked position and flip the blower filter door open. (fig.6.2).
8.1.4. remove the hose from the vacuum port and insert the locking end of the hose into the blowing port on the power head and lock into
position. (fig.6.3).
8.1.5. fit the desired extension wand and/or nozzle to the free end of the vacuum hose. (fig.6.4).
8.1.6. Before turning ON the vacuum, firmly hold the loose end of the hose. Turn the motor on by flipping the switch to the 'I' ON postion or
use the vacuum with the switch set to remote control. (fig.6.5)
9. maintenance
9.1.
Make sure the power cord is disconnected from the outlet. (fig.7.1)
9.1.1. Disconnect the hose from the vacuum. (fig.7.2)
9.1.2. remove the vacuum from the mounting rack.
9.1.3. Undo the latches and remove the power head from the container. (fig.7.3)
9.1.4. Clear out all dirt or debris from the container and the hose. (fig.7.4)
9.1.5. Clean the foam filter by washing it with water and mild soap. (fig.7.5)
9.1.6. check the hose, attachments and power cord to check that they have not been damaged.
imPortant: Clean or change the cartridge filter regularly for best performance. ALWAYS USE CARTRIDGE FILTER FOR DRY
VACUUMING. If the machine is used without the cartridge filter, the motor will burn out and the warranty will be voided. Always keep spare
filters on hand.
imPortant: The filters are made of high quality materials designed to stop small dust particles. The cartridge filter and dust collection bag
should be used for dry pick-up only. A dry cartridge filter is necessary to pick up dust. If the cartridge filter is wet, it will clog quickly and be
difficult to clean. Handle the filter carefully when removing it for cleaning or replacing. Check the filters for tears or small holes. A small hole can
let dust pass through and out of the cleaner.
Do not use a filter with holes or tears, replace it immediately.
Warning! Always disconnect the plug from the power outlet before removing the power head from the container.
9.2.
inStalling the cartriDge Filter
9.2.1. Make sure the power cord is disconnected from the outlet. (fig.8.1).
9.2.2. remove the power head and place upside down.
9.2.3. Install the cartridge filter over the filter cage with the flat end of the filter towards the vacuum power head. Carefully push filter in until it
stops against the power head. (fig. 8.2 & 8.3).
9.2.4. Place filter retainer on top of cartridge filter over the raised lip and tighten down by turning retainer clockwise.
Do not overtighten.
(fig.8.4 & 8.5).
9.3.
removing anD cleaning the cartriDge Filter
9.3.1. Unlock and remove the filter retainer by turning the handle anticlockwise.
9.3.2. Carefully hold and pull the cartridge filter up for removal. (fig.8.6).
9.3.3. Clean the cartridge filter by gently tapping or brushing dirt off. Cleaning should not be done indoors. For optimal performance a new filter
is recommended.
9.3.4. Install cleaned filter, refer to 9.2. (INSTALLING THE CARTRIDGE FILTER)
fig.8
fig.7
fig.6
8. BloW oPeration
Original Language Version
GV180WM issue no.2(i) 02/04/15
© Jack sealey Limited