Fig.3 – Sealey SUPERSTART1020 User Manual
Page 3
NOte: If charger is connected to a fully charged battery the ammeter will show a low charging output. no charging is necessary.
do not continue to charge a fully charged battery, as this will damage the battery. do not leave a battery on charge unattended.
4.2.
cONNectINg charger tO BatterY
ensure the battery charger is unplugged from the mains power supply before connecting power leads to the battery.
4.2.1.
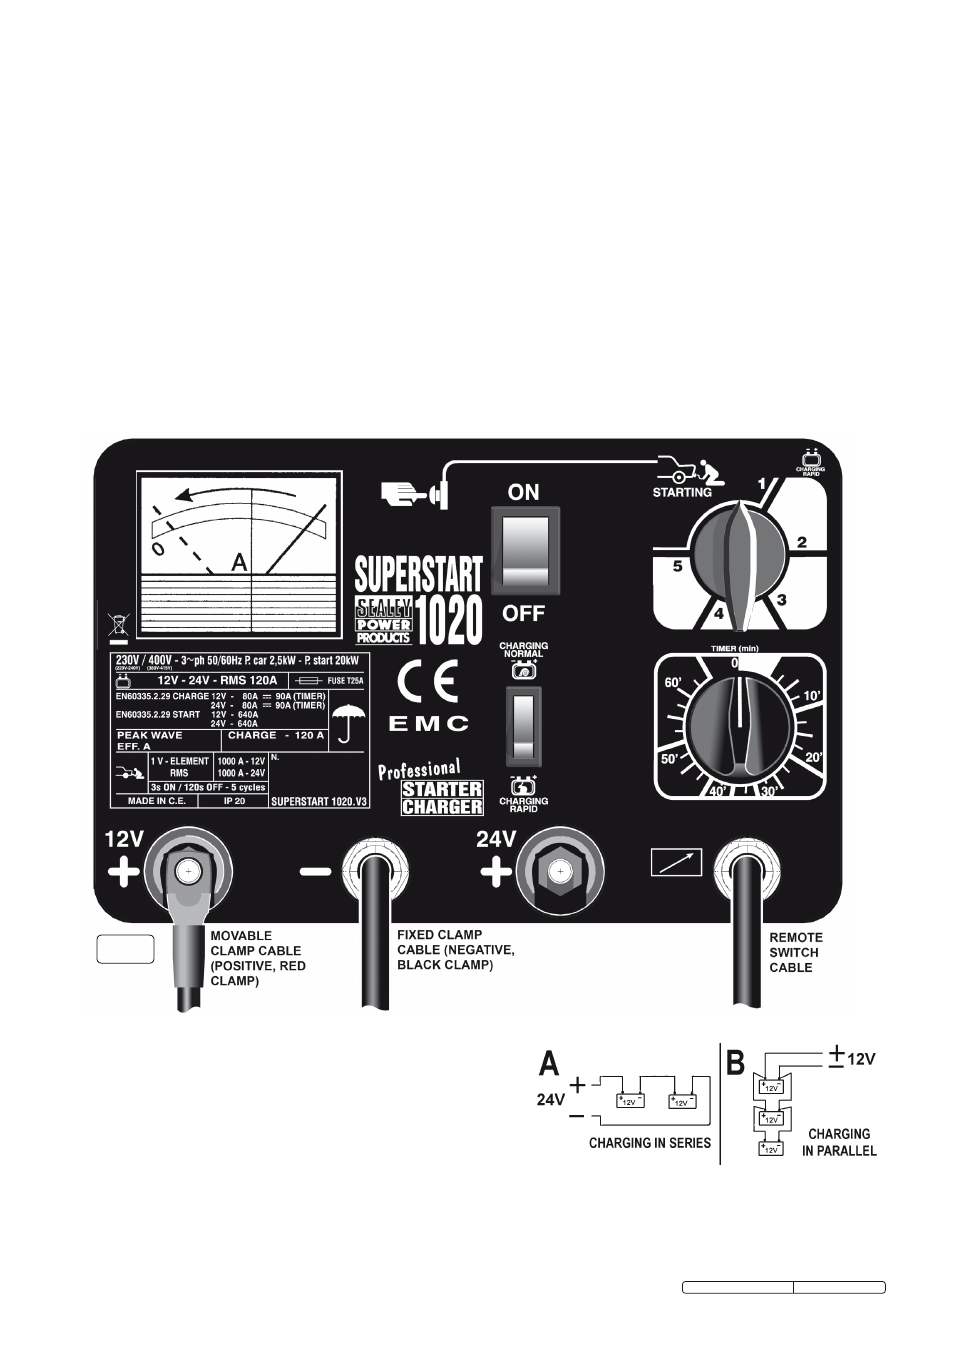
set the charger voltage to match that of the battery by attaching the positive (+) lead to either the 12 or 24 volt terminal. see fig.3.
4.2.2.
check the charger clamps and battery terminals to ensure they are clean and free from oxidation.
4.2.3.
connect the charger PosItIVe (red or +) lead to the PosItIVe (+) terminal of the battery and the negAtIVe (Black or -) lead
to the negAtIVe (-) terminal of the battery.
4.3.
chargINg the BatterY
connect the charger to the mains power supply and set the rate of charge. the ideal current value is 1/10 the amp hour capacity of
the battery e.g. for a 40Amp battery the optimum charge current is 4Amps
4.3.1.
select charge level 1,2,3,4 or 5 as appropriate using the rotary switch situated above the timer. ensure that the mode switch to the left
of the timer is set to normal charging.
4.3.2
once you have checked that the charger is correctly set up for the required situation, switch on the power.
4.3.3.
check the current delivery to the battery by reading the ammeter on the front of the battery charger (fig.3). Initially, there will be a
high rate of charge which will slowly decrease according to the capacity and condition of the battery.
4.3.4.
When fully charged the ammeter reading should be close to “0” and the electrolyte in the battery should begin to gas. stop charging
to protect battery plates from oxidisation and damage.
4.3.5.
switch charger off and unplug from mains power. disconnect the power clamps, clean the charger and store in a safe, dry area.
4.3.6.
replace the battery electrolyte cover or caps. Wipe up any splashes or spillage (remember the electrolyte is a corrosive acid). return
the battery to the vehicle, secure according the manufacturer’s instructions and re-connect the power leads. check to ensure all
tools are removed before closing the bonnet.
fig.3
4.5.
raPID charge
superstart1020.V3 to initiate rapid charging set the rocker switch to the left of the timer to rapid charging indicated by a ‘hare’ symbol
then turn the timer to the required charging time in minutes. turn the rotary power switch to position 2 which also has the rapid
charging symbol associated with it. When the pre-set time has elapsed the current is automatically switched off. When rapid charging
is no longer required remember to select ‘normal charging’ on the rocker switch below the timer.
4.4.
simultaneous charging of several batteries.
WarNINg! do attempt to simultaneously charge different types of
battery or batteries of different capacities or levels of discharge. If you
have to charge more than one battery at a time they can be connected
'in series' (see fig.4A) or 'in parallel' (see fig.4B). of the two systems
we recommend charging 'in series' as the current shown on the
ammeter represents the current charging each battery.
note: When connecting two 12V batteries in series the positive cable
should be connected to the 24V terminal.
Original Language Version
suPerstArt1020.V3 Issue: 3 - 22/10/10