Assembly/disassembly, Operation – Silvercrest SHSS 12 A1 User Manual
Page 38
35
SHSS 12 A1
GB
MT
Assembly/disassembly
Floor nozzle
■
Attach the fl oor nozzle to the handle so that the
connection plug of the fl oor nozzle u engages
with the connection socket i on the handle.
■
To remove the fl oor nozzle, simply pull it from
the handle.
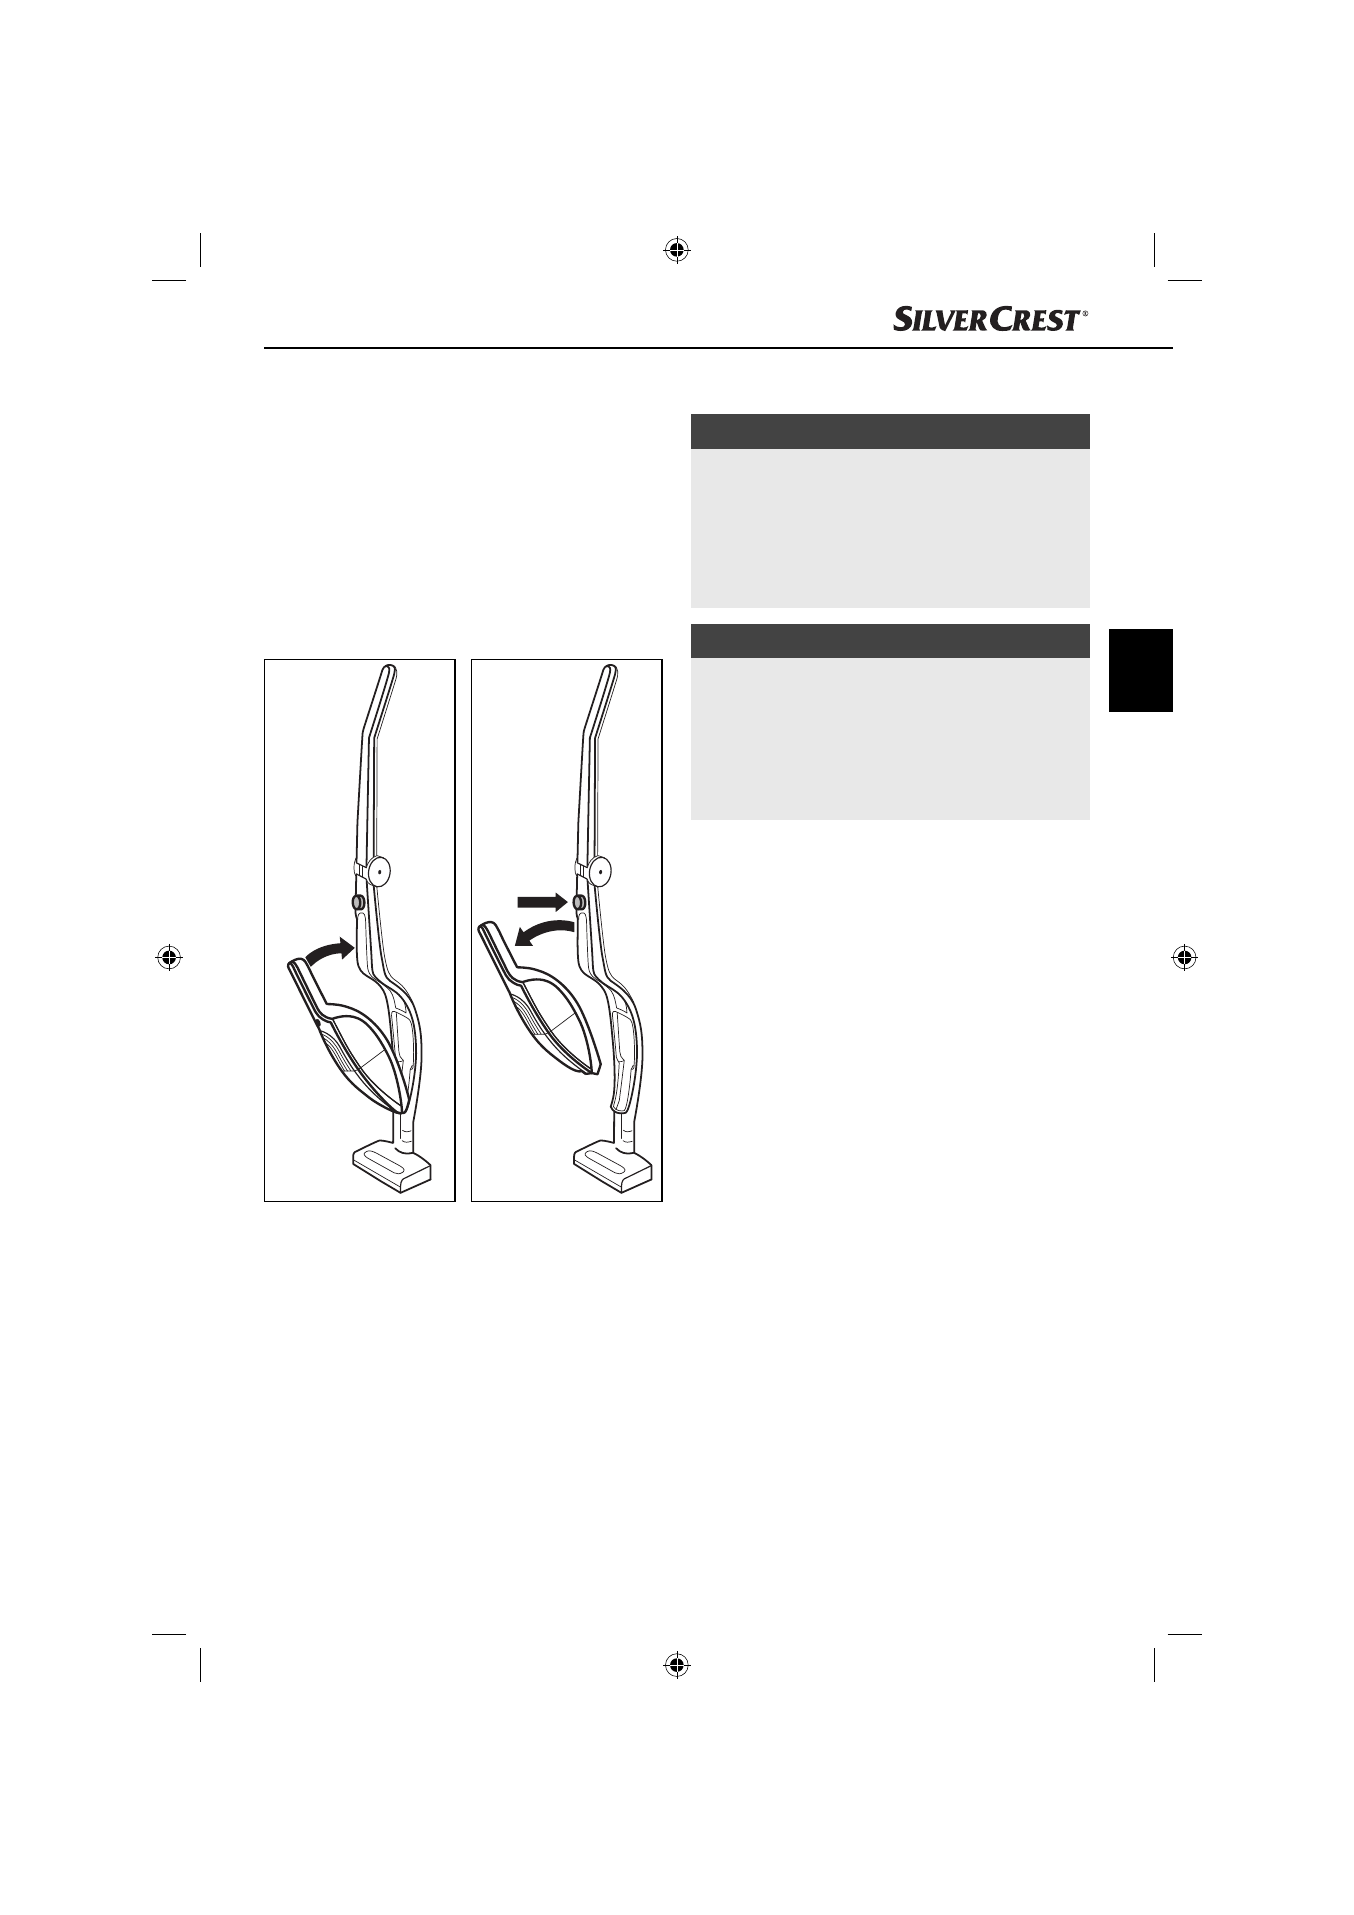
Connecting the hand element to the
handle/removal from handle
Fig. 1
Fig. 2
■
To connect the hand element 5 to the handle,
push the tip of the hand element 5 into the
opening in the hand element recess r.
■
Then press the grip 1 of the hand element 5
into the handle so that the hand element 5
clicks fi rmly into position (Fig.1).
■
To remove the hand element 5 from the handle,
press the "Hand element" release w.
■
Then pull the hand element 5 upwards and for-
wards out of the hand element recess r (Fig. 2).
Operation
ATTENTION! DAMAGE TO PROPERTY!
►
The suction opening must always be open and
unblocked. Blockages lead to overheating
and damage to the motor.
►
Do not vacuum shag pile carpet with the fl oor
nozzle. The rotary brush t can get caught in
the carpet and block!
NOTE
►
Make certain that the dust fi lter 7 and the
coarse fi lter 8 are always inserted before
using the appliance.
►
As soon as the suction power of the appli-
ance begins to diminish noticeably, connect
the appliance to the charger p.
Using the hand element with the
handle
1) Insert the hand element 5 into the hand
element recess r as described in the chapter
"Assembly/disassembly".
2) Fold out the grip 0 by pressing the "Grip"
release q and at the same time pulling the
grip 0 upwards. You have the choice of two
positions into which the grip 0 will click into
place.
3) Attach the fl oor nozzle.
4) Switch on the appliance using the on/off
switch 2. The operating light z on the fl oor
nozzle will light up and the rotary brush t
starts turning.
5) Guide the fl oor nozzle over the area to be
vacuumed. Hold the grip 0 so that the fl oor
nozzle moves smoothly over the fl oor.
6) Set the on/off switch 2 to "O" when you have
fi nished vacuuming. The rotary brush t stops
turning and the operating light z goes out.