Retrotec DucTester 341 User Manual
Page 3
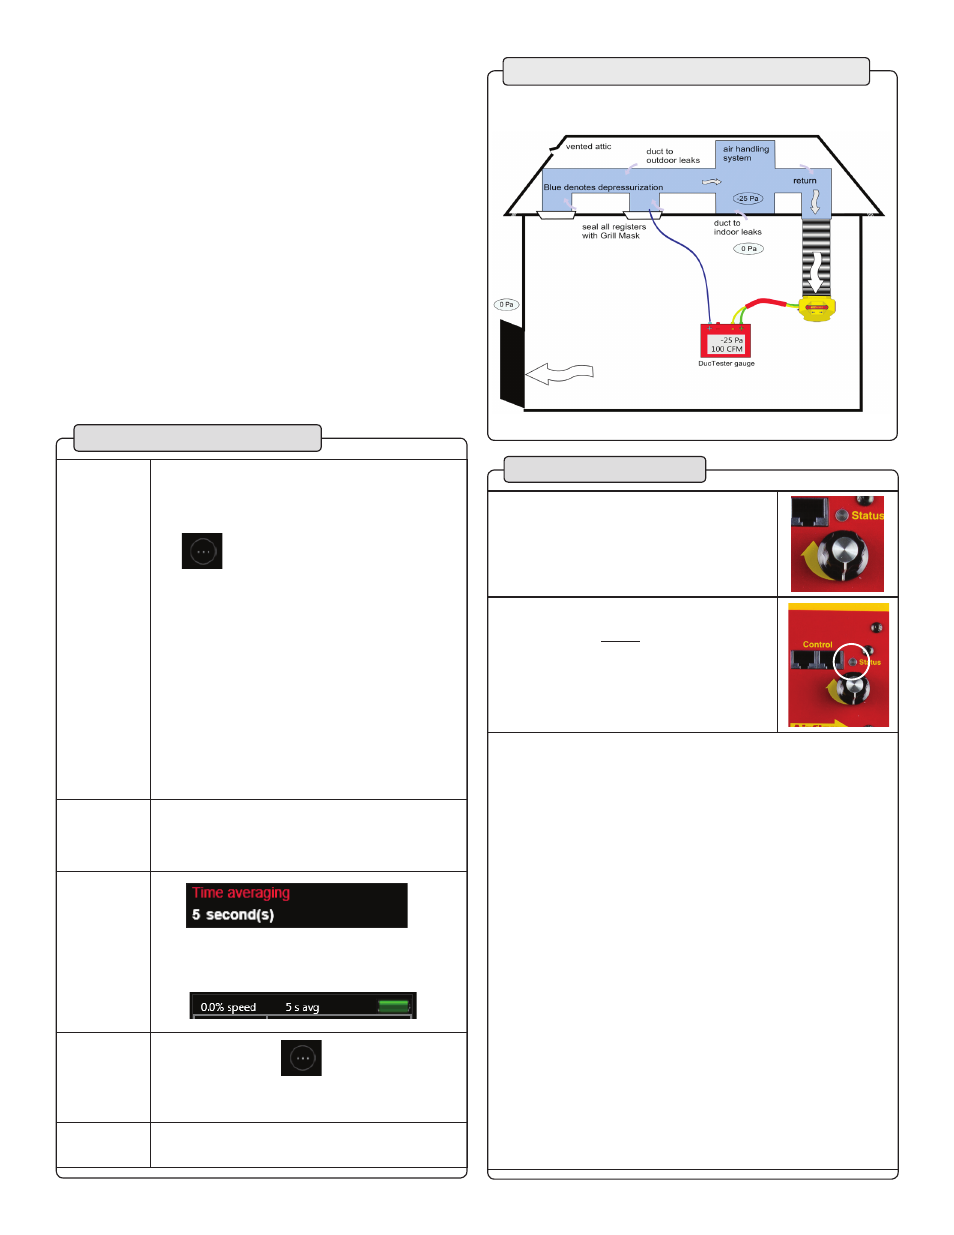
Make sure DucTester 340 is showing on the
Home screen.
If not, tap the fan picture, then
Tap
, tap DucTester 340, then select the
range that you have installed.
Tap on [Channel B] to change the type of result
or units. Select based on “Get the results you
need” on page 4.
Tap [Settings] then [Time averaging] and
select 5 seconds.
Tap [Settings] then .
Make sure the [Default @ Pressure] is 25 Pa.
Tap to return to the Home screen.
□
Adjust fan speed knob clockwise
until [Channel A] reaches test pressure.
Usually -25 Pa.
□
I
f you cannot achieve the test pressure,
refer to page 4.
□
Now connect the Speed Control Cable
to allow the gauge to control the
speed. Solid green Status light indicates
gauge is ready to control the speed.
□
For a test pressure of
25 Pa, tap
□
Enter 25, tap [Set]
□
T
ap
to display what the
result would be at
exactly 25 Pa
.
Page 3 of 4
□
Read results directly from
the gauge.
Tubing connections:
Step 4:
Prepare the gauge
Total Duct Leakage Test: Depressurize
Step 5:
Conduct test
Speed Control Cable
Step 3:
Connect gauge & fan (cont’d)
□
Press
on the gauge, then tap the screen, and
check the battery state indicator at the top right:
□
If the battery display is not green, connect
USB to power outlet to charge the gauge.
□
Connect yellow, green and blue tubes
to the gauge.
Channel A
Channel B
Connect the
gauge
like this for
all tests.
219.9
219.9