1 pip position, Pip position – Datavideo SE-1200MU 6-Input Switcher and RMC-260 Controller Bundle User Manual
Page 53
53
Windows PC Users
MAC Users
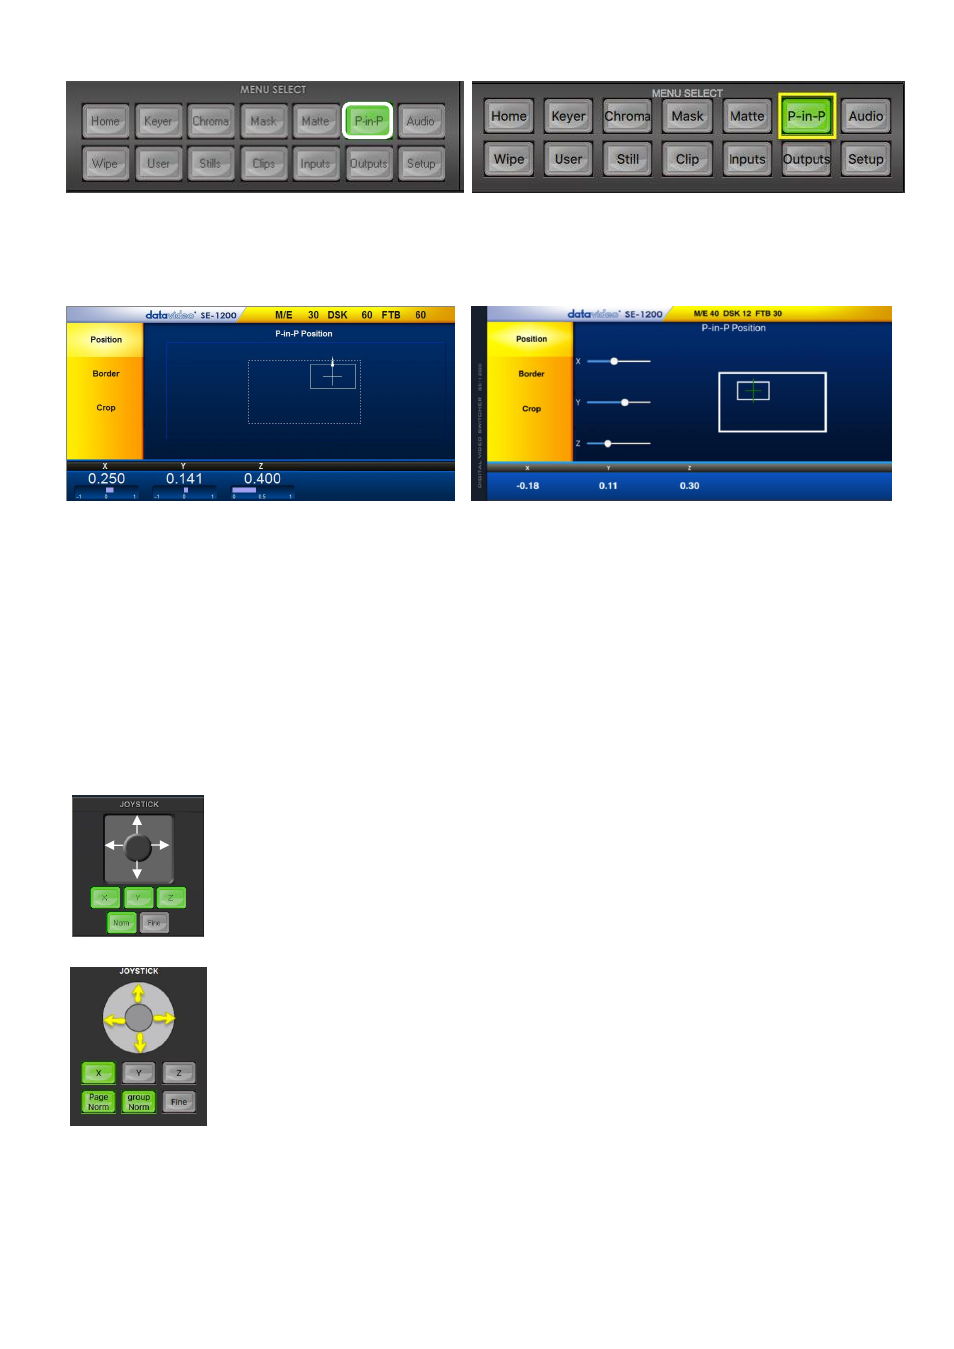
Step 6:
PIP options displayed in the yellow menu area:
Position
,
Border
and
Crop
. The following sub-sections
will describe how Position, Border and Crop can be adjusted.
Windows PC Users
MAC Users
7.3.1 PIP Position
Values are shown along the bottom of the screen.
The X and Y values
change the PIP image location.
The
X value
moves the image left and right.
The
Y value
moves the image up and down.
The
Z value
adjusts the image size. Where the value 1.0 makes the PIP occupy the whole screen (100%),
0.5 reduces the PIP size to half screen (50%).
Windows PC Users
Click and hold the joystick circle
then drag the joystick circle
in the desired
direction.
Left-mouse button Joystick dragging allows the PIP to be moved in the X & Y
directions.
Right-mouse button Joystick dragging to the left and right resizes the PIP (Z
value).
Click the
FINE
button to enable/disable fine adjustment in smaller/slower steps.
Click the
NORM
button to return the selected PIP image to the factory default
position and size values as shown above. The
Norm
button default for Z value
(size) is 0.40 or 40%
MAC Users