5-23. settings - storage - scheduled backup – Vivotek ND9542P 32-Channel 4K UHD NVR (No HDD) User Manual
Page 159
VIVOTEK - Built with Reliability
User's Manual - 159
3-5-23. Settings - Storage - Scheduled backup
To configure a scheduled backup,
1.
Select the Scheduled backup: Enable checkbox.
2. Server:
Enter the server name or IP address of the FTP server.
3. Port:
Enter the port number. Default is 21.
4. Path:
This is the destination folder/path if different than root.
5. Authorization:
Click the Enable checkbox, and enter the User name and Password for a
private FTP server (no anonymous access allowed).
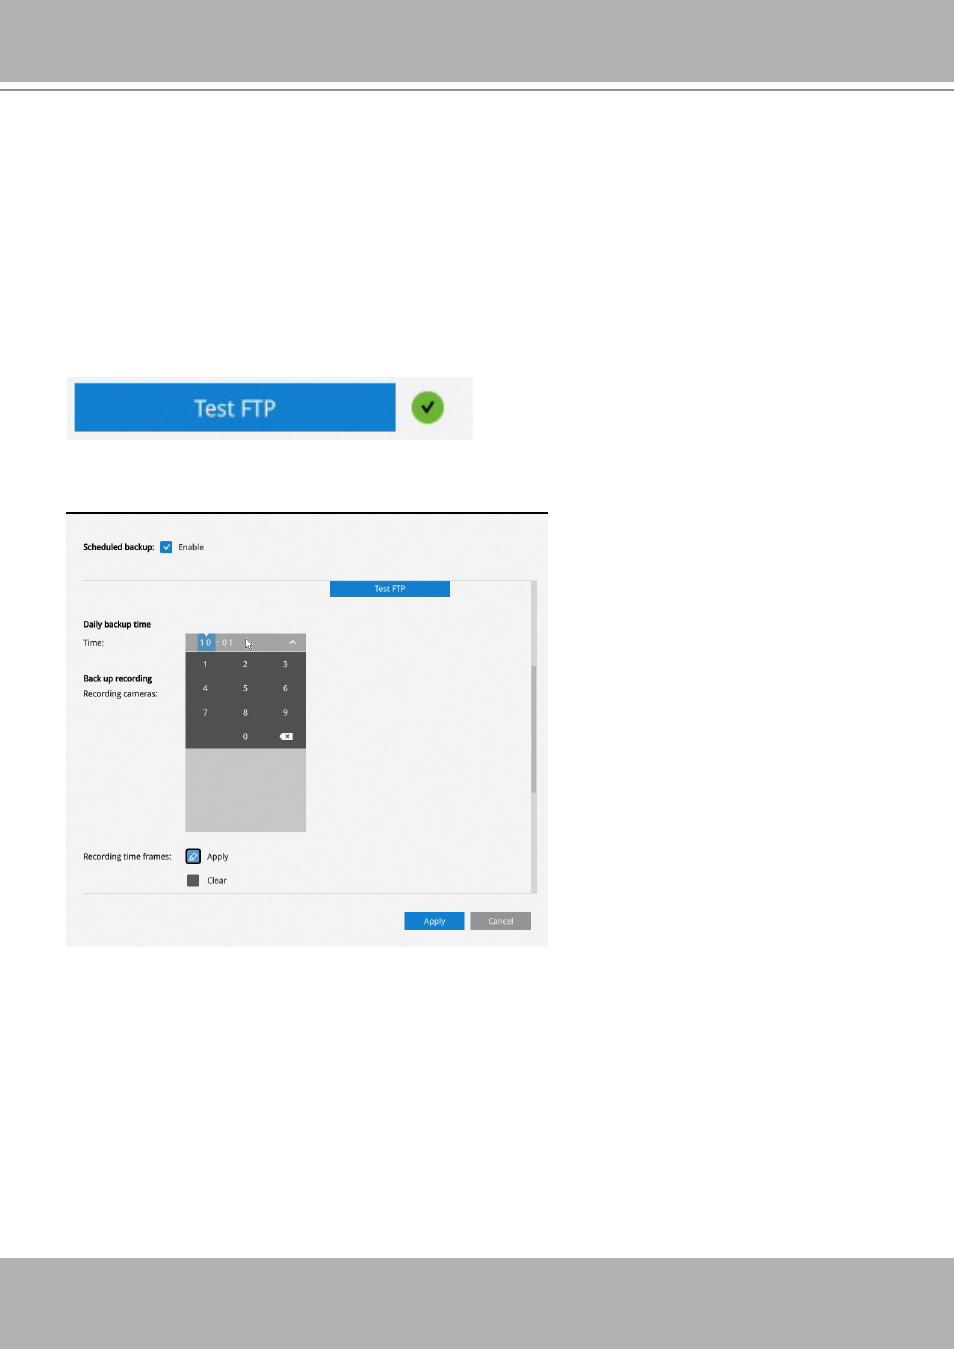
6. Test FTP:
Use the Test FTP button to see if your FTP server configuration is valid.
If the connection is successful, an indicator will appear.
7. Daily backup time:
Select a time to begin the daily backup from the number pad.
8. Backup recording
Recording cameras:
By default, all cameras' recordings will be backed up. Deselect one or
several cameras if you prefer to back up the recordings of only the specific cameras.
Recording time frame:
Select the time span within which the recordings occurred. The
recordings within the time span will be backed up. Use the Applpy and Clear buttons drag
your mouse cursor on the schedule pane to determine the effective hours on the schedule.
Connection:
Select to enable the Upload limits by entering a number for the upper threshold
of the bandwidth, e.g., 124 Kbps. Configure an upper threshold if your network bandwidth is
of the concern.