3 dac-v1 installation and connection, 1 dac-v1 rear panel connections, 2 mains power connection – Naim Audio DAC-V1 User Manual
Page 9: 3 audio inputs and outputs, Dac-v1 installation and connection
7
DAC-V1 Installation and Connection
3 DAC-V1 Installation and Connection
Your DAC-V1 should be installed on a desk or equipment stand intended for the purpose.
Ensure it is well ventilated, and do not stand it directly on top of another item of electronic
equipment. It should be installed in its final location before connecting cables or switching
on. The DAC-V1 has no standby mode and is intended to be left switched on.
Connecting the DAC-V1 to mains power and to a variety of audio peripherals and sources
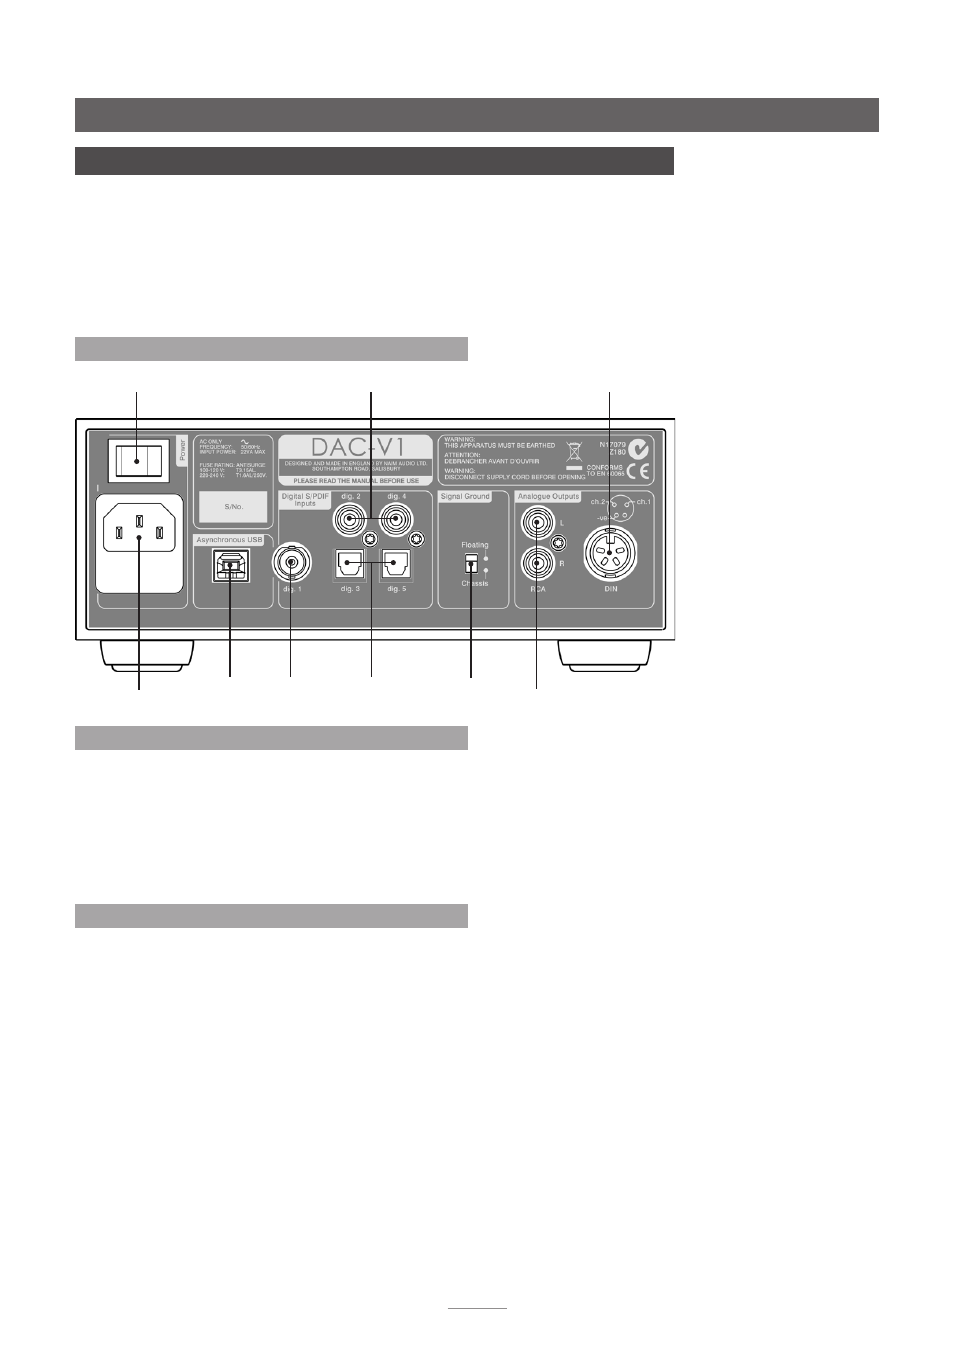
is described in the following paragraphs. Diagram 3.1 illustrates the DAC-V1 rear panel
connection sockets.
3.1 DAC-V1 Rear Panel Connections
mains input
and fuse
power
switch
analogue
output (RCA)
analogue
output (DIN)
input 1
(BNC)
USB
input
inputs 2 & 4
(coaxial)
inputs 3 & 5
(optical)
signal
ground
switch
3.2 Mains Power Connection
Check that the
mains
supply specified on the DAC-V1
rear panel is appropriate for your territory. Connect the
DAC-V1 to the mains using the supplied cable (or a
Naim PowerLine) but do not switch it on until all other
connections have been made and, if appropriate, the
DAC-V1 Windows OS driver application has been installed
on the USB connected computer (see Section 2).
3.3 Audio Inputs and Outputs
3.3.1 Audio Signal Inputs
The DAC-V1 provides one asynchronous USB digital input
and five S/PDIF digital stereo inputs. Connection to the
inputs is made via a variety of socket types:
Input Type
Socket
USB
Asynchronous USB
USB Type B
dig. 1
S/PDIF Digital
Coaxial (BNC)
dig. 2
S/PDIF Digital
Coaxial (RCA phono)
dig. 3
S/PDIF Digital
Optical (TosLink)
dig. 4
S/PDIF Digital
Coaxial (RCA phono)
dig. 5
S/PDIF Digital
Optical (TosLink)
Always use high quality interconnect cables to connect
sources to DAC-V1 inputs.
For optimum audio performance the USB connection from
the computer to the DAC-V1 should be direct rather than
via any “hub” device. The USB cable used should be no
longer than 3m.
3.3.2 Audio Signal Outputs
The DAC-V1 provides both DIN and RCA phono analogue
outputs for connection to a “downstream” amplifier. If
the option is available on the pre or power amplifier, DIN
socket connections should be used in preference to RCA
phono sockets. The DIN and RCA phono socket options
should not be connected or used simultaneously.
Always use high quality interconnect cables to connect to
DAC-V1 outputs.
3.3.3 Headphone Output
The DAC-V1 incorporates a front panel 6.3mm stereo
headphone socket. Inserting a headphone plug will mute
the DAC-V1 signal outputs. Removing the headphone plug
will restore the signal outputs.