Nac 252 preamplifier, 7 nac 252 introduction and installation, 8 nac 252 controls and connections – Naim Audio NAP 500 User Manual
Page 8
e6
NAC 252 Preamplifier
7 naC 252 Introduction and Installation
The naC 252 preamplifier does not incorporate an internal power supply and can be used
only in conjunction with the supercap power supply. Diagram 8.3 illustrates connection of
the naC 252 to its power supply.
The preamplifier and power supply should be installed on a dedicated equipment
stand intended for the purpose. Do not stand either directly on top of another item of
equipment. Care should be taken to ensure that the preamplifier is level.
The preamplifier and power supply should be installed in their final locations before
connecting cables or switching on. ensure that power amplifiers are switched off and the
preamplifier volume is turned down before the power supply is switched on. The power
button is located on the power supply front panel.
The power supply is heavy and care should be taken when lifting or moving it. make sure
that the surface on which it is to be placed can support its weight.
The following section 7 paragraphs describe installation features and functions specific to
the naC 252. operational features common to all preamplifiers and integrated amplifiers
are described in section 28.
7.1 source Inputs and record outputs
The input selection buttons arranged along the upper
bank select the source signal to be routed to the power
amplifier and the loudspeakers. Below them, in the lower
bank, are a corresponding array of buttons which select
the signal to be routed to the preamplifier’s record outputs.
These separate source and record sections enable one
source (a CD player, for example) to be listened to whilst
the output from another (say, the tuner) is simultaneously
selected for recording.
note:
It is possible to lock the record controls and prevent
accidental de-selection during recording. Record-lock is
switched on or off by pressing the source mono button four
times within six seconds.
7.2 Input socket assignment
The NAC 252 has six DIN input sockets and two alternative
pairs of RCA Phono sockets. The RCA Phono sockets can
be assigned individually to the CD and AUX 2 input buttons
in place of the DIN sockets.
Input assignment setup is accessed through the NAC
252 program mode. To switch into (or exit from) program
mode press and hold the
prog key
on the remote handset
(in preamplifier mode). Program mode is indicated by a
flashing indicator on the front panel volume control and
the record selection indicators extinguishing.
note:
If no function is operated within five minutes of
entering program mode the NAC 252 will return to normal
mode automatically.
Once in program mode press and hold the remote
handset
1
key to select or de-select the RCA Phono socket
input for CD, and the remote handset
6
key to select
or de-select the RCA Phono socket input for AUX 2. The
corresponding front panel input buttons can similarly be
used to select or de-select the RCA Phono socket inputs.
The appropriate input button indicator will flash three
times on selection of the RCA Phono option and once on
selection of the DIN option.
To exit from program mode press and hold the
prog
key on
the handset until the record select indicators are restored
and the volume indicator stops flashing.
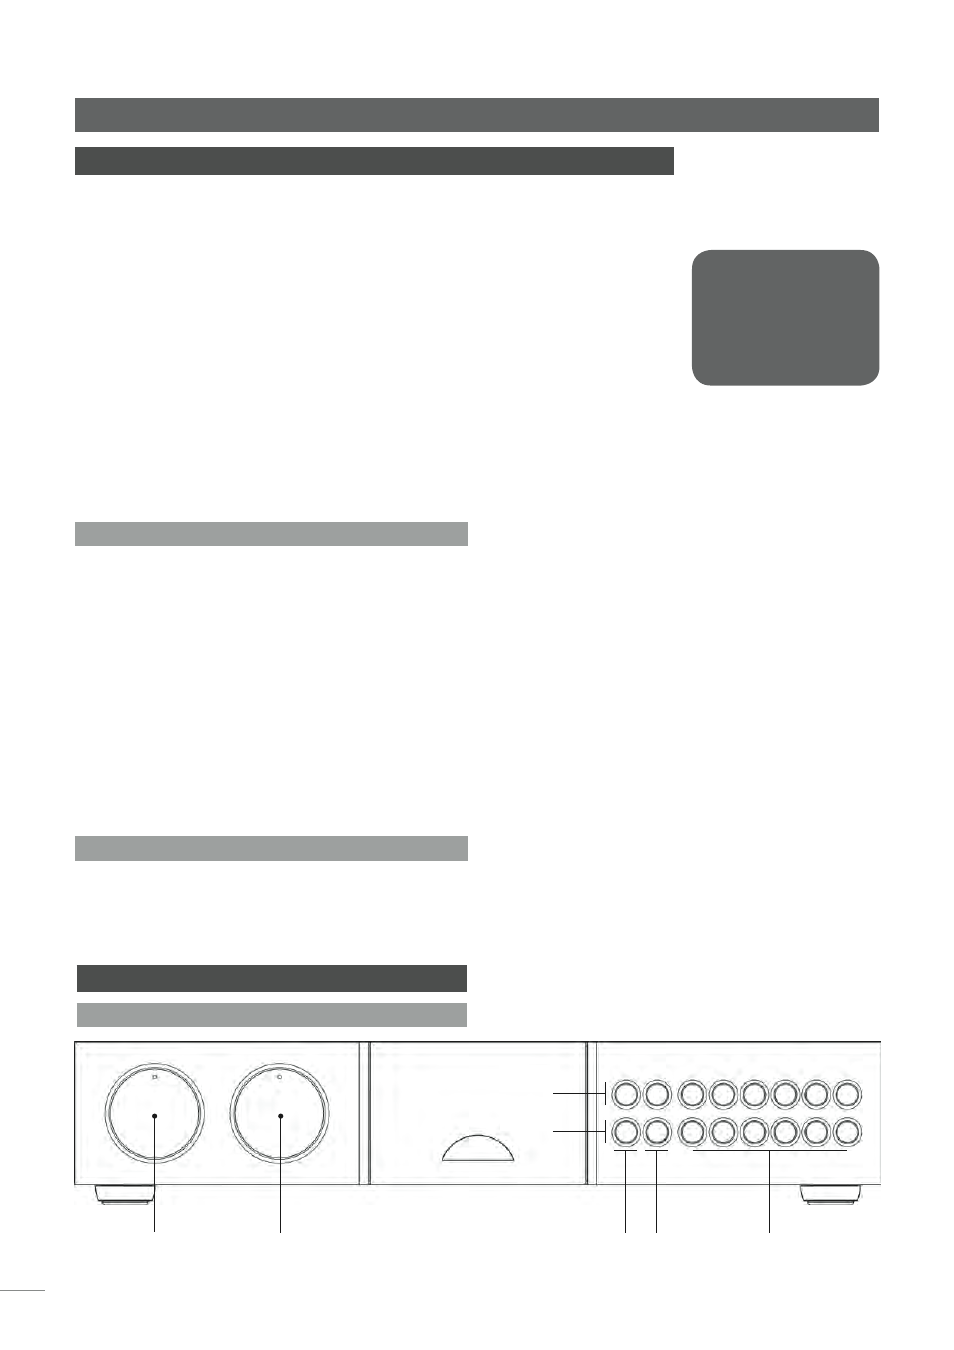
8 naC 252 Controls and Connections
8.1 naC 252 Front
volume
balance
mute
mono
source
bank
record
bank
source and record
selection
operational features
common to all
preamplifiers and
integrated amplifiers
are described in
section 28