CONTA-CLIP EMS-Engraver User Manual
Page 9
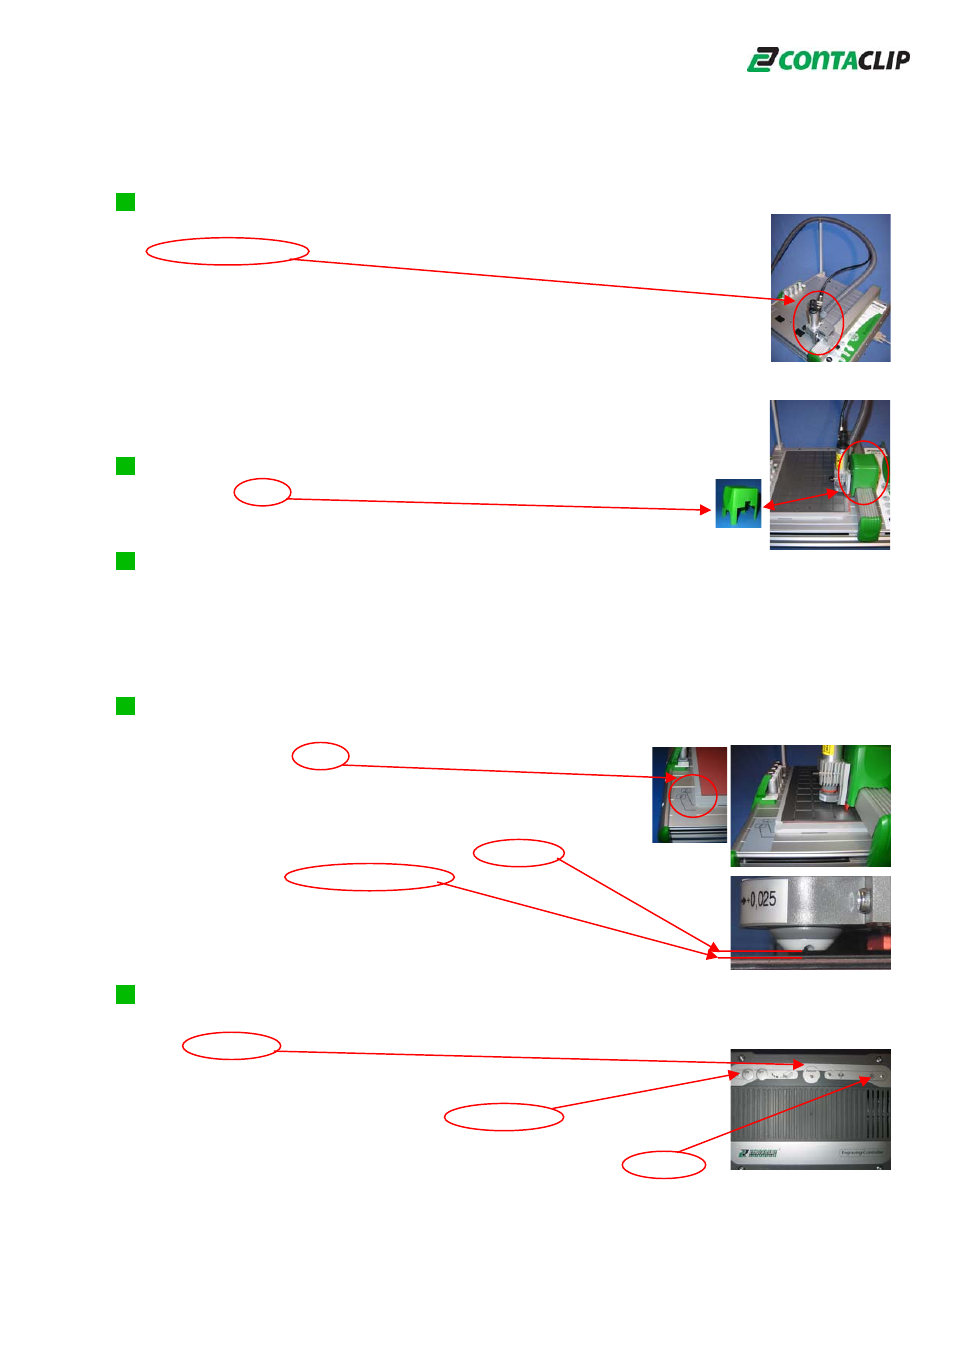
3.8 Connections at the engraving head
Manually move the arm with the engraving head to the
lower right corner, the EMS-2 must be turned off. Connect the vacuum
hose to the engraving head as shown and clip the hose into the support
arm placed in the pipe with a slight bend. Connect the opposite end to
the Vacuum cleaner EVC.
The connection of the cable between the engraving spindle and the
Controller EC is the same process.
Tighten all screws at the connection plugs.
3.9 Placing the cover on the Engraving head
Place the cover over the engraving head and push the cover
down to the limit.
3.10 Test run
First turn on the power with the switch located at the back of the Controller EC.
Then turn on the EMS-2 and the engraving unit moves to its zero position
alignment, noticeable with a short noise. Once aligned the EMS-2 arm will be in zero
position alignments in z, x and y direction, turn off the EMS-2 thereafter.
3.11 Placement of the Engraving material
Place the support plate together with the engraving material on the EMS-2 Engraver
as shown on the label, (place the label per instructions of
support plate). Move the arm manually, with the engraving
head, over the engraving material. The EMS-2 must be
turned off.
Important: The distance between the lower end of the
spindle and the engraving material must be
2 mm
. If the distance is
lower or higher re-check the alignment of the engraving unit with
the calibration plate. Now turn on the Controller EC and the
Vacuum cleaner EMS-2 in order to start the engraving unit.
3.12 Buttons and indications of the Engraver-Controller (EC)
The power switch of the Controller EC is placed at the back, once switched on
the green LED is lit. The EC controls the Vacuum
cleaner EVC automatically. In case the Vacuum cleaner EVC
should be operated manually e.g. to clean the engraved material
after the job is completed, use the ON and OFF button.
The proper operation of the spindle is indicated with the yellow
LED, any
failure
of the spindle will be indicated with the
red
LED
and the engraving will be stopped.
8