Beam angle adjustment, Installation – ILUMINARC Ilumipod™ Inground Tri-12 IP User Manual
Page 10
Installation
6
Ilumipod Inground IP Series User Manual (Rev. 4)
Make sure to
disconnect the
power to the
product before opening it.
Be careful when
opening and
closing the
product’s housing as it
may compromise the
product’s IP67 rating.
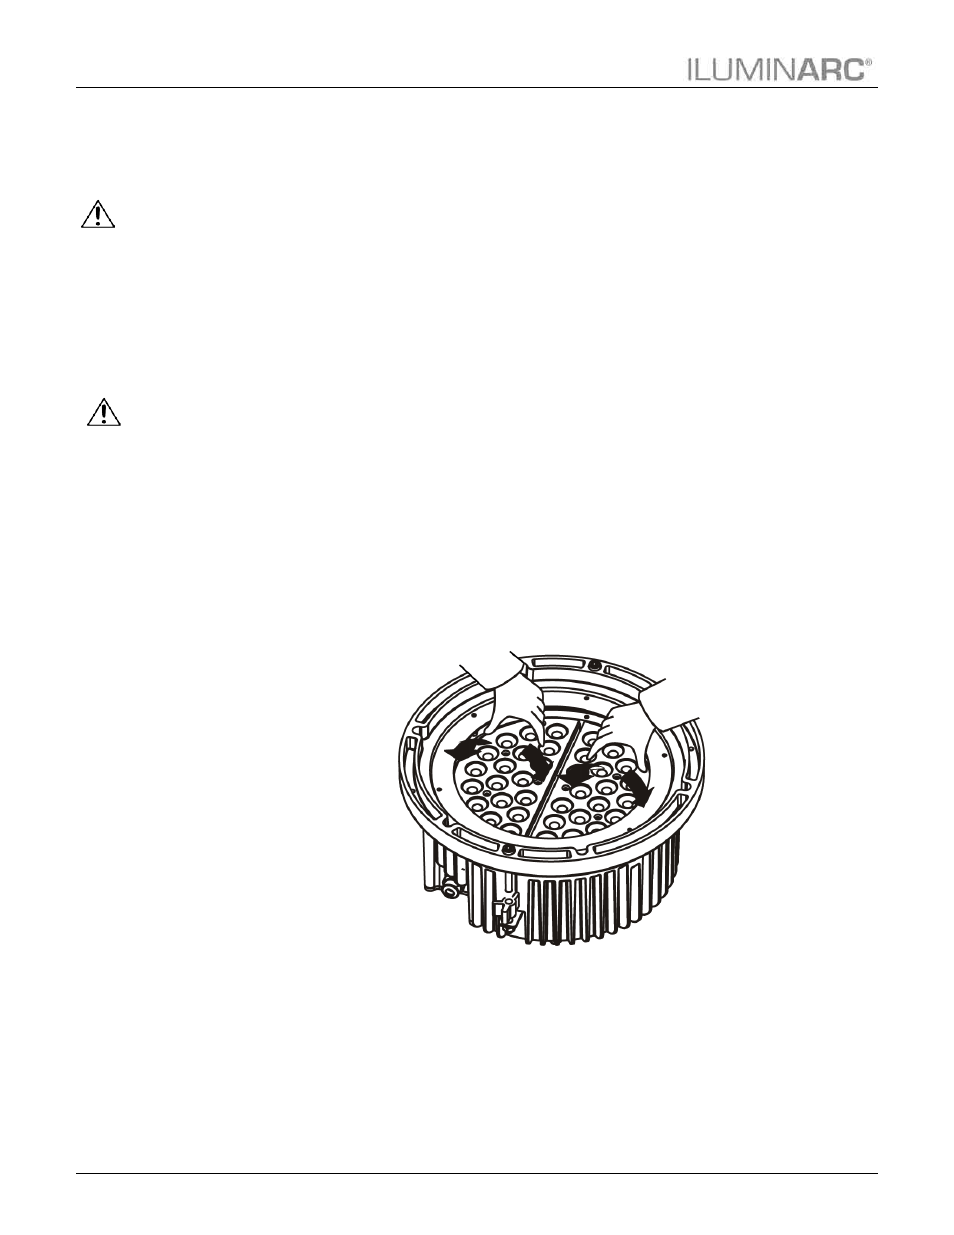
Beam Angle Adjustment
The Ilumipod Inground IP products have two LED modules each. You can adjust the angle of
each of these modules to spread or narrow the product’s beam. To do so, follow these steps:
1. Loosen the Allen bolts on the stainless steel collar by turning them CCW, not more
than a turn or two, enough to release the aluminum latch from its “locked”
position.
2. Lift the product from the installation sleeve, making sure not to stretch the power
and signal cables.
3. Loosen four of the six nuts that hold the collar to the housing, leaving untouched
any two adjacent nuts.
4. Wait a few seconds for the seal to expand. This lowers the possibility of damaging
the seal.
5. Complete the removal of the two remaining nuts.
6. Remove the stainless steel collar.
7. Carefully, lift and remove the protective glass and the seal attached to it, making
sure not to reverse the glass.
8. Using only your hands, push on the sides of each module to adjust its angle, as
shown in the figure below.
9. Replace the glass and then re-silicone the seal to insure a watertight seal.
10. Replace the stainless steel collar, making sure to align it with the Allen screws and
while keeping the glass surface flush with the collar.
11. Replace all six nuts and adjust them manually until they touch the housing.
12. Tighten the nuts uniformly by alternating between opposite nuts.
13. Reattach the product to the installation sleeve by turning the Allen bolts CW. You
should only need a turn or two to have the stainless steel collar firmly attached.