19 antenna mounting – Thuraya IP Voyager User Manual
Page 19
• The Antenna - Above Deck Unit (ADU)
19
Antenna Mounting
Always install the antenna so that it is in a horizontal position, even if the surface on
which it is installed e.g. roof of a vehicle, is not horizontal.
The antenna has three drainage holes at the bottom. Always install the antenna so
that clearance between bottom of antenna with drainage holes and mounting surface
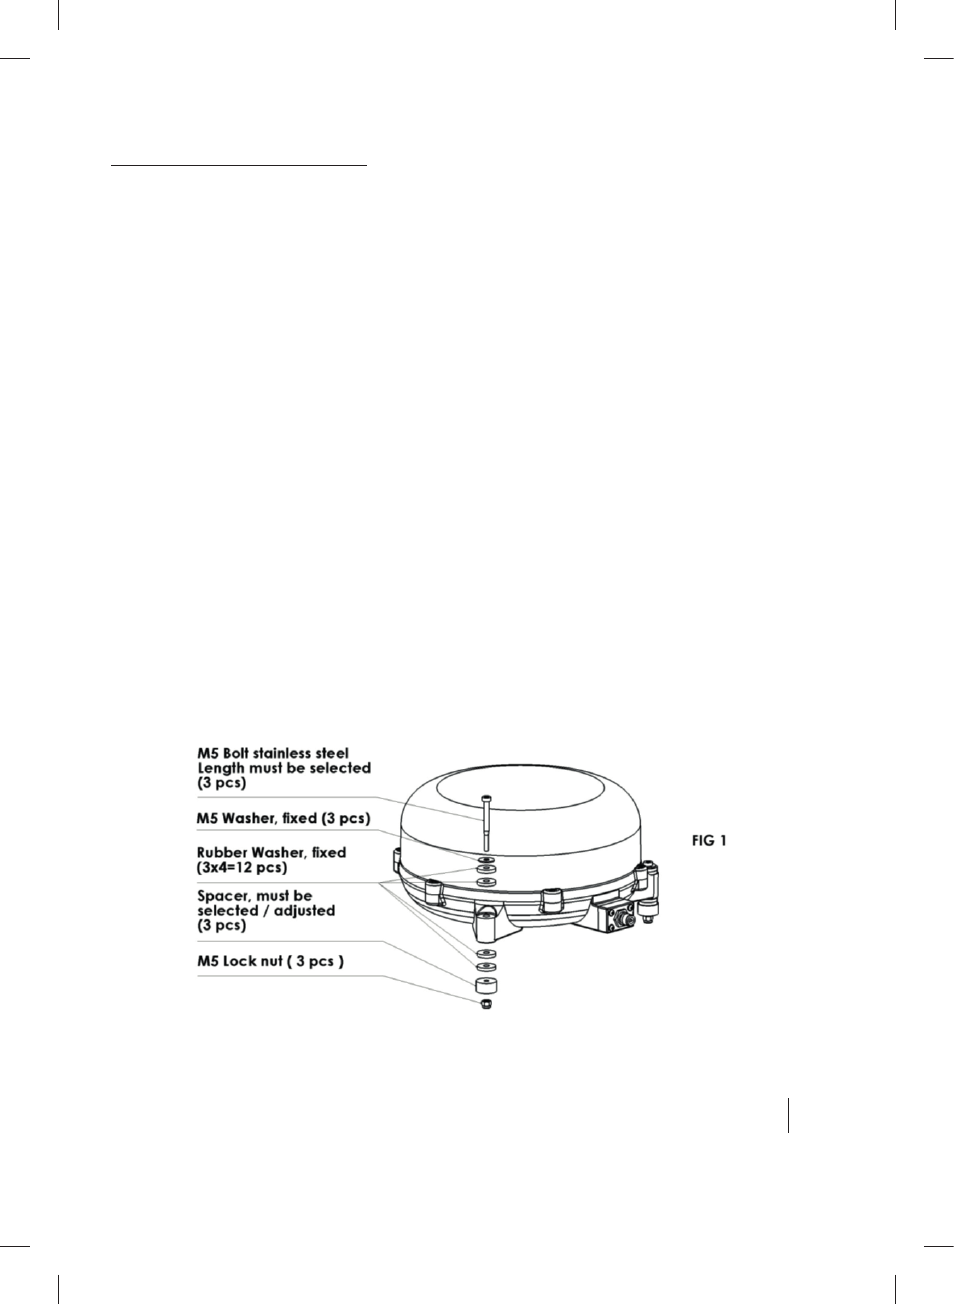
is no less than 5 mm and preferably 10mm, refer to Fig.2. In order to fulfill these
criteria a set of bolts and washers has to be defined for each individual installation,
refer to Fig.1.
The M5 stainless steel washers/rubber washers and spacers in the kit are always used
and positioned as shown in Fig.1.
The 3 spacers will have identical length if the antenna is installed on a non-tilting
surface, but may require individual length adjustment if the surface is tilting.
The M5 stainless steel bolts will have identical length if the three spacers are identical
and may require individual length adjustment if spacer length are different.
Note 1: Drainage of the antenna - a simple mechanism in the form of three holes in the
dome (plastic enclosure) bottom is used. The holes are made so that water e.g. solid
drops is not likely to enter the dome and simultaneously water that has entered the
dome or moisture condensed in the dome is drained out simply by gravity. Correct
function of the drainage system is ensured by following the correct installation
requirements as shown in Figures 1 and 2.
Note 2: Antenna Cable - it is important to protect against moisture using self-
amalgamating tape (or similar) wrapped around the coaxial connector at the ADU.
Also, secure the antenna cable at short intervals to prevent movement and stress.