Table 4-2, Viewcheck service os image files, Installation of viewcheck – Artesyn ViewCheck on PrAMC-7311 Installation and Use (May 2014) User Manual
Page 32
Installation of ViewCheck
ViewCheck on PrAMC-7311 Installation and Use (6806800S45C)
32
The ViewCheck service OS along with the ViewCheck RPM, test suites, and test procedures are
distributed as an ISO file that contains:
ViewCheck OS as Ram Disk image that can be Net bootable
The following table provides details of the files that are distributed as part of this image once
the ViewCheck service OS is installed.
Installing the ViewCheck Service OS image
Before installing the ViewCheck service OS Image, you should have knowledge of configuring
TFTP, DHCP, and PXE to perform a diskless booting on PrAMC-7311. For more information,
refer to the sections 2.2 and 2.3.1 in Basic Blade Services Software on PrAMC-7311 Programmer's
Reference.
1. Copy the diagnostics-RELEASE-
BUILD.windriver.linux.pramc7311.gz
image to the /tftpboot/
directory.
2. Change the PXE default configuration file ramdisk_size=819200, and reboot
the blade.
Once the blade is configured with the new ramdisk image, it will have ViewCheck,
Orion License utils, and Blade Services Framework installed.
3. Generate the Activation record to start using the ViewCheck application. For more
information, see
Obtaining the Activation Record
.
4. After the activation record is placed, restart the ViewCheck application using the
following script:
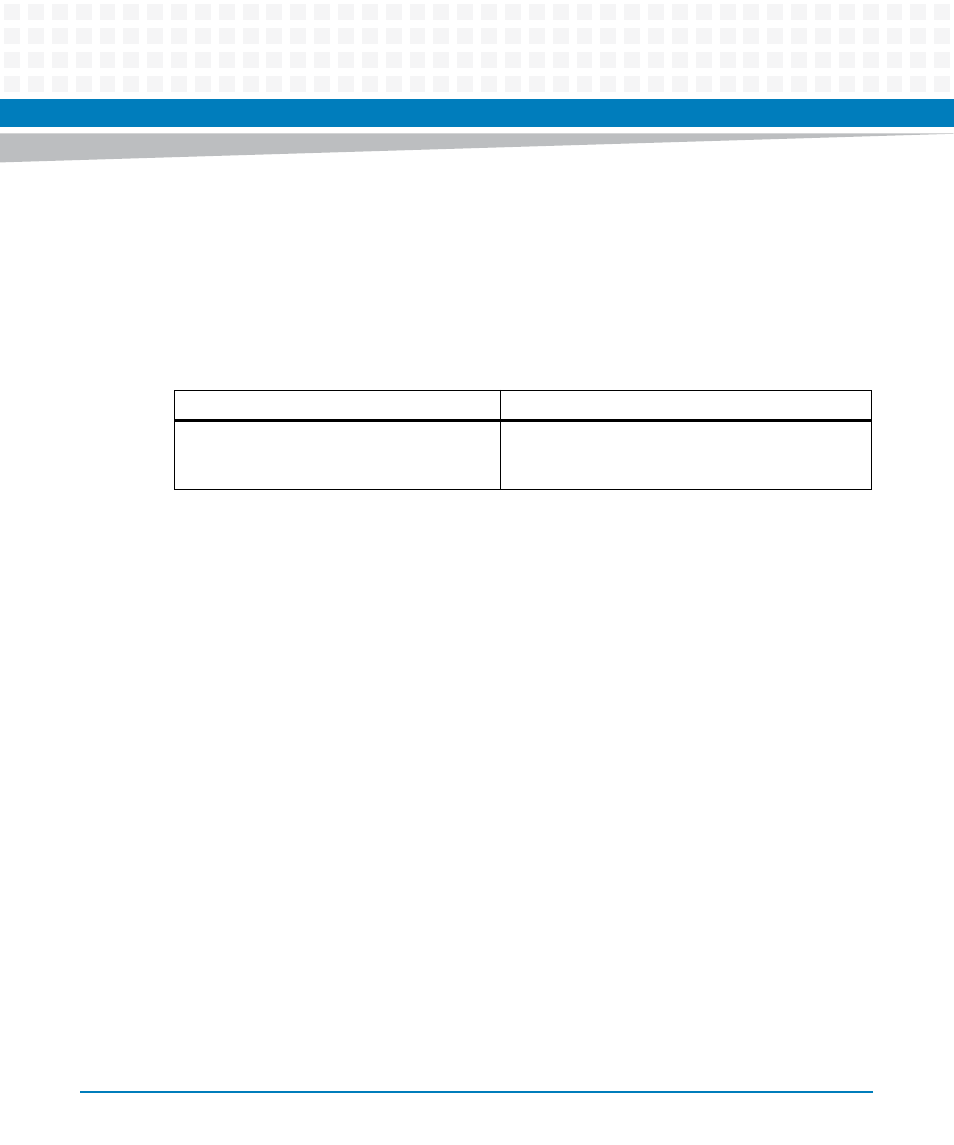
Table 4-2 ViewCheck Service OS Image Files
File Name
Remarks
diagnostics-RELEASE-
BUILD.windriver.linux.pramc7311.
gz
Net bootable Ram Disk image with
ViewCheck RPM, and BSF services package.