Detailed setup – BUG-O Systems DC IV v.2 User Manual
Page 10
10
DETAILED SETUP
2. SECURE CARRIAGE ON RAIL
A. Select the correct pair of holes on each side of the carriage for the
rail diameter being used (see chart on next page). If the wheels are
not attached to the correct set of holes, remove the wheel brackets
and bolt them in selected holes. Tighten the bolts until the brackets
are snug but still free to rotate.
B. Loosen the adjustment knob to separate the two halves of the split
carriage. Loosen and turn the clutch knob counterclockwise to put
the drive in the declutched position.
C. Place the carriage on the ring rail with the wheels in the rail grooves.
Close the cam handle and move the carriage back and forth a few
inches. The wheels on their mounting brackets will align themselves
correctly with the rail grooves.
D. Verify that wheels are properly aligned, then tighten the wheel mount-
ing bolts to lock them in position. Rotate the clutch knob clockwise
to engage the drive pinion with the rack.
E. Verify that pinion is properly engaged in rack. The correct wheel
position will provide a minimum of 1/8" (3.175 mm) engagement
between the drive pinion and the gear rack.
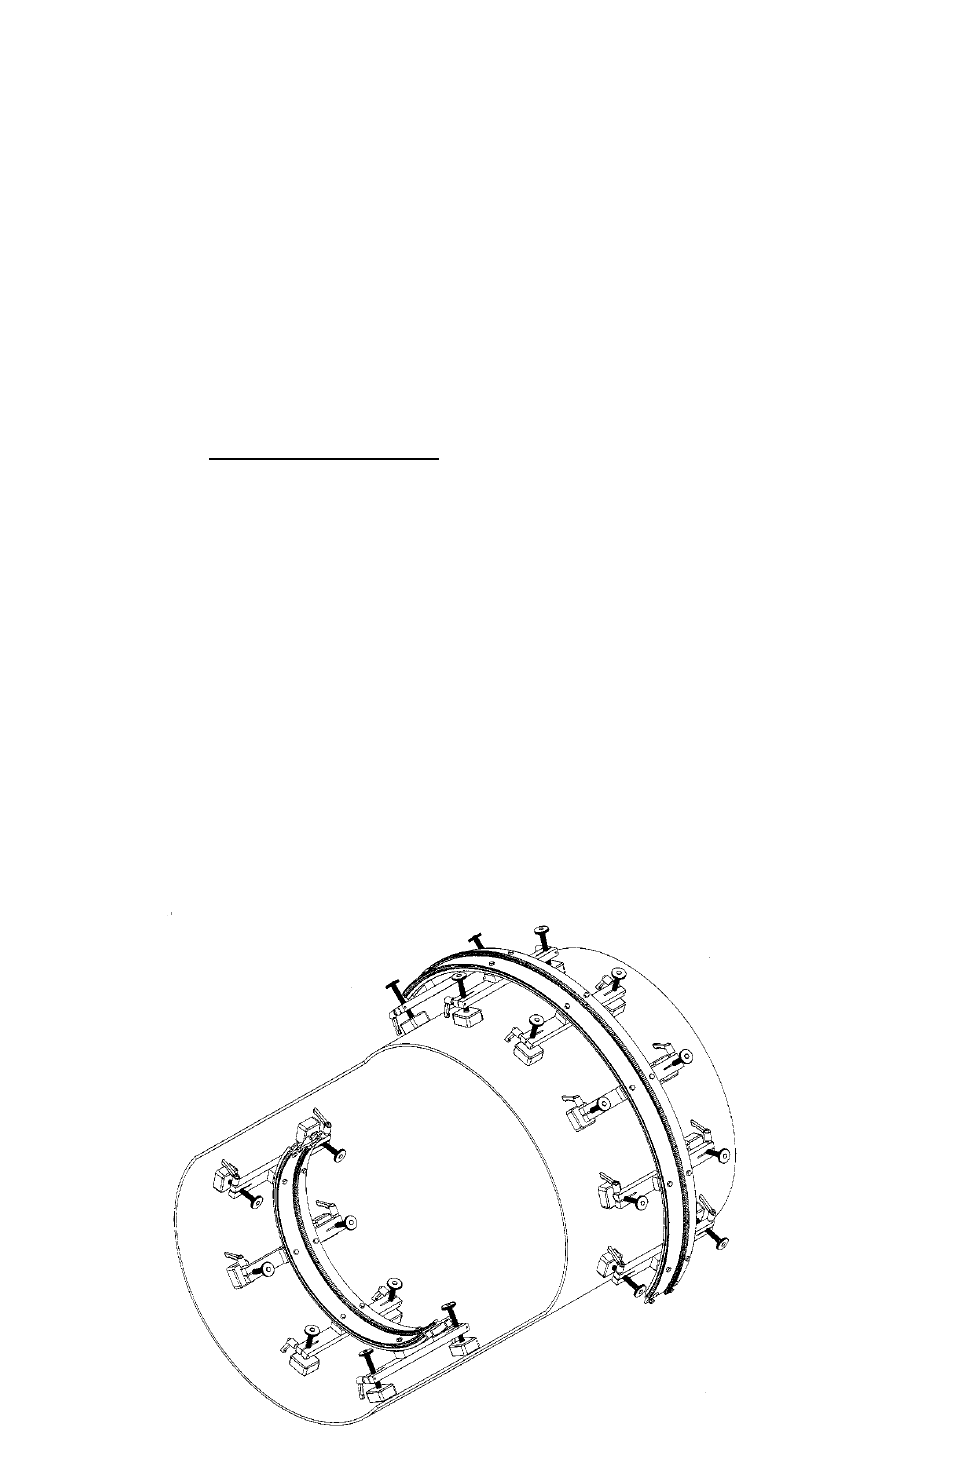
1. INSTALL RAIL
The Tube Carriage is designed for use with Bent Rigid Rail (BRR) or
Ring Rail. The exact outside diameter (OD) of the work piece, including
coating, must be known when ordering rail. Minimum pipe OD is 9 inch-
es (229 mm). Rail is custom bent for each OD and features adjustable
feet to accommodate pipe ovality and deviations in coating thickness.