3 – assembling flown arrays – EM Acoustics X3-DFSP self-powered downfill element User Manual
Page 21
Page 21 of 36
X3-SP User Manual
v1.0 May 2012
5.3 – Assembling Flown Arrays
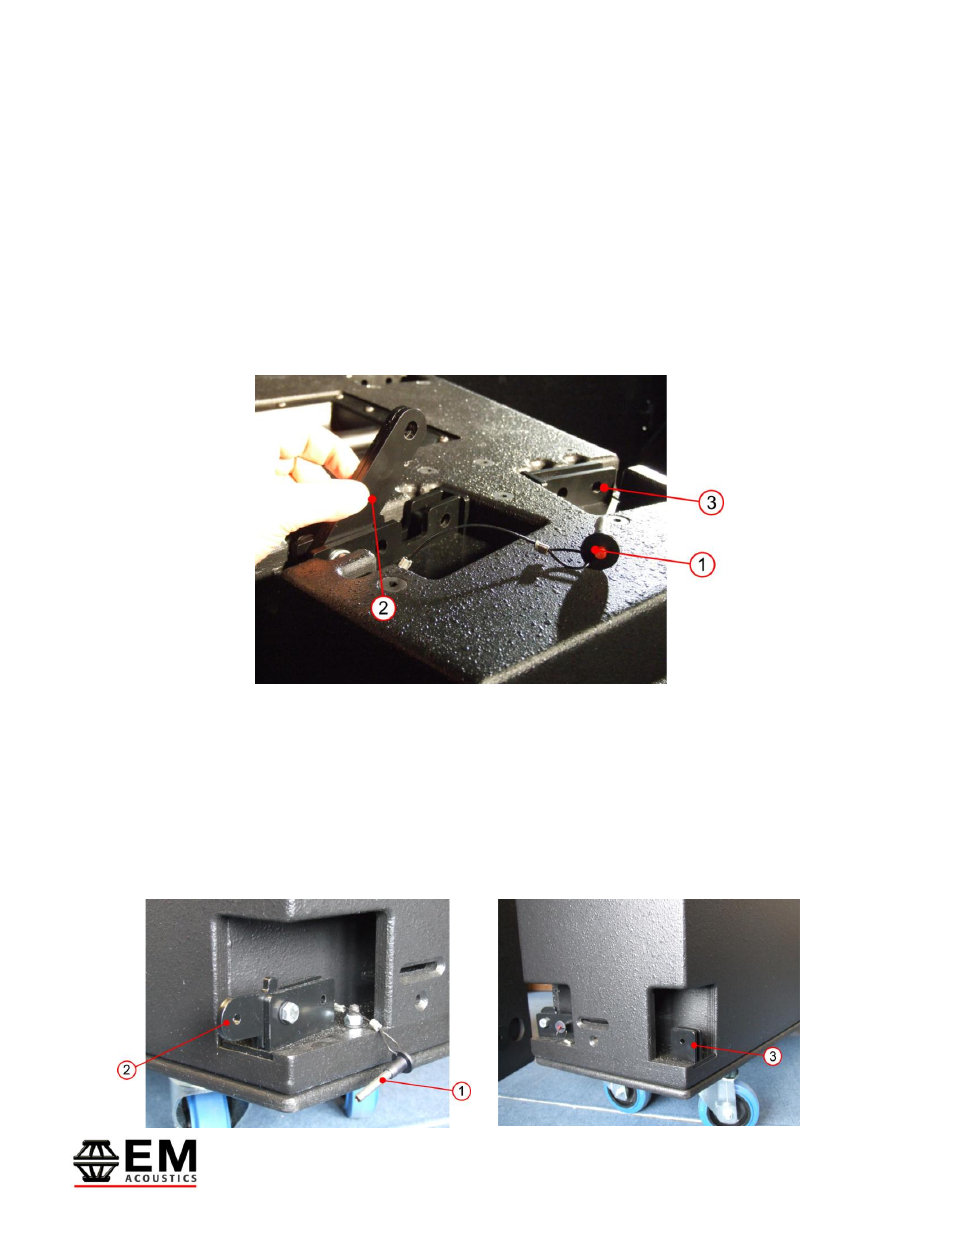
Step 1 – Connect primary rigging links
The use of the WB-X3 transit wheelboard allows the enclosures to be positioned easily
prior to flying the system. Align the first two enclosures side by side, so their rigging
recesses line up. Release the ball-lock pin on each of the rigging assemblies (Item 1) and
lift the link up (Item 2) so it drops into the slot on the adjacent enclosure. Secure the link
with the ball-lock pin into the flying pin hole on the adjacent enclosure (Item 3). Repeat
this process for the second primary rigging link.
Step 2 – Rear rigging link
Remove the ball-lock pin at the rear of the enclosure (Item 1), and using the protruding
tab, flip the link (Item 2) into the slot on the adjacent enclosure. Secure the link in place
with the ball-lock pin (Item 3).
The first pair of X3 enclosures are now secured ready for flying hardware to be attached.
For arrays larger than 2 elements, repeat the above process until all enclosures are
securely fixed together.