Standard insinkerator mountings, Special insinkerator mountings – InSinkErator SS-50 User Manual
Page 6
6
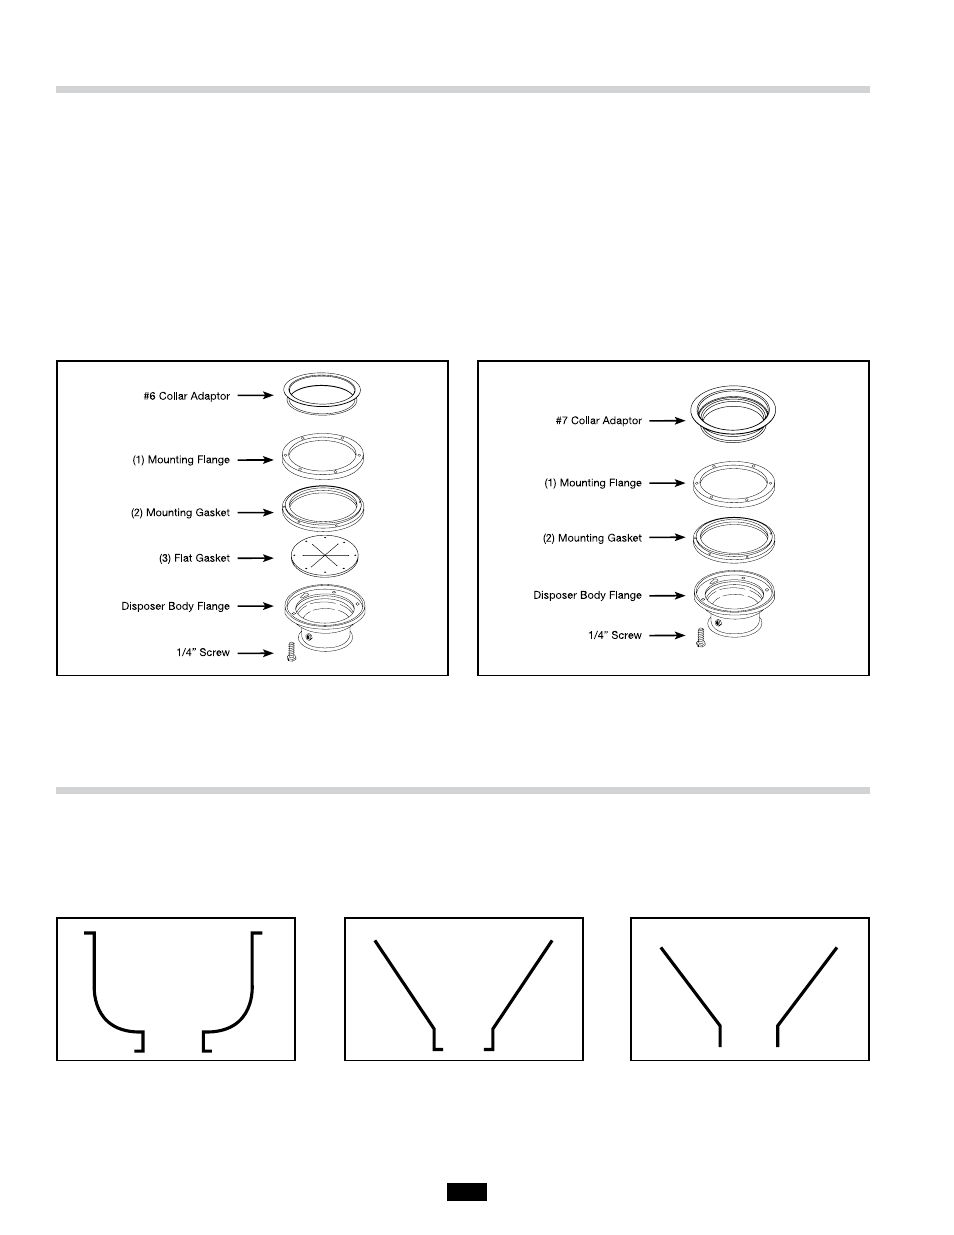
Standard InSinkErator Mountings
1. Place the mounting flange (1) over the existing collar
adaptor connection lip or sink bowl flange (this may
require some force).
2. Push the mounting flange up out of the way and fit
the groove in the mounting gasket (2) onto the
connection lip. Make sure the gasket is fully seated
on the flange.
3. Push the mounting flange down over the mounting
gasket, fitting the threaded mounting flange fasteners
into the recesses in the top of the mounting gasket.
#6, #7, & SINK BOWL MOUNTING ASSEMBLIES
4. From the bottom, insert two screws through opposite
sides of the flat gasket (3) and mounting flange, into
the threaded fasteners in the existing flange. The flat
gasket is used only in the #6 mounting assembly.
The screws should protrude about 1/4 inch below the
mounting gasket.
5. Position the disposer beneath the mounting gasket
and raise it to engage the two protruding screws in
the disposer body flange keyhole slots. Secure the
remaining screws and position the disposer correctly
for the plumbing connections. For SS150-SS1000
disposers, adjust the legs to support the disposer.
Figure 4. #6 Mounting Assembly
Figure 5. #7 or Sink Bowl Mounting Assembly
Special InSinkErator Mountings
When installing an InSinkErator Foodservice disposer to a non-InSinkErator sink bowl, a special mounting adaptor kit
is required. The special mountings are described in the Mounting Adaptor Selection Guide (for more information, call
1-800-845-8345, or go to www.insinkerator.com). Figures 6-8 show examples of non-InSinkErator sinks. (Mounting
instructions are included in each special mounting adaptor kit.)
Figure 6. Outward Flange
Figure 7. Inward Flange
Figure 8. Straight Flange