Lynx Studio LS-AES User Manual
Page 7
LS-AES
Page 5
LS-AES Internal Card Installation
1. If you are installing one LS-AES internal card, verify that a shorting jumper is in place on JP4
(refer to figure on following page for location). This will set the board’s LStream bus address
to 0. If you are installing a second LS-AES, remove the jumper to set the address of this card
to 1. For dual-card installations, each card must be assigned a unique address and the
LStream Dual Internal option must be checked in the advanced settings menu in the
LynxTWO mixer.
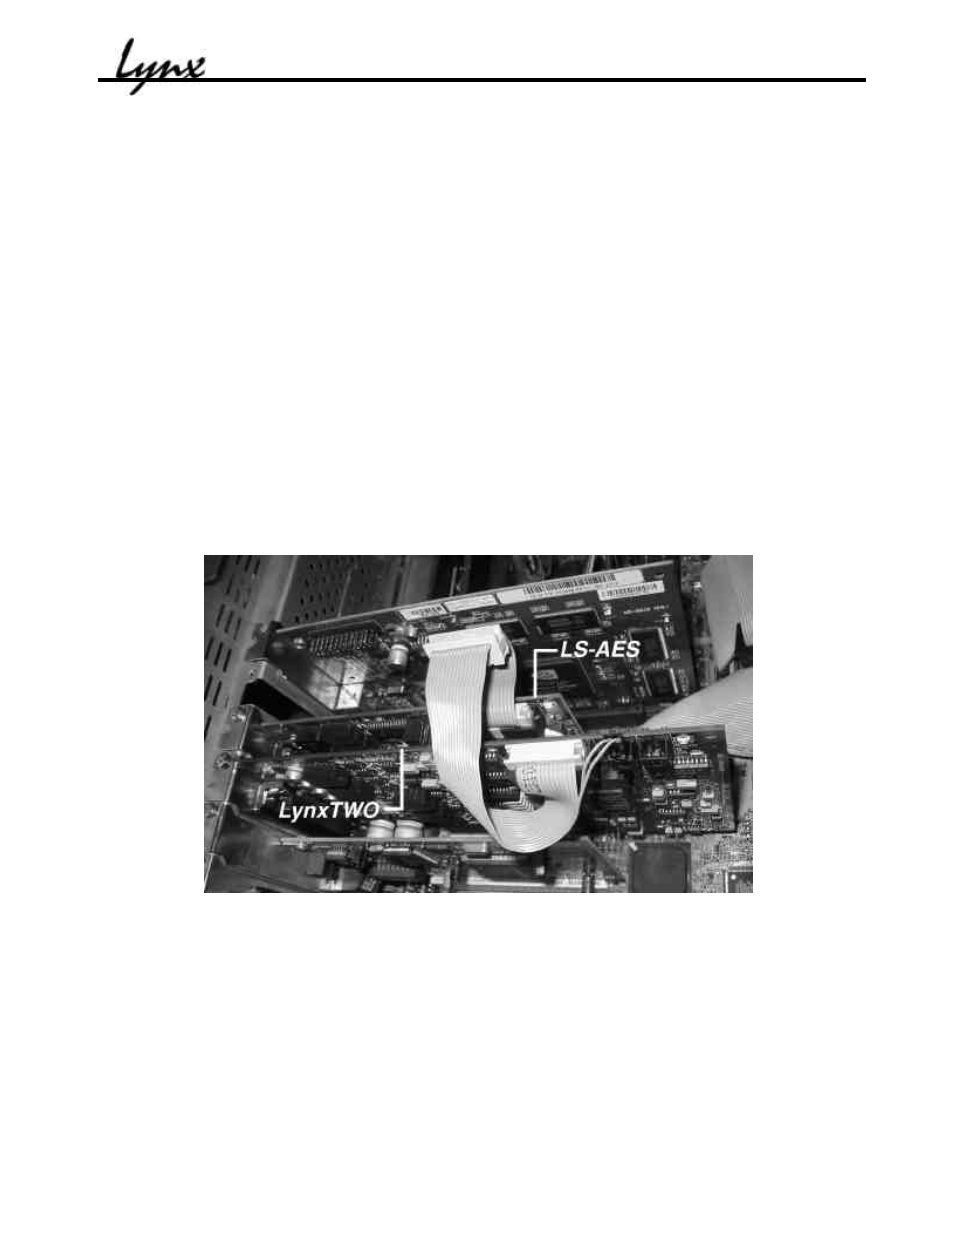
2. With the computer powered down, install the LS-AES in a bracket slot adjacent to the
LynxTWO/L22 as shown in the figure below. The LS-AES must be secured to the computer
chassis with a screw.
3. The included LStream ribbon cable connects a LynxTWO/L22 to either one or two LS-AES
internal cards. Locate the cable end terminated in both a 14-pin and 2-pin receptacle. Connect
the 14-pin receptacle to the connector labeled JP1 on the LynxTWO/L22. Take care to align
the polarizing tab on the cable connector with the slot on the board connector. Failure to do
may result in serious damage to the LynxTWO/L22 and LS-AES. Snap the 2-pin cable
receptacle to connector labeled JP2/CLOCK IN on the LynxTWO/L22.
4. Connect either of the two 16-pin cable connectors to connector JP1 on the LS-AES (labeled
INT LSTREAM). Again, insure that the polarizing tab is aligned. In dual-card installations,
both cable connectors are used.
LynxTWO and LS-AES Installation in Computer Chassis