Installation, Rear vent venting runs, Heat shields – Montigo MD38 DV2 User Manual
Page 9
Page 9
MD38-DV-2 Homefire
Part No. XG0111
Installation
Rear Vent
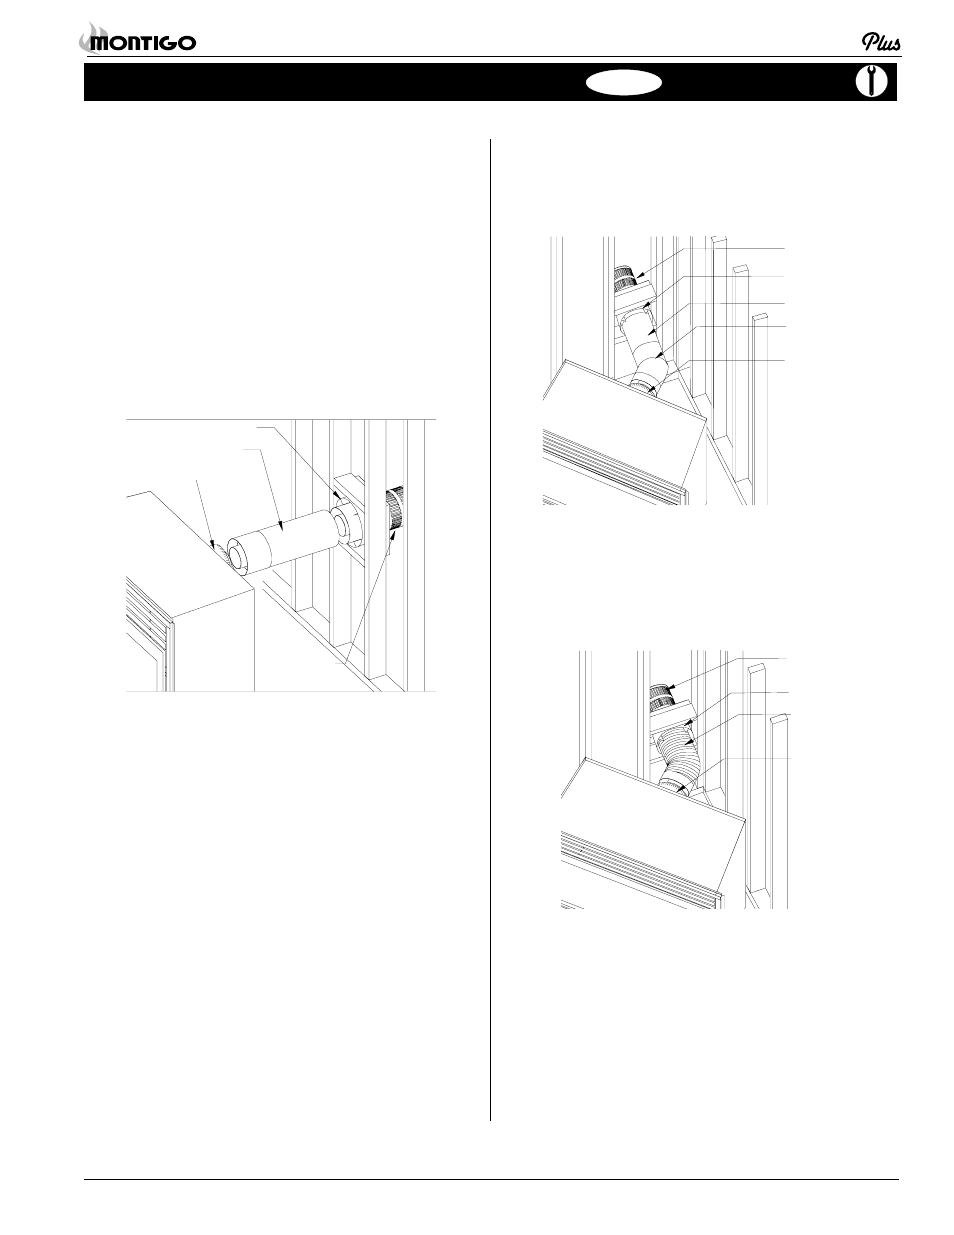
2. 45° Corner Installation.
Attach an EEL-45 (45° elbow) directly onto the flue collar. Cut the
EXT-18 to suit, and attach it to the EEL-45. Slide the fireplace into
position and attach to the termination.
Rear Vent Venting Runs
The MD38-DV-2 Rear Vent has three possible installations which do
not require vertical lift:
Heat Shields
Due to high flue temperatures, heat shields are required on all MD38-
DV-2 installations (except those with vertical terminations) at the point
where the venting connects to the termination. With the heat shield,
vent clearances can be maintained at 1".
See Figure 8.
1. Straight Installation.
The height from the hearth to the center of the termination is
28 ¾". MD38-DV-2 Rear Vent versions are supplied with an 18"
extension pipe (EXT-18) with female/female connections. For
shorter installations, cut the EXT-18 to the desired length.
For extended installations, use the EXT-18 section as supplied for
an 18" vent run.
Note:
For Rear Vent models, maximum horizontal run with no
vertical lift must never exceed 18".
Flue Collar
Heat Shield
EXT-18
Termination
Figure 15.
Extended installation.
Heat Shield
EXT-18
Termination
EEL-45
Elbow
Flue Collar
Figure 16.
Corner installation.
3. Corner Installation - 45° or less.
Use an MTO-3 termination and an MFL-1 or MFL-18 (12" or 18"
compressed length) and a frame, if appropriate. Flex may be
turned to obtain desired degree of angle required but must not
exceed 45°.
Figure 17.
Flex installation.
Heat Shield
Termination
Flex
Section
Flue Collar