Installation, Installing decorative burner trays – Montigo SP28 F2 User Manual
Page 6
XG0318
Page 6
SP28-F2 Modular Series Fireplace
Installation
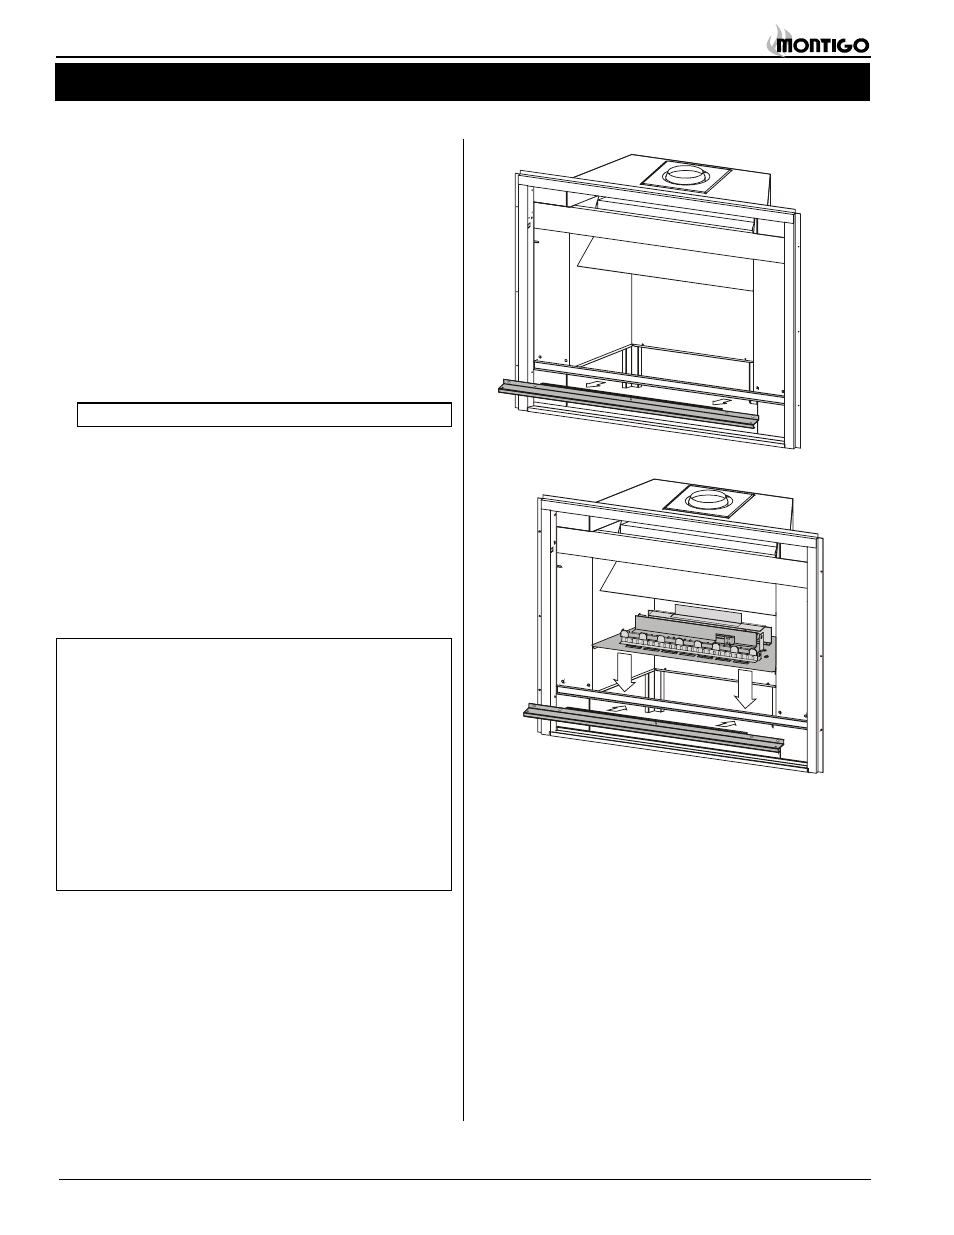
Installing Decorative
Burner Trays
The burner tray may be installed/upgraded before or after the EP28
outer shell has been installed.
1. Remove the lower trims.
2. If you are converting or upgrading an EP28 Series fireplace which
has doors installed, you must first remove the doors. To remove the
doors, push up firmly on the spring clip to release the top of the
door.Tilt the top of the door towards the middle of the fireplace, and lift
the bottom door pin out of its locating hole.
Continue on with steps 3 - 9.
3. Remove the four screws holding the front bar in place. See figure 7.
4. Warning: You must disconnect the gas supply line from the fireplace.
5. If replacing an existing burner tray, remove the two screws located
at bottom rear of burner pan. Lift complete burner assembly, up and
out of unit to clear support ledge.
6. Install the new burner by reversing step 5. Be sure to re-install the
two screws at the bottom rear of burner pan to secure pan into place.
7. Re-install the front bar. Make sure the front bar is secured with four
screws.
8. Reconnect gas line by following the information on page 4.
9. Turn on gas supply and leak test the connection.
Notes:
n
A Spill Switch is suppled with each unit. This must be wired
in the Wall Switch - Gas Valve circuit. (See Figure 24a, 24b, or
24c for Schematic Diagram.)
n
After gas line is connected each appliance connection, valve
and valve train must be checked while under normal operating
pressure with either a liquid solution, or leak detection device, to
locate any source of leak. Tighten any areas where bubbling
appears or leak is detected until bubbling stops completely or
leak is no longer detected. Do NOT use a flame of any kind to
test for leaks.
Figure 7. Removing the front bar.
Figure 8. Burner tray installation.