How to set the channels, How to measure automatically – OWON VDS Series User Manual
Page 19
Instruction of Trigger mode icon in Trigger window:
Rise in Edge mode
Fall in Edge mode
Synchronic trigger in video line
Synchronic trigger in video field
Synchronic trigger in video odd
filed
Synchronic trigger in video even field
Rising in Slope
Falling in Slope
+Pulse Width
-Pulse Width
5.How to Set the Channels
Click
to show Function menu, choose "Channel". You can also click
or
in the Channel window on the left bottom. Or click
,
or
in the Channel window on the left bottom when it is four- channel oscilloscope.
Fig. Dual channel setting Fig. Four channel setting
To turn on/off channels
Click to choose "CH1" or "CH2", check "On" to turn on the channel, uncheck it to turn off.
You can also click the channel switch in Channel window in left bottom. See figure below.
To invert a waveform
Waveform inverted: the displayed signal is turned 180 degrees against the phase of the earth potential.
Click to choose "CH1" or "CH2", check "Opposite" to invert the waveform, uncheck it to display normally.
To set channel coupling
DC: Pass both AC and DC components of the input signal.
AC: Block the DC component of the input signal.
Ground: Disconnect the input signal.
You can also click the coupling mode to switch it. See figure below.
To adjust the probe attenuation
For correct measurements, the attenuation coefficient settings in the operating menu of the Channel should always match what is on the probe
(see
1.How to Set the Probe Attenuation Coefficient
). If the attenuation coefficient of the probe is 1:1, the menu setting of the input channel
should be set to X1.
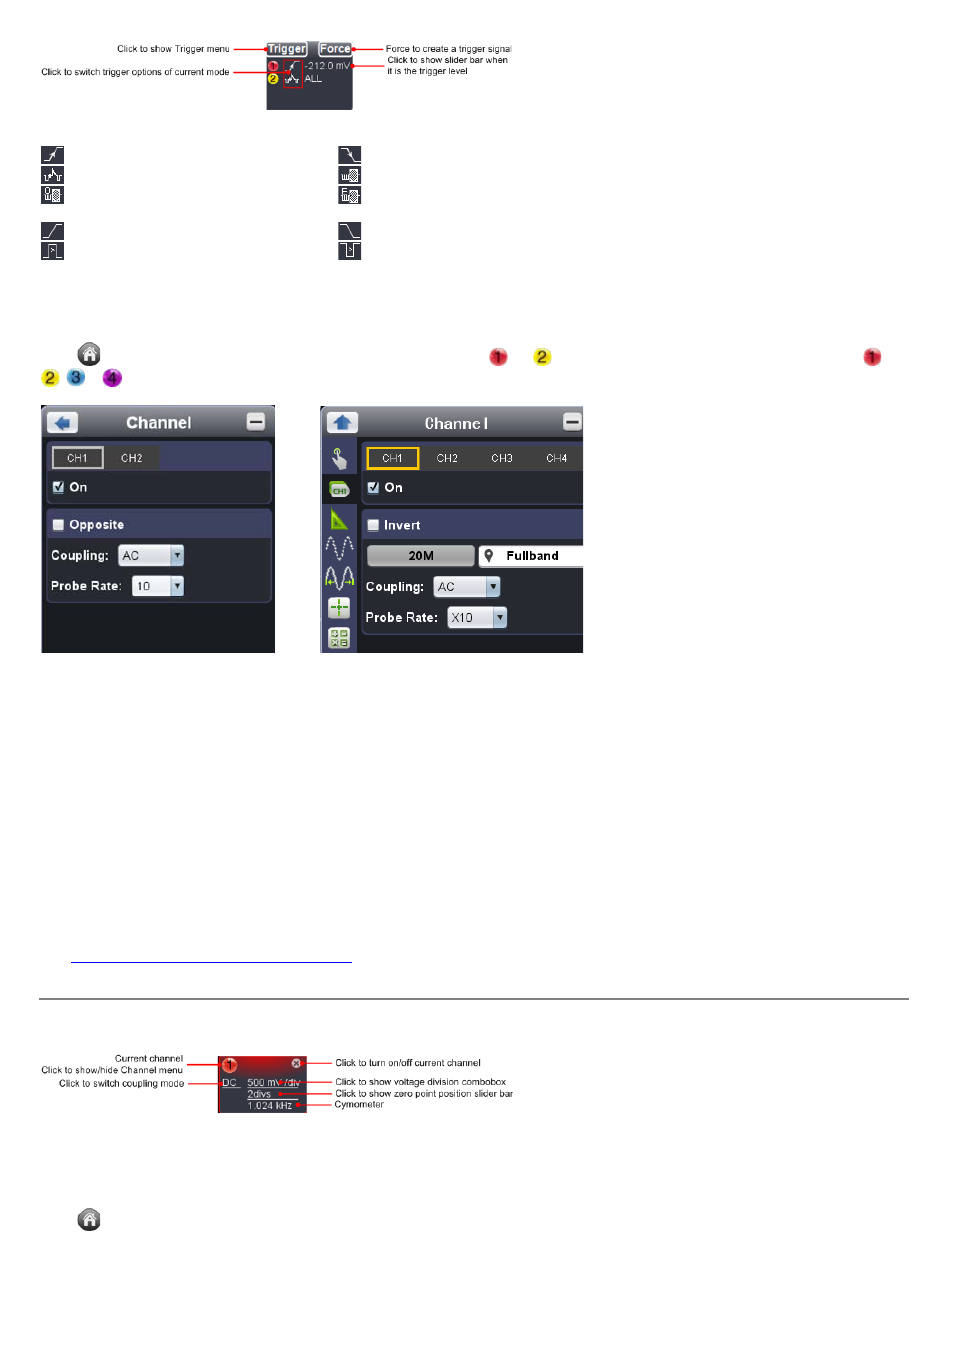
Some operations could be done in Channel window:
6.How to Measure Automatically
Click
to show Function menu, choose "Measure".
15