Creating a super schedule – Smart Avi PresenterWall User Manual
Page 26
26
7. Creating a Super Schedule
Super Schedules were designed for those who want to get the most from their video wall.
Super Schedules allow the user to create a variety of alternating screen layouts.
Virtual View
Setting Virtual Views creates various layouts for your video wall. This should be configured
the same way as your physical video wall layout. These views can be used for any Super
Schedule you create. For this example we created a 2x2 video wall.
1. In your task manager, at the top, click “Wall,” then “Setup Virtual Views.”
2. On the Wall View tab, assign the number of rows and columns that is the same as
your station views setup
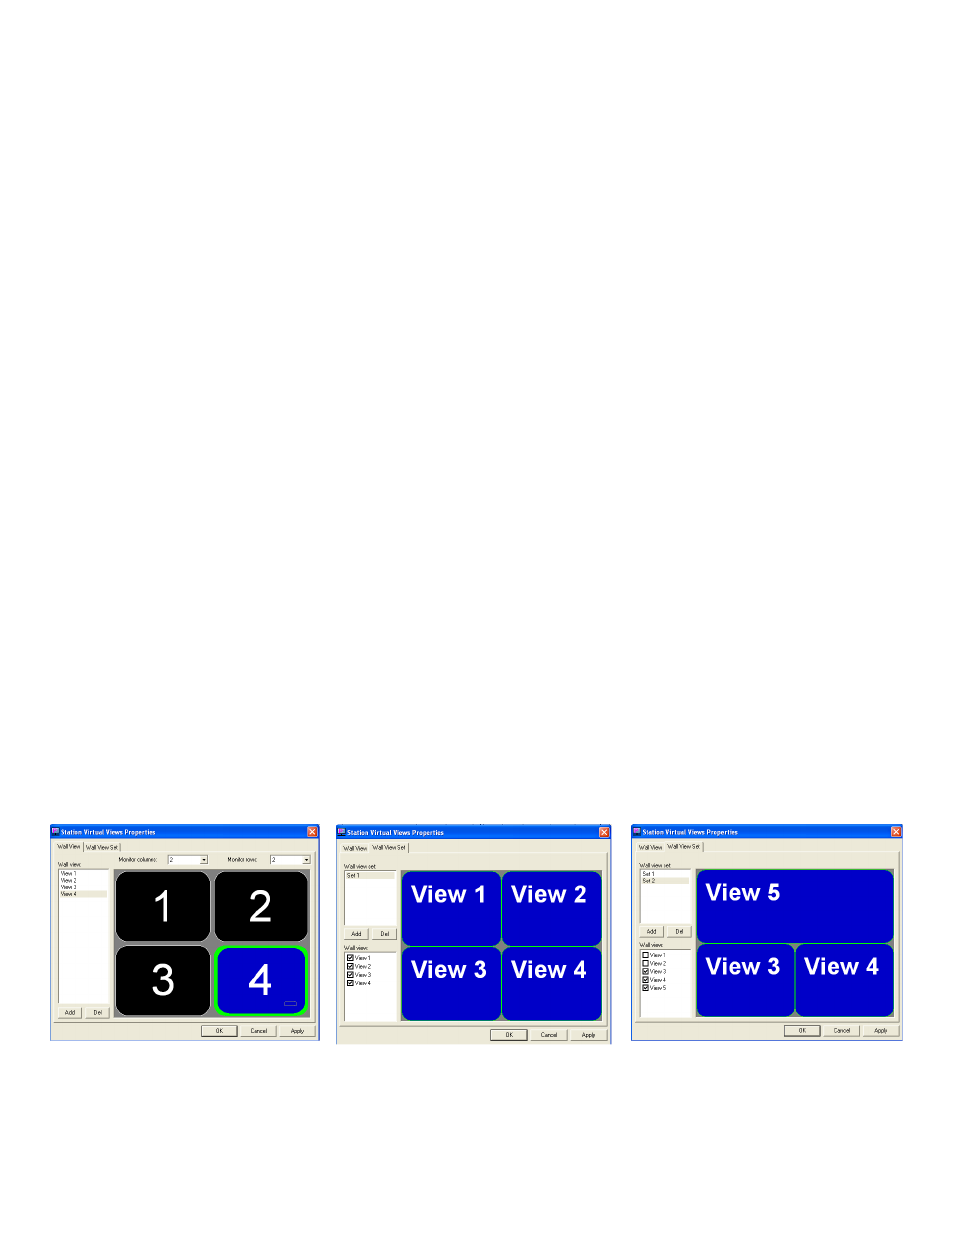
3. Click “Add” on the bottom left to add a view, which you may name whatever you
like. Drag your mouse across whichever screen or screens you would like to assign
to this view. You may use individual or multiple screens. (Figure 7.1)
4. Repeat step 3 until you have the views you need.
5. Click the “Wall View Set” tab to start creating different sets using the views you have
just created.
6. Click “Add” to add sets, which you may name whatever you like. Now you may add
different views to your set by clicking the check boxes for each view you would like
to add. Make sure you do not use views that overlap. (Figure 7.2) You may also
add additional sets for different view configurations. (Figure 7.3)
7. Once your sets are complete, you will be ready to configure your Super Schedule
Figure 7.1
Figure 7.2
Figure 7.3