Installing the presenterwall hardware – Smart Avi PresenterWall User Manual
Page 7
7
Section 1
Installing the PresenterWall Hardware
1. Hardware Installation (PCI-E 4-port DVI Video Card)
1. Turn off your computer
2. Remove the outer case from your computer.
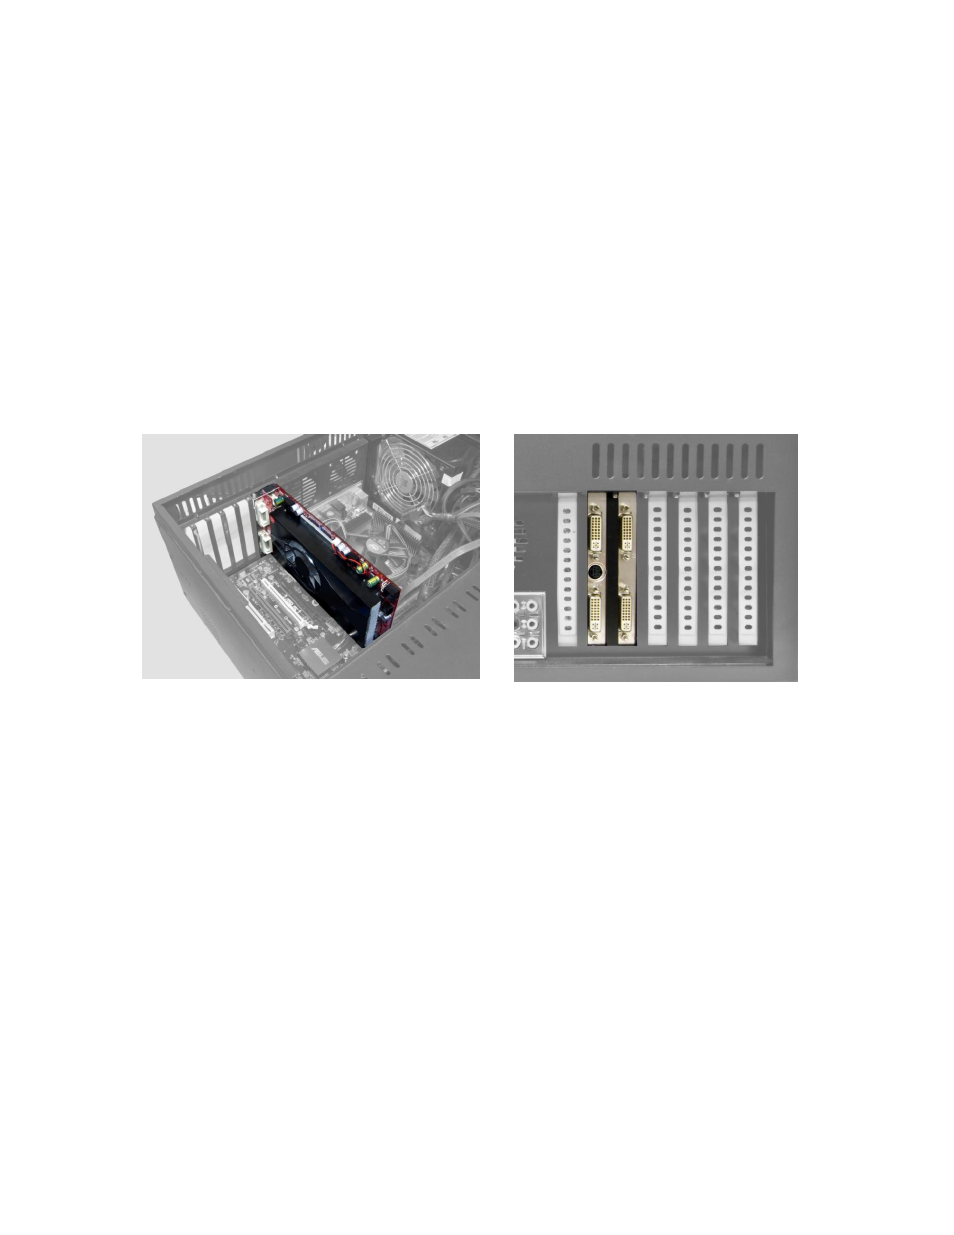
3. Firmly insert the Video Card adapter into a free PCI-E slot. (Figure 1.1)
4. Screw the Video Card adapter into the case.
5. Restore the outer case to your computer.
Note: If you are installing multiple PCI adapter cards, be sure the previously installed
card is fully operational by reassembling your PC and booting Windows before
installing additional PCI adapter cards.
6. Connect each of the four DVI to VGA adapters to the four available DVI ports on the
Video Card. (Figure 1.2) Connect each of your monitors to the VGA end of the
adapters that are connected to the Video Card.
(Note: If you have DVI cables for your monitors, this is not required. You may
connect to your monitors directly to the DVI ports.)
7. Turn on your computer.
8. You will see a ‘New Hardware’ bubble pop up from the system tray.
Windows will automatically find the correct drivers for the Video Card.
9. To ensure proper installation of the hardware, please click ‘Start’ / ‘Control Panel’ /
‘System’ and select the ‘Hardware’ Tab / ‘Device Manager’ button. (Figure 1.3)
Under Display Adapters you should see your two video adapters, two ATI
Radeon 4600 series. (Figure 1.4) Any other adapters you see should be other
cards you already have installed.
10. Reboot your computer once more.
Figure 1.1
figure 1.2