Trouble shooting nozzle valves – Smithco Spray Star 2005/2005D Operator Manual User Manual
Page 26
24
Spraying Procedures
PARTS MANUALS AVAILABLE ONLINE AT smithco.com
TROUBLE SHOOTING NOZZLE VALVES
1.
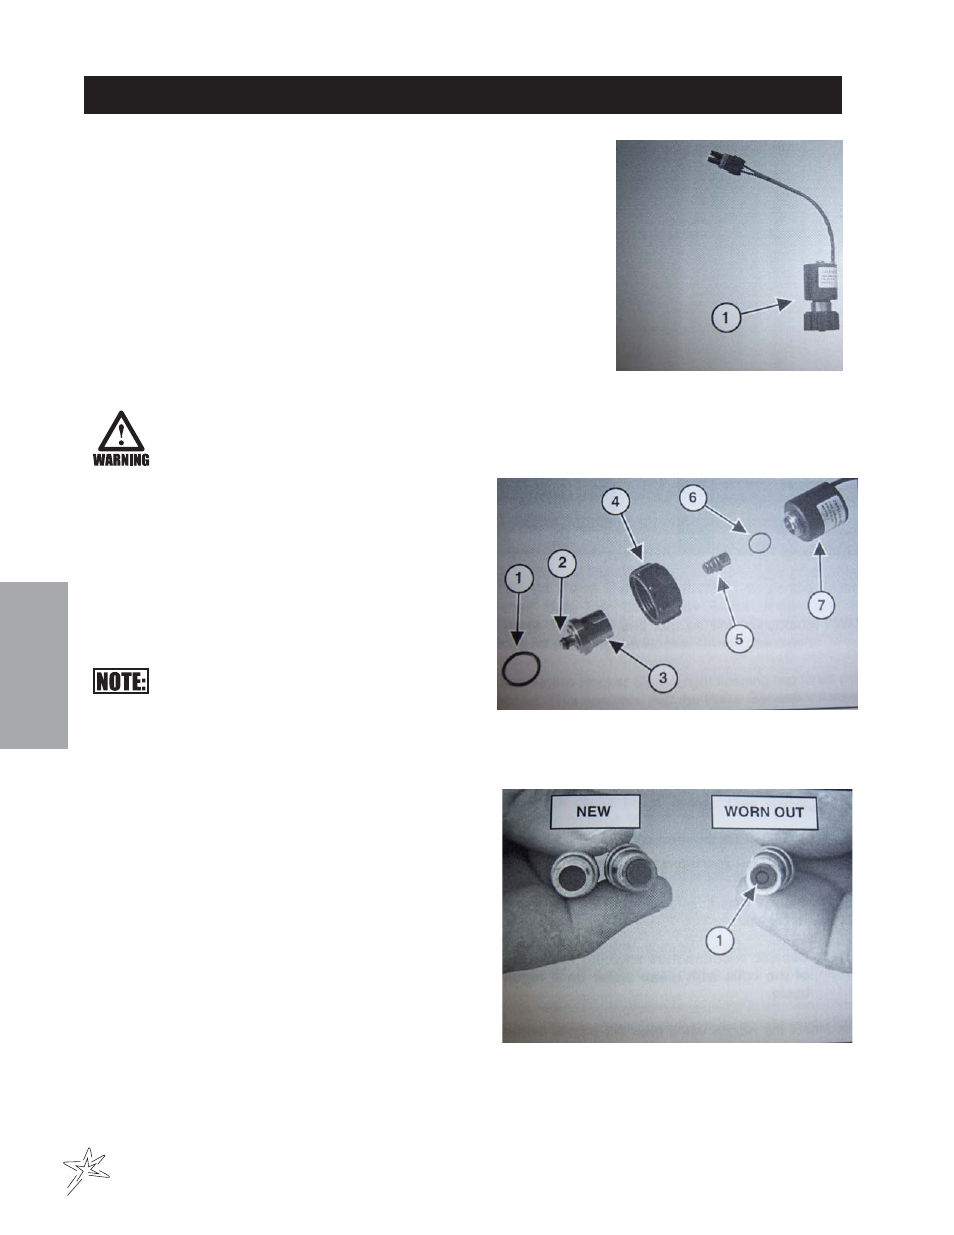
Complete Nozzle Valve Assembly
30-168-05P
The nozzle valve assembly (30-168-05P) screws into the nozzle bodies re-
placing the standard diaphragm check valve.
NOZZLE CLEANING
Before removal or installation of nozzle valves make sure pressure has been removed from the
sprayer lines.
Remove the O-ring (Item 1), O-ring (Item 2), valve body
(Item 3), flynut (Item 4), plunger (Item 5) and O-ring (Item
6) from the coil (Item 7).
Inspect the plunger for wear or damage. Replace plunger if
worn or damaged.
Remove debris from nozzle components by
washing components with clean water.
After extended use the soft plunger seal (Item 1) will wear
a groove where the seal impacts the hard orifice seat. Re-
place plunger if worn or damaged.
As the groove deepens the pressure capacity of the valve
will decrease, until the pressure capacity interferes with
the operating pressure of the sprayer.
The result is erratic pulsing, often described as “flickering.”
SharpShooter will operate normally at lower pressures until
replacement parts can be acquired. High operating pres-
sures and abrasive spray solutions will accelerate the wear
of the plunger seal material.