Teo NT1-296 Rack User Manual
Page 3
13-102848 Rev. G
Page 3
Wall Mounting
Note – When mounting the NTI-296 Rack in conjunction with a Battery Backup unit, refer to the
NT1-200 Battery Backup/NT1-200 Add-on Battery Installation Instructions (doc. #13-102688)
for proper mounting positions.
1. Remove all circuit cards from the rack. Disconnect the power supply and set it aside.
2. Attach the mounting brackets to the rack in the wall mounting position, using the supplied mounting
bracket screws.
3. Fasten a plywood sheet to the wall.
4. Hold the rack up to the wall to mark the hole locations, then pre-drill the mounting holes for the rack.
Make sure that the power cord can reach a local 120 VAC, 60 Hz, single phase grounded power outlet.
5. Attach the rack to the plywood using four suitable fasteners (such as #10x¾” pan head self-tapping
screws). A fully loaded NT1-296 Rack weighs 14.5 lbs.
When mounting the rack to the wall, ensure that the power supply vents are not obstructed or
flush against the wall.
6. Remove the top bracket mounting screw on each side of the rack and tilt the rack forward to connect
ribbon cable connectors. After all cables are connected, replace mounting screws and install the cards
– see page 4.
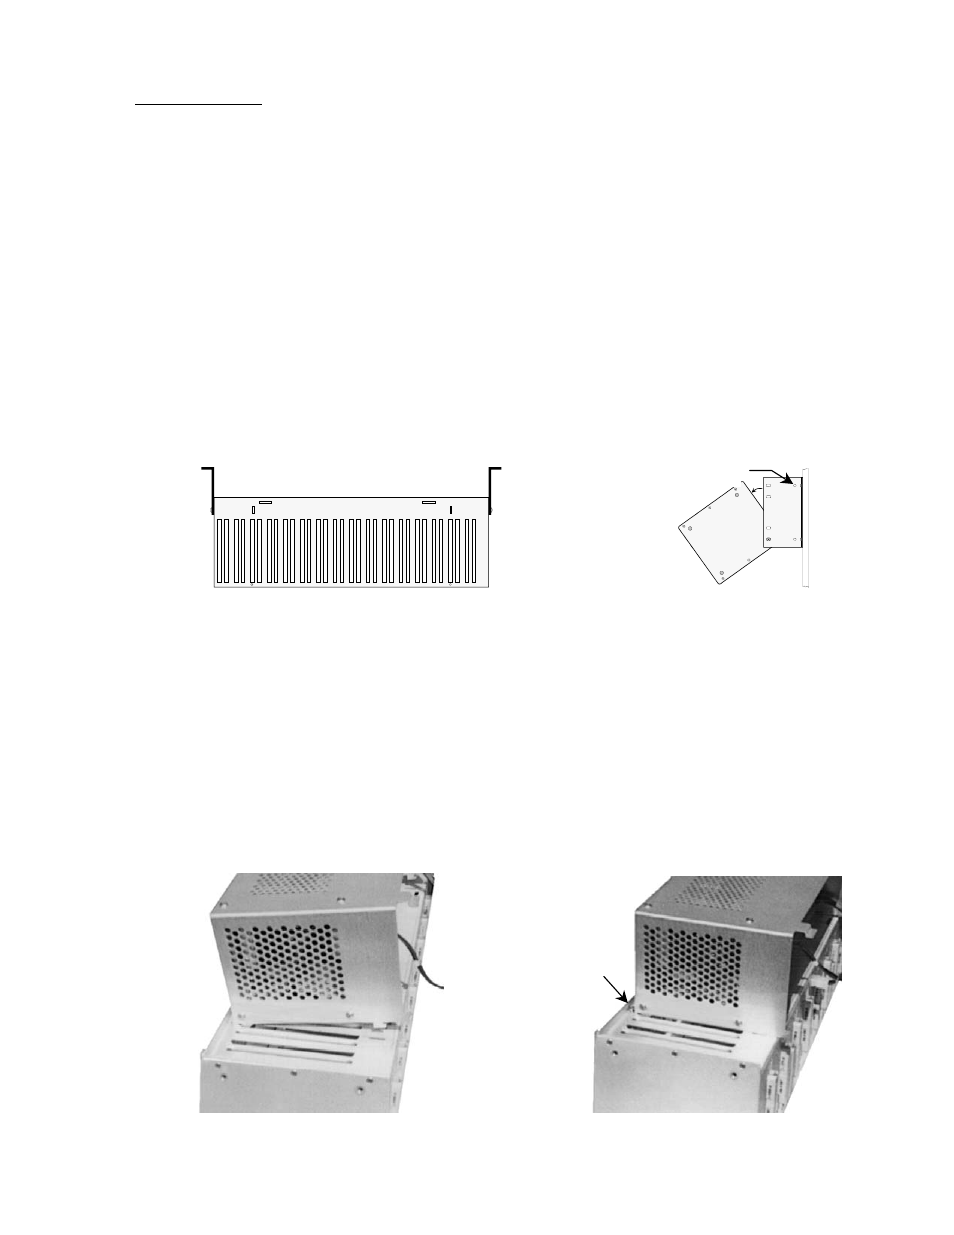
Bracket Positions – Wall Mount
Tilting Rack for Cable Access
Power Supply
For wall mounting configurations, the power supply mounts on top of the NT1-296.
1. Slide the grooved tabs on the power supply into the slots in the front of the rack top panel as shown
below. Use the slots directly behind the two screw holes at the front of the top panel.
2. Tilt the rear of the power supply down to insert the back tabs into the rack top panel, then push the
power supply back to secure it.
3. Insert the two retaining screws into the rack top panel, in front of the power supply, to prevent the
power supply from sliding forward.
4. Plug the power supply output cable (red and black wires) into the POWER connector on the rack back
panel.
Wall Mount Power Supply Installation
Remove This Screw
Retaining
Screw