AEC OFC Series User Manual
Page 26
Extrusion Control & Extruder Monitor Units Chapter 4: Operation
25
Unit Calibration and Setup
Scale Calibration
Starting from the #1 Startup menu, press 3, 1, 4, 1. This will bring you directly to the Scale
Calibration menu.
Simply follow the menu prompts to set the hopper empty weight (zero weight), and then
place the calibration weight on the hopper and key in the calibration weight to set the scale
span.
If you want to check the scale periodically, enter the Diagnostics menu (pressing 3, 2, 4 from
the #1 Startup menu) to check the scale readout.
If sufficient material is not present in the weigh hopper, the display will notify you of a load
problem.
System Setup
The system setup menu allows adjustment of the software program to conform to the
particular configuration of each system as the application requires.
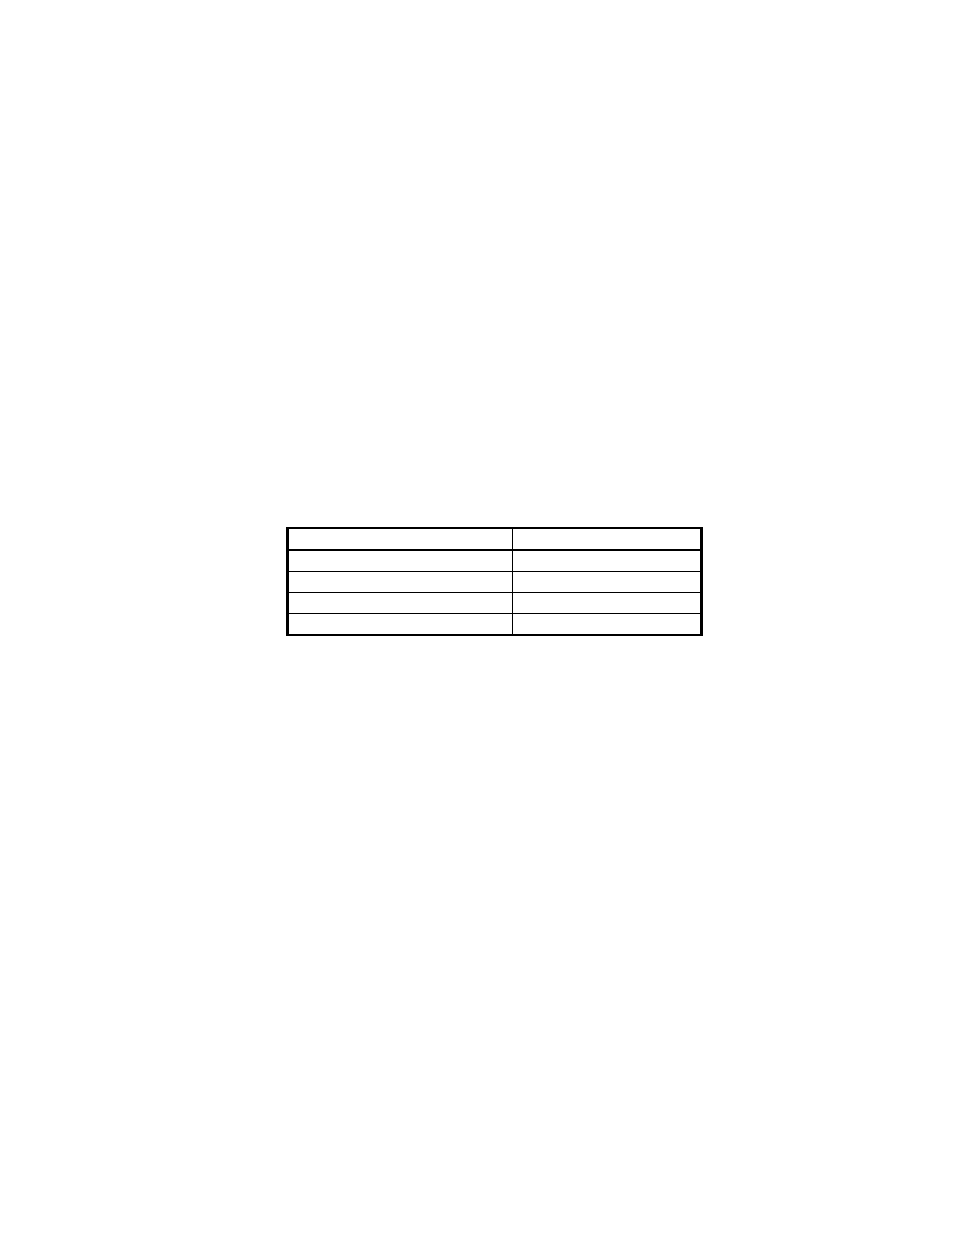
1. Set in the weigh hopper size. This is normally preset in the factory, based on 32#/cu.
ft. material, but should be checked. Hopper sizes are approximate and can vary
according to the application. Use the following as a guideline:
Hopper Setting
9” weigh hopper
Set in 8#
12” weigh hopper
Set in 15#
14” weigh hopper
Set in 25#
20” weigh hopper
Set in 50#
Note: Some adjustment for bulk density may be required.
If an extrusion control unit is connected to a host computer system, the unit ID number and
communications baud rate may have to be adjusted before the unit will communicate. This is
done in the communications menu. Set up the host unit first to determine the proper ID
number for each slave unit and then set in the ID number on the slave.
Make sure that all units on the same network are running on the same baud rate (they will all
have to be talking the same communication protocol).
2. Program in the haul off roll diameter ft./revolution. This will vary from extruder to
extruder, depending on the size of the roll. This figure will be the actual
circumference of the roll.
3. Set in the desired Rate Deviation window by pressing keys 3, 1, 1, 4 for haul-off
weight per length control or 3, 1, 1, 7 for dual control from the Startup menu. This
function will reset the unit to Monitor mode from Control mode in case the extruder
makes some sudden speed changes, such as being shut down by the operator when a
string up is lost, etc.
4. Now you are ready to set in the Recipe for the product you will be running. Starting
from the Startup menu, press 2, 1. A screen will prompt you to enter the
weight/length. Enter the weight/length specification you want, then press ENTER.
5. The menu then instructs you to enter the Stretch Factor, which compensates for slip
on the nip roll, etc. Factory default is 1.00. Adjust up or down after the line is started,
until the actual weighed product weight and the displayed weight match.