Airmar 200WX—Ultrasonic WeatherStation® Instrument User Manual
Page 13
13
Attaching the Cable to the WeatherStation Instrument
1. With the nut assembly on the cable near the WeatherStation connector, thread the
cable through the extension tube (if used), antenna mount, and the cable exit. Be
sure to leave several inches of cable extending beyond the nut assembly (see
Figure 5).
2. Screw the nut assembly onto the top of the antenna mount /extension tube.
Hand tighten only. Do not over tighten.
NOTE: If you use a thread lock, use teflon pipe thread tape only.
3. Remove the protective cover from the connector. (Save the cap to protect the
connector, when the WeatherStation Instrument is removed.) Plug the
connector into the WeatherStation Instrument. The alignment key on the
connector fits into a notch in the base of the WeatherStation Instrument.
4. To accurately measure the wind direction, be sure to orient the alignment
indentation correctly. Grasp the lower housing of the WeatherStation Instrument
below the reflector plate and hold it in the proper position (see Figure 4).
• Moving vehicle/boat—The alignment indentation must point forward and be
parallel to the centerline of the vehicle/boat.
• Stationary surface—It is recommended that the alignment indentation point
toward true north.
5. Slide the captive nut upward and screw it onto the base of the WeatherStation
Instrument (see Figures 4 and 5). Hand tighten only. Do not over tighten. Be
careful not to rotate the WeatherStation Instrument changing the alignment or
loosen the nut assembly from the antenna mount/extension tube.
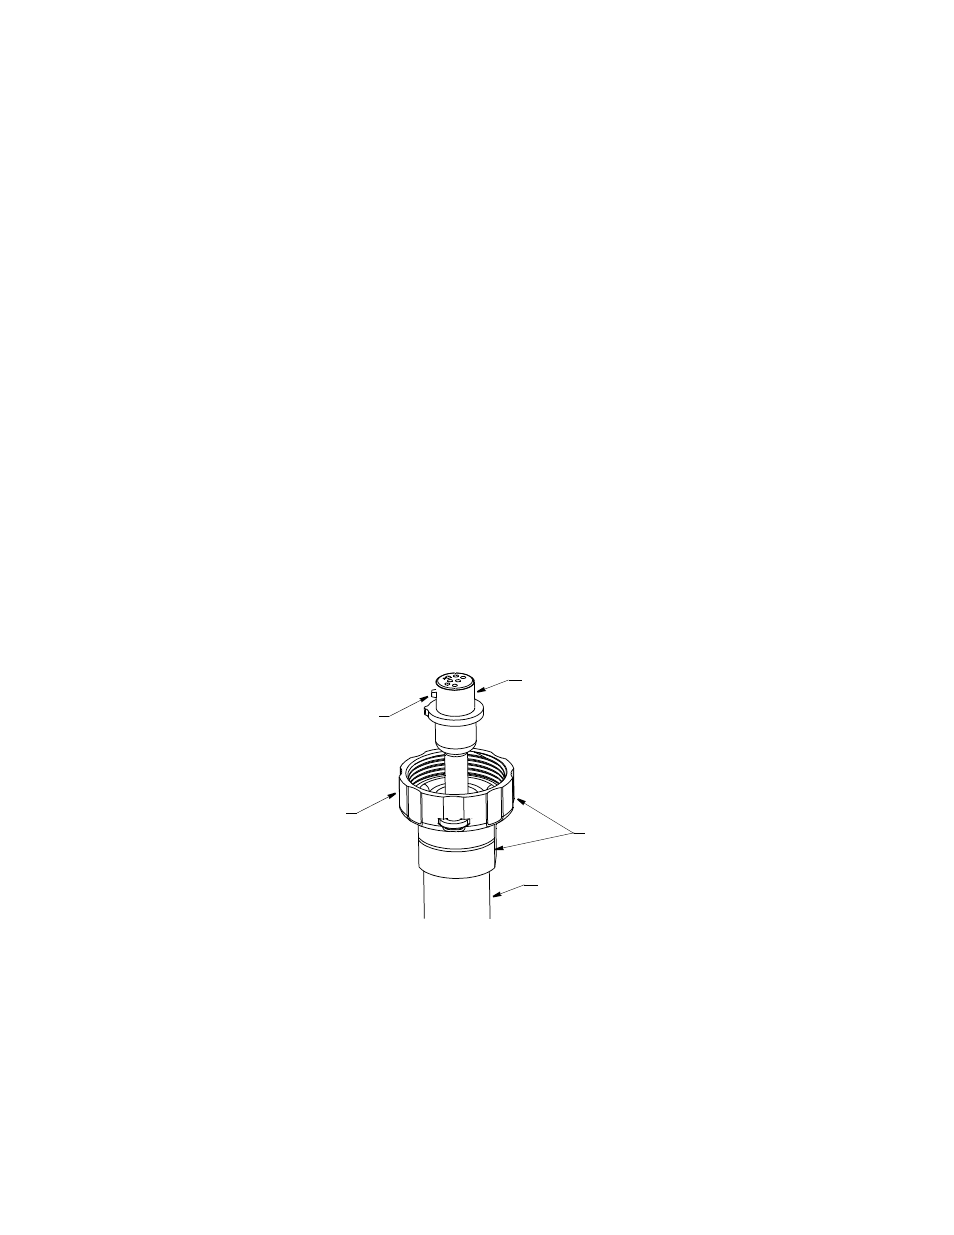
Figure 5. Attaching the cable to the WeatherStation Instrument
WeatherStation
nut assembly
captive
nut
alignment
key
connector
antenna mount
or extension tube
Copyright © 2007 - 2011 Airmar Technology Corp.