Archgard 60-1600I User Manual
Page 13
Chalet 1600I
13
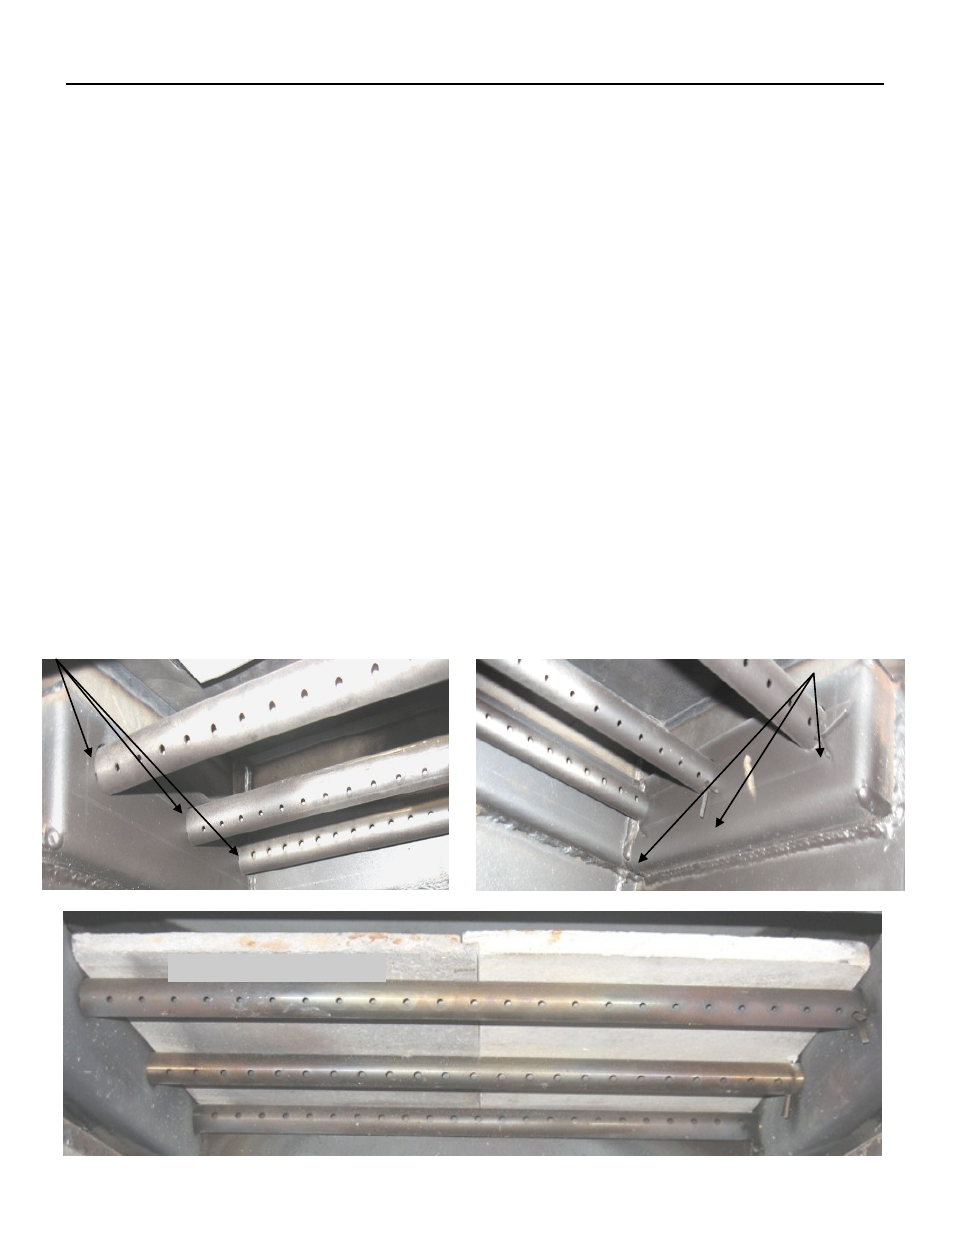
The Air Tubes in the Archgard Chalet 1600I come already assembled with the baffle plates installed. If for some
reason they need to be removed or installed, the following guidelines must be adhered to. (The stove must be
cool)
1) Open the Archgard Freestanding Chalet 1600I door.
2) NOTE: The holes in the two back tubes are larger than the holes in the front tube. The left hand side of
the tubes have little “notches” or “relief's” cut into them that mate with the left hand side of the stove
that align the air hole for proper combustion.
3) The 2 ceramic baffles are fragile and must be installed as shown below. They are installed prior to putting in the
last tube in the front position.
4) Slide the first rear tube into the right hand side hole, as far as possible and then bring it back into the hole on the
left hand side lining up the “relief or notch” cut into the tube on that side until it locks into position. If the tube will
not slide in easily, simply use a pair of vise grips or pliers and tap it into place with a hammer. Then insert the
cotter pin from the top through the hole.
4) Before installing the final air tube, slide the a lightweight baffle plate over the air tubes (leaving the step joint in
the middle) from the front and then push it to the back and over to side of the stove as far as it can go. Do the
same with the other lightweight baffle plate ensuring that the step in the middle will overlap the previous light-
weight baffle plate.
5) When both lightweight baffle plate are in, install the third secondary air tube.
Handle the ceramic baffle plates with care as they are fragile.
AIR TUBE INSTALLATION
Notches
Cotter Pins
Baffles shown in proper position.