Archgard 60-1600I User Manual
Page 15
Chalet 1600I
15
FACEPLATE INSTALLATION
NOTE: There is 3 1/2” to 6 1/2” of adjustability be-
tween the back of the faceplate and the front of the flue
collar. The faceplate box will have all required hard-
ware for installation.
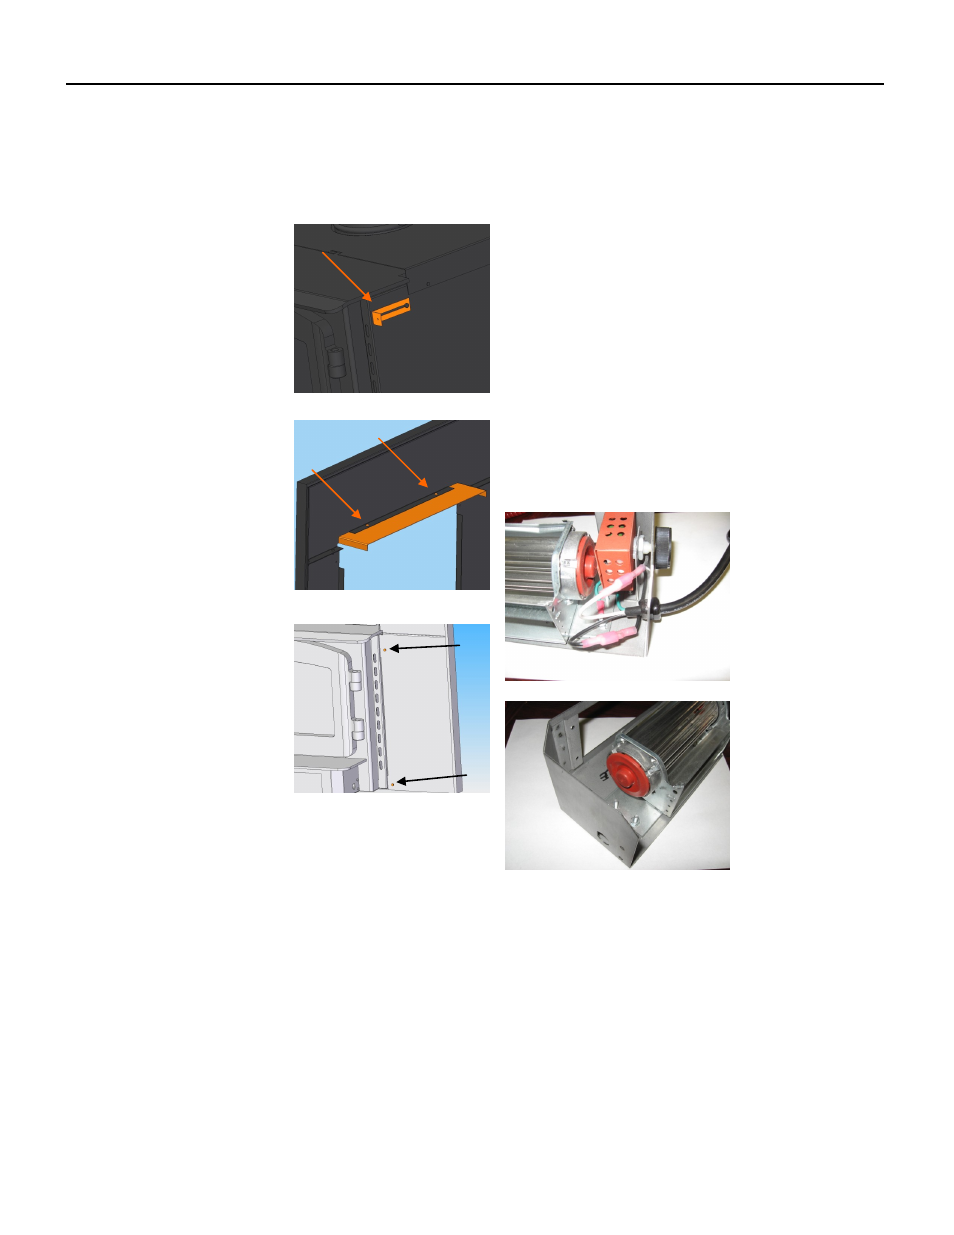
1) Start the installation by re-
mounting the 4 angle clips into
the predrilled holes in the top
and bottom of each side of the
insert as shown. The faceplate
will mount flush with the sur-
face it is covering. Take this
into account when adjusting
the 4 mounting brackets.
2) Remove the Faceplate and
Louver assembly from the
packaging. From the back,
screw the louvered section to
the top section of the face-
plate as shown with 2 self tap
screws. (complete surround
not shown)
3) Start by placing some
form of protection on top of
the insert top so that the sur-
face will not be scratched as
you slide the faceplate and
louvered section onto the
top.
Push the faceplate back until
it contacts the 4 installed
angle clips. Make sure that
the faceplate is flush and
even with the area it is cov-
ering. Adjust the clips as re-
quired.
Remove the material used
as protection and using 4
black supplied screws install
the faceplate to the brackets.
BLOWER / FAN ASSEMBLY AND REMOVAL.
(MODULE COMES PACKED IN FIREBOX )
The CHALET 1600I WOOD Fireplace Insert is certified
for operation with or without the fan.
CAUTION: Do not plug in Fan Module until full In-
sert installation has been completed. If servicing is
required or if you need parts contact your dealer or
installer.
To switch the power cord to the right side:
1) Remove the strain relief with a pair of slip-joint
pliers.
2) Disconnect all connections and remove power
cord by pulling it out of the hole.
3) Insert power cord from the hole on right side
and reconnect all connections.
4) Secure power cord with strain relief.