How to configure md destinations – Grass Valley NV9601 v.2.2 User Manual
Page 39
29
NV9601
User’s Guide
Multi-destination configuration uses the display portion of the panel graphic in the panel
configuration page. It also uses ‘Page Up’ and ‘Page Down’ buttons
—
also in the panel graphic
—
to select a group of MD destinations that will appear in the display. The display scrolls by 8
lines when you click a scroll button.
The limit to the number of MD devices is controlled by a panel option. If the limit is 64, for
example, the display can scroll through 8 pages of 8 rows, regardless of whether these rows
have been assigned a destination device.
Initially the list of MD destinations is empty and all you will see in the display are numbered
blank lines. After you assign MD destinations to the numbered lines, the destinations’
mnemonics appears on those lines.
How to Configure MD Destinations
Follow these guidelines.
1 Click any line in the display portion of the panel graphic. (A single click is all that is required.)
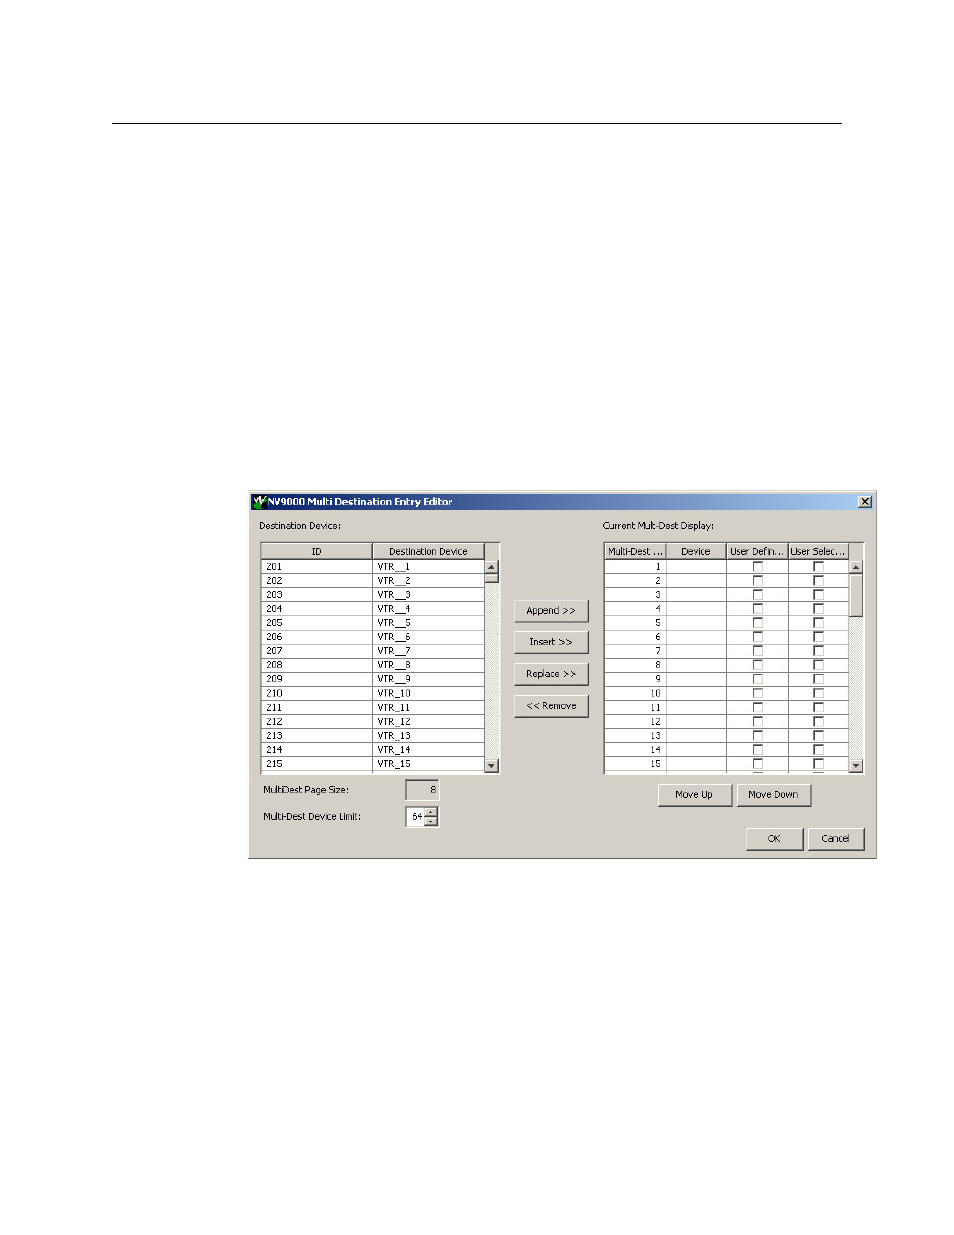
A dialog appears. This is the multi-destination entry editor:
On the left is a list of all destinations defined in the NV9000 system. On the right is a table of
the MD destinations you are defining. The number of rows in this table is equal to the maxi-
mum number of MD destinations your configuration allows.
To define an MD destination, select a destination on the left and copy it, using either the
‘Append’ button, the ‘Insert’ button, or the ‘Replace’ button, to the right.
The ‘Append’ button appends the selected destination to the end of your set of MD destina-
tions.
The ‘Insert’ button places the selected destination immediately above whatever MD destina-
tion you have highlighted on the right.
The ‘Replace’ button replaces whatever MD destination you have highlighted on the
right.with the selected destination from the left.