Installing the front panel – Grass Valley PDR 100 9GB Media Drive Upgrade User Manual
Page 36
9GB Disk Drive Upgrade
26
PDR 100 9GB Disk Drive Upgrade
Installing the Front Panel
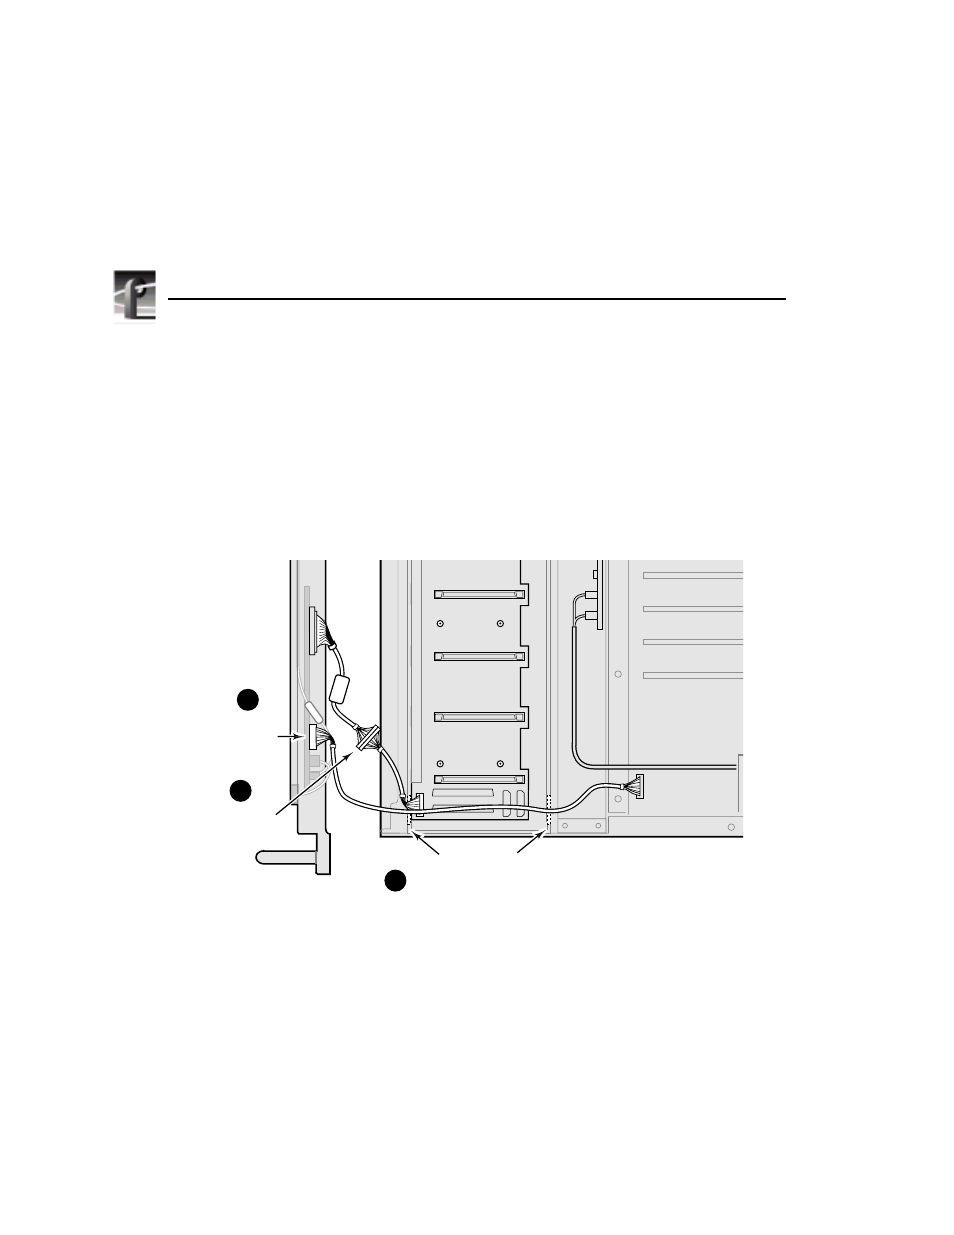
1. Locate the LED cable at the bottom right of the drive tray. Feed the LED cable
through the slot in the corner of the drive tray and through the front chassis slot
(
➊
2. Thread the ribbon cable for the On/Standby switch through the slot in the rear
of the tray and on through the slot out the front of the tray as shown in
Figure 19.
Figure 19. Routing the LED and On/Standby switch cables
3. Plug the On/Standby cable to the two-row set of pins. Ensure that the marked
pin 1 on the cable connector is aligned with the marked pin 1 on the board
connector.(
➋
4. Plug the LED cable onto the single-row connector pin on the front panel circuit
board. Ensure that the marked pin 1 on the cable connector is aligned with the
marked pin 1 on the board connector (
➌
5. Re-install the front panel on the chassis and fasten the two handles to the front
panel and the chassis with the four screws removed earlier.
9686-14
Connect
On/Standby
cable (J4)
Thread On/Standby cable
through disk carrier at
locations shown.
Connect
LED cable
1
2
3