SMA WB 3300-11 Installation User Manual
Page 66
Troubleshooting
SMA Solar Technology AG
66
WB33-38-IA-IEN120940
Installation Manual
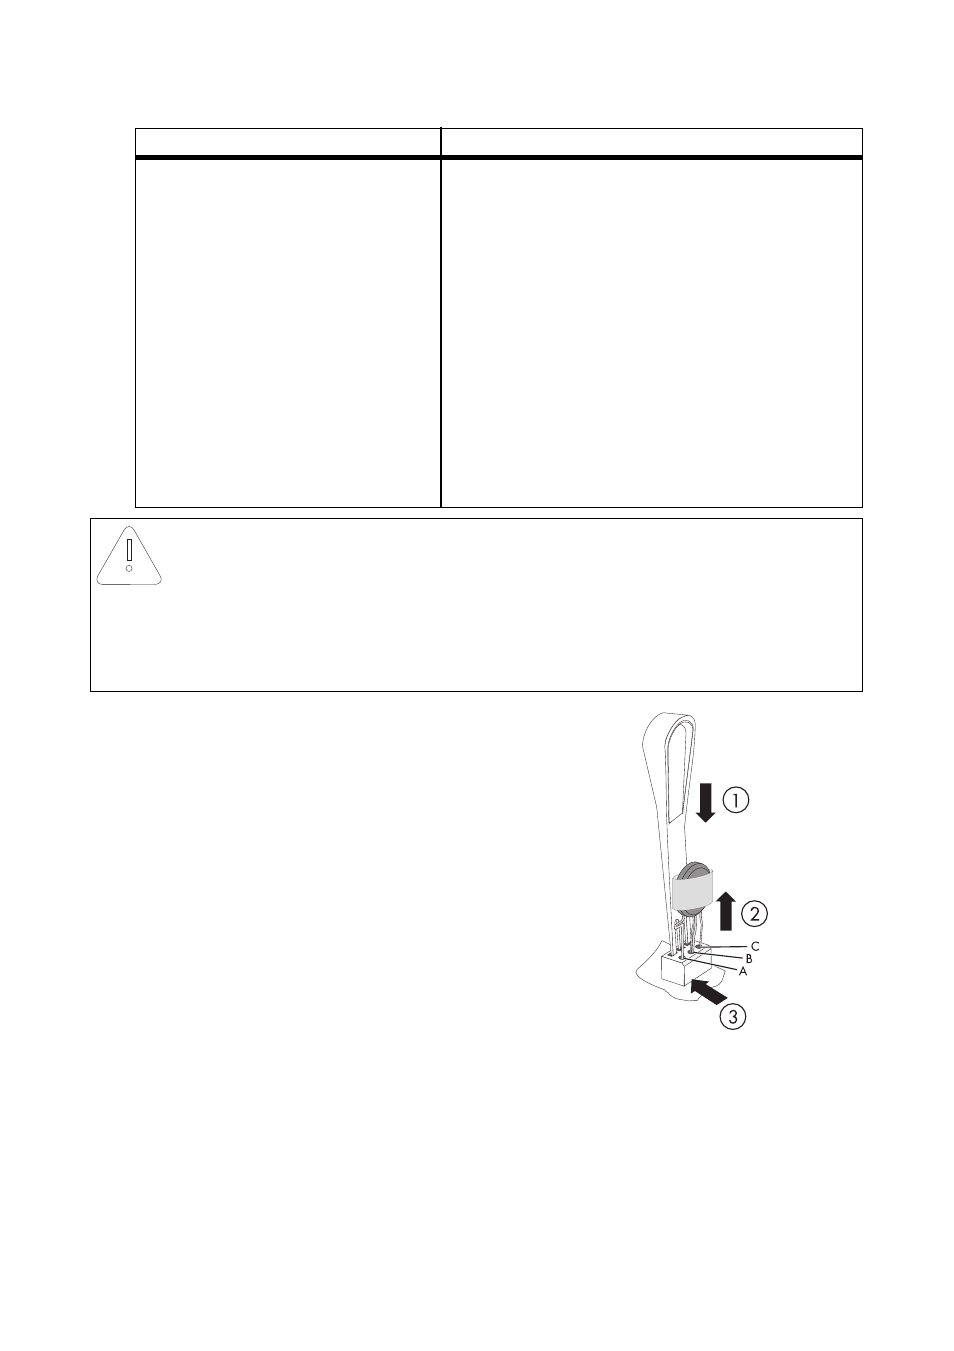
3. Insert the special insertion tool into the openings of
the terminal contacts (1).
☑ This releases the terminals.
If you have not received an insertion tool to operate
the terminals together with the replacement
varistors, contact SMA Solar Technology AG.
Alternatively, the individual terminal contacts can
be operated using a screwdriver with blade width
3.5 mm.
4. Remove the varistor (2).
5. Insert the new varistor (3).
When installing the new varistor, the pole with the
small loop (crimp) must be mounted in terminal
A (3).
6. Close the inverter as described in Section
7.3 "Closing the Inverter" (page 50).
☑ Testing and replacement of the varistors is now complete.
There is no conductive connection.
The respective varistor is defective and must be
replaced.
Varistor failure is generally due to influences that affect
all varistors in a similar manner (temperature, age,
induced overvoltage). SMA Solar Technology AG
recommends that you replace both varistors.
The varistors are specially manufactured for use in the
inverter and are not commercially available. You must
order replacement varistors directly from
SMA Solar Technology AG (see Section 13 "Contact"
(page 77)).
• For the replacement of the varistors, proceed to
step 3.
NOTICE!
Inverter overvoltage due to faulty varistors. Destruction of the inverter due to
overvoltage
• Procure replacement varistors immediately and replace the defective varistors.
• In systems with a high risk of overvoltage, do not operate inverters with faulty
varistors or no varistors at all.
Result
What to do