Quickdraw media installation – iSys V24 Direct Thermal Printer User Manual
Page 18
18
Quickdraw Media Installation
CAUTION: Do not touch the thermal print head. Natural body oils can damage it.
Scratches in the print head will affect image quality. Print head damage caused by users
is not covered by warranty.
Your plotter comes with a sample roll of media properly installed. To replace or change
media, refer to the following procedure:
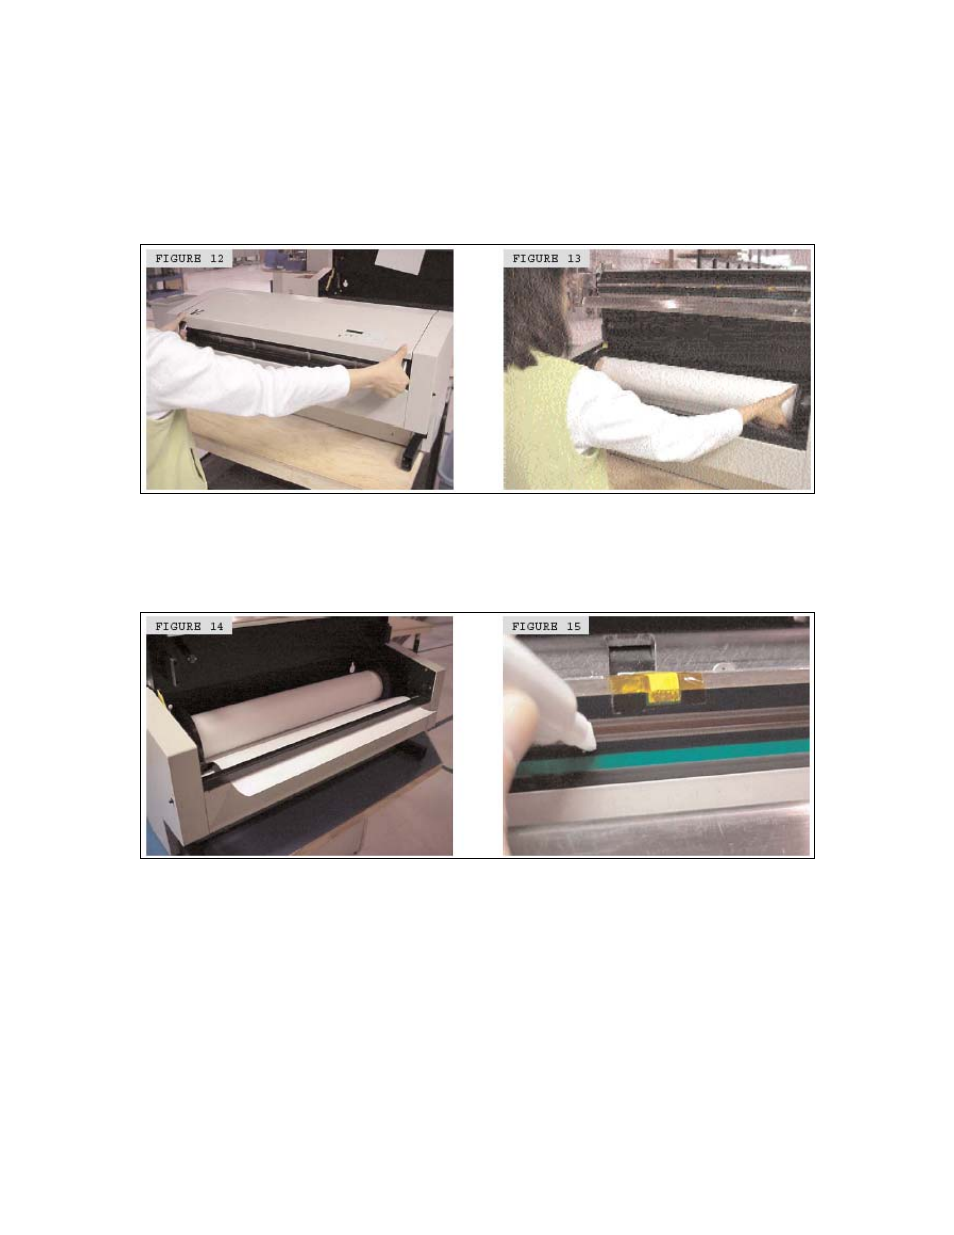
1. Pull up on both lid latches and lift lid up until lid support is locked (figure 12).
2. Insert spindles in the core ends of the new media roll.
3. Carefully position the new roll in the media housing and seat the spindles in the
spindle blocks. Press down firmly to seat the roll in the blocks. Ensure the roll is
seated squarely in the blocks (figure 13).
4. The media unwinds from the bottom of the installed roll.
5. The media is threaded as shown in Figure 14. Allow an extra few inches of media
through the exit path, past the cutter assembly.
6. Once the media is through the exit path, hold the opposite sides of the media and tug
forward to squarely align and remove wrinkles.
7. Clean the print head with the Print Head Cleaning Pen shown in Figure 15.
CAUTION: The thermal print head should only be cleaned with the Print Head Cleaning
Pen or with a solution of 99.9% Isopropyl alcohol on a lint free wipe. Water and other
solvents can damage the print head. Print head damage caused by users is not covered
by warranty.