Attach the bracket unit to the wall anchor plate, Installing the wall mount bracket – Casio YM-80 User Manual
Page 11
Installing the Wall Mount Bracket
EN-10
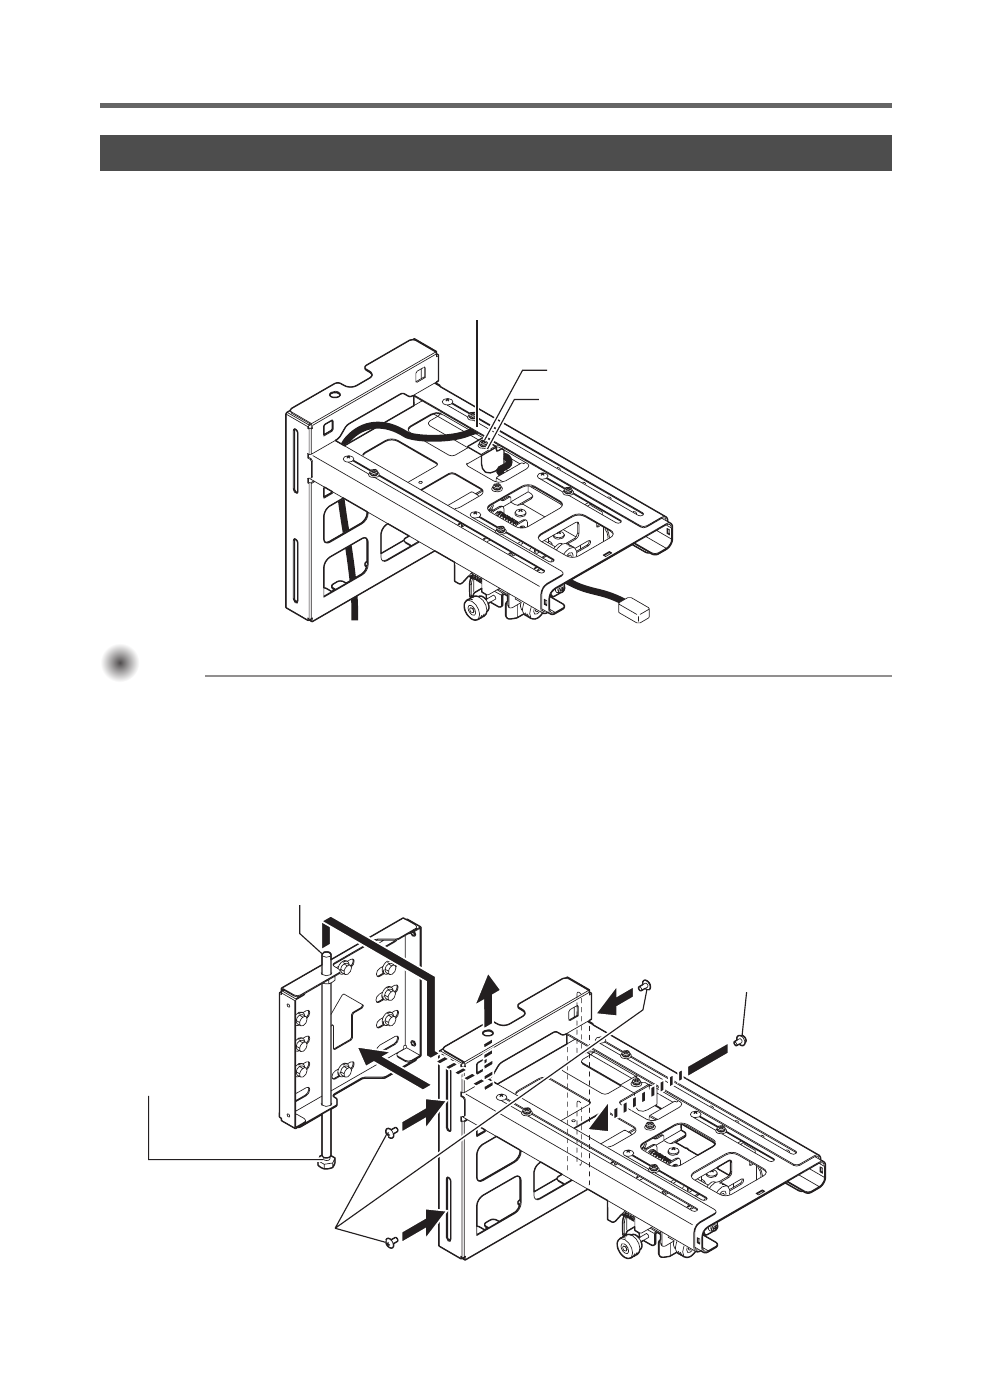
1.
Remove the screw and then remove the cable guide bracket.
2.
Pass the cable through the main bracket.
3.
Return the cable guide bracket to its original position and secure it with the screw.
Important!
Important!
Important!
z Route the cable as shown above, taking care not to damage it.
z Do not try to force the cable through the arm.
4.
Re-attach the bracket unit to its original position in the wall anchor plate and tighten
the four screws to secure it in place. Securely tighten the three shoulder bolts and
lightly tighten the screw with spring washer.
z The bracket will be able to move up and down even after the shoulder bolts are tightened.
z Use the screw with spring washer at the location shown in the illustration. You will use this screw
when adjusting the height later, so tighten it lightly at this time.
3. Attach the bracket unit to the wall anchor plate.
Pass the cable through the arm.
Secure the cable with the cable guide brackets.
Screw
Insert the wall anchor plate vertical adjustment screw into the holes of the bracket.
Screw with spring washer
(M5 × 10)
Shoulder bolts x 3
(Bolts with spacers)
Slide the groove below
the head of the vertical
adjustment screw into
the U-shaped cutout of
the bracket.