Casio PV-750 Plus v3.0 User Manual
Page 14
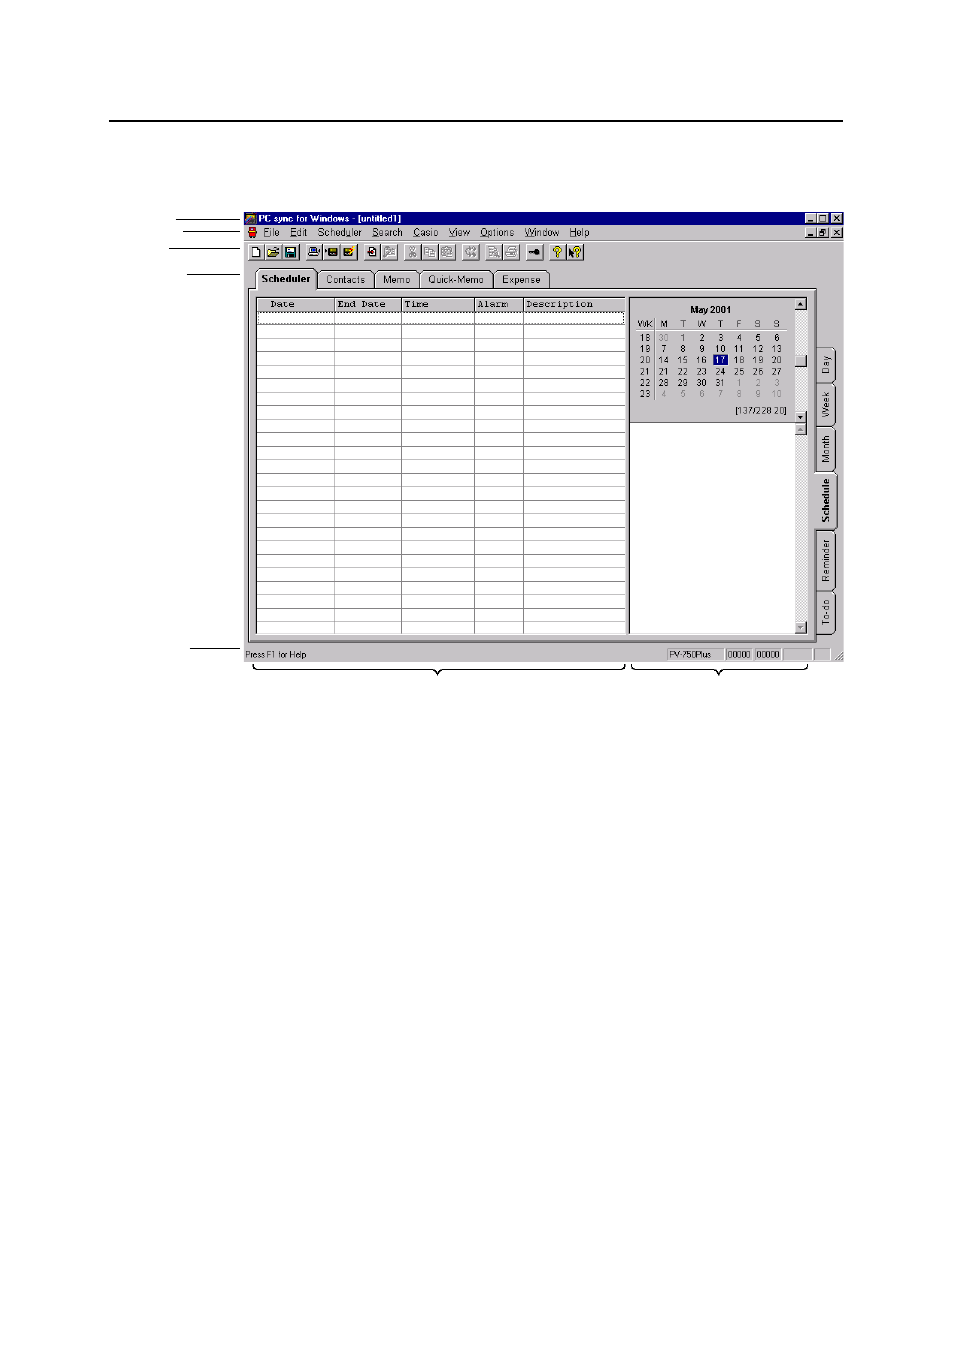
After start-up, press the [Schedule] button at the right side:
List Windows
View Windows
The title bar, next to the program name, contains the file name under which your current
data has been saved to disk. The menu bar underneath the title bar allows you to call up
all the functions of the program. The name and content of the third menu depends on the
current database area. We shall refer to it as the "area-specific menu".
A number of options from the menu bar are repeated on the toolbar, in the form of icons.
These are the most frequent functions, and the purpose of the toolbar is to give you more
convenient access to them. Appendix B of this User's Guide contains a complete list of all
toolbar icons and their functions.
The display window shows the data currently in the memory of your PC. It is divided into
two sections - the List Window and the View Window. The Appointment area also has a
calendar display which will be explained at a later stage. In the List Window, several
records (i.e. entries) are presented below one another, one per line, whereas the View
Window displays the selected record. The ratio between the List Window and the View
Window can be changed with the vertical deviding line between them. To change the size
of the two windows, simply move the line to the left or right with the mouse.
To change any other settings of the two windows, such as column width, font and font
size, go to the area-specific menu: 'List Window Layout…' and 'View Window Layout…' or
'Options': 'List Window Font…' and 'View Window Font…'.
If you press one of the alphanumeric keys in the main window, the selection automati-
cally goes to the first record that starts with the relevant character.
To edit a record, double-click on it. The Editor is opened, where you can now make any
changes that are required.
Working with PC sync
14
Menu Bar
Toolbar
Area Tabs
Title Bar
Status Bar