Transport, Using for the first time, Operation – Silvercrest STG 70 B3 User Manual
Page 6
4
GB
3.
Transport
DANGER! Please make sure that the refrigerant cir-
cuit 9 (lines on the interior and on the rear of the ap-
pliance, compressor 14) is not damaged.
WARNING! Do not tilt the appliance further than 45°.
4.
Using for the first time
Removing packaging
•
Remove the packaging material and adhesive strips.
•
Remove the foam parts in the interior.
Checking for damage
•
Check the appliance for damage, especially the refriger-
ant circuit 9 (lines on the interior and on the rear of the
appliance, compressor 14) and the power cable 15.
DANGER! Do not connect the appliance if it is dam-
aged.
Cleaning before first use
•
Clean the appliance as described in section "Defrosting
and cleaning" on page 6.
Positioning
DANGER! Position this appliance in a room with a
capacity of at least 4.5 m
3
. In the event of a leak in
the refrigerant circuit, an inflammable mix of refriger-
ant and air may form in rooms that are too small.
•
The compressor 14 and the side walls of the appliance
become hot during operation and require good ventilation
all around the appliance. Therefore please observe the
following minimum clearances:
- at the rear: 10 cm;
- at the sides: 10 cm.
•
Position the appliance in a well-ventilated, dry room.
Place it on level, solid ground.
•
This appliance complies with the climate classifications
SN, N, ST and T and so is intended for an ambient tem-
perature of +10 °C to +43 °C.
Position the appliance in a location with a suitable ambi-
ent temperature.
•
When positioning, avoid the following:
- direct sunlight,
- proximity to heat sources such as an oven or radiators.
•
If the nature of your premises require it, you can reverse
the door fittings. See section "Reversing the door fittings"
on page 7.
Aligning
To ensure the flawless function of the appliance and air-tight
closure of the door seals, the appliance must be aligned
straight. For this purpose, two height-adjustable feet 12 are
provided at the front.
1. Have a second person raise the freezer slightly at the
front.
2. Increasing the height of the foot: Turn the foot clock-
wise. Please note that the feet can also be unscrewed
completely.
Decreasing the height of the foot: Turn the foot anti-
clockwise.
Connecting
DANGER! Do not connect the appliance until it is lo-
cated in its final position and has been aligned
straight.
WARNING! After moving the appliance, allow it to stand for at
least 24 hours so that the refrigerant circuit can settle.
DANGER! Connect the appliance to a wall socket
with protective contacts, where the technical data
match those of the appliance (see rating plate 13).
•
Do not use any extension cables or multiple sockets.
•
The wall socket must also be easily accessible after con-
nection. If this is not possible on your premises, it must
always be possible to disconnect the appliance from the
mains, for instance with the fuse.
5.
Operation
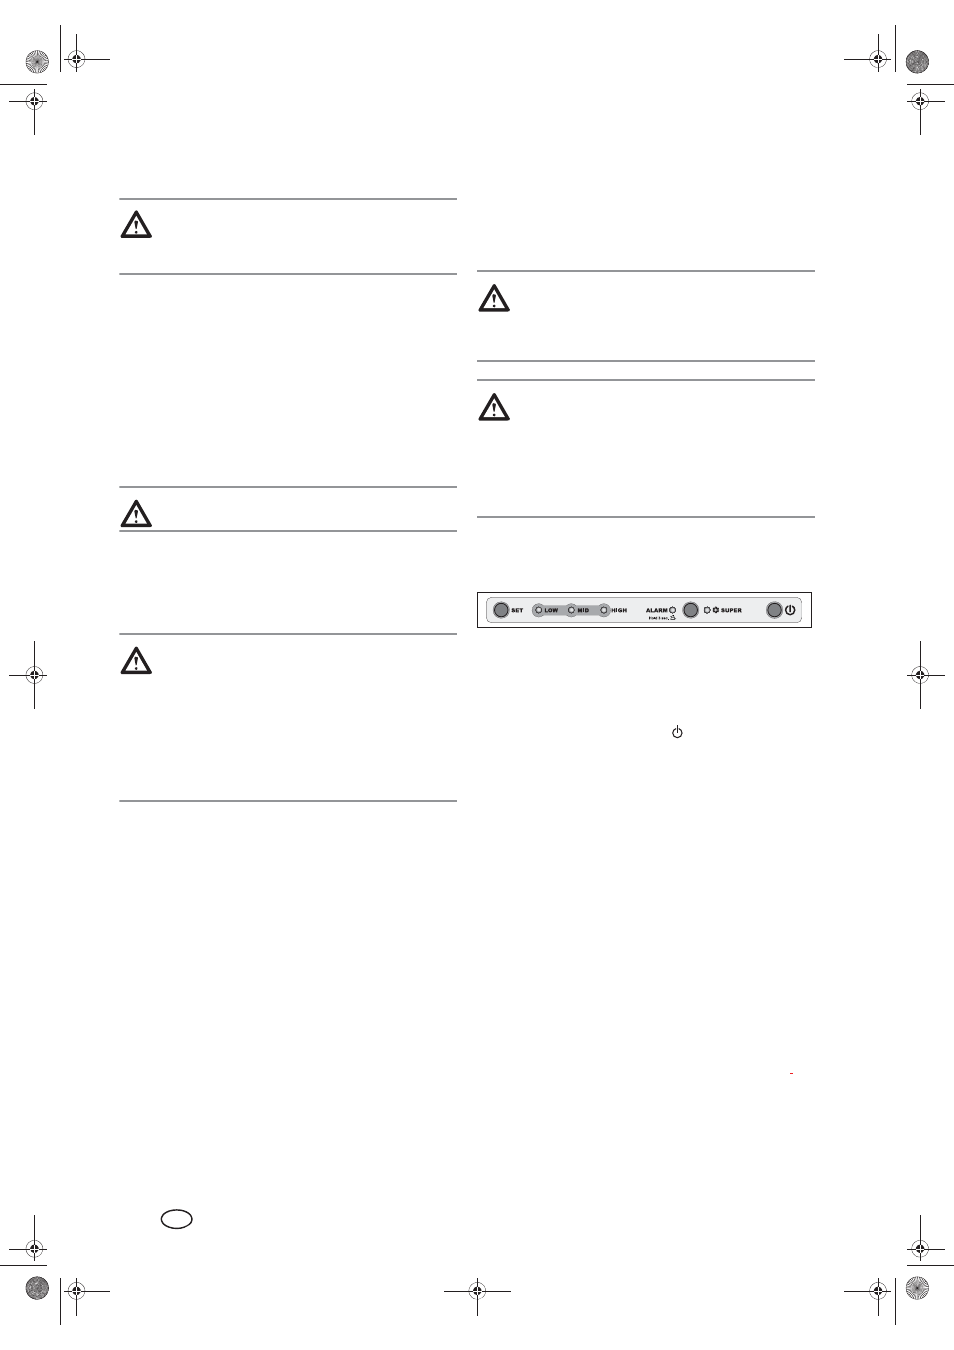
•
Use the temperature controller SET 1
to change
between
3 temperature ranges. The LEDs next to
LOW
,
MID
and
HIGH 2 indicate, which level is activated. Switch by
pressing the SET button.
Switching on and off
•
To switch on and off, press the
button 6. This also
switches on or off an LED, which is located next to LOW,
MID or HIGH 2.
•
If the alarm sounds after 1 minute and the ALARM LED 3
lights up, press the ALARM/SUPER button 4 for 3 sec-
onds to switch the acoustic alarm off. The ALARM LED
remains until the operating temperature is reached.
•
When using the device for the first time and after defrost-
ing activate the Superfrost function. For this purpose,
press the ALARM/SUPER button 4 briefly. The SUPER
LED 5 remains lit as long as the function is active. The
function is switched off automatically when the average
temperature of the past 30-65 hours was -27 °
C
to
-
30
°
C
.
•
To monitor the temperature, you require a freezing ther-
mometer. The normal operating temperature for the
freezer is -18 °C.
•
The temperature setting that you require depends on var-
ious factors, such as the ambient temperature.
•
For normal operation, select a setting between the tem-
perature levels
LOW
,
MID
and
HIGH
2 by pressing the
SET 1 button. Here, the temperature level
LOW
repre-
sents the hottest temperature, and temperature level
HIGH the coldest.
•
In most cases, the temperature level
MID
corresponds to
the normal operating
temperature
of -18 °C.
•
After setting, monitor the temperature for several hours
with a freezing thermometer. Repeat this check from time
to time and change this setting, if necessary.
__RP71979_B6.book Seite 4 Freitag, 23. März 2012 2:21 14