Reversing the door fittings – Silvercrest STG 70 B3 User Manual
Page 9
7
GB
10. Reversing the door fittings
In delivery condition, your freezer has the door fittings on the
right. To switch the door fittings to the left-hand side, please
proceed as follows:
You will require:
-
a second person to help you moving and tilting the
freezer;
-
a cross-head screwdriver, size PH1, PH2.
This is how it’s done
DANGER! Disconnect the power plug before revers-
ing the door fittings.
WARNING!
•
Do not tilt the freezer more than a maximum of 45°.
•
Move the appliance only when it is empty.
NOTE: Place all individual parts that you remove safely to
one side and note the locations where you removed them
from.
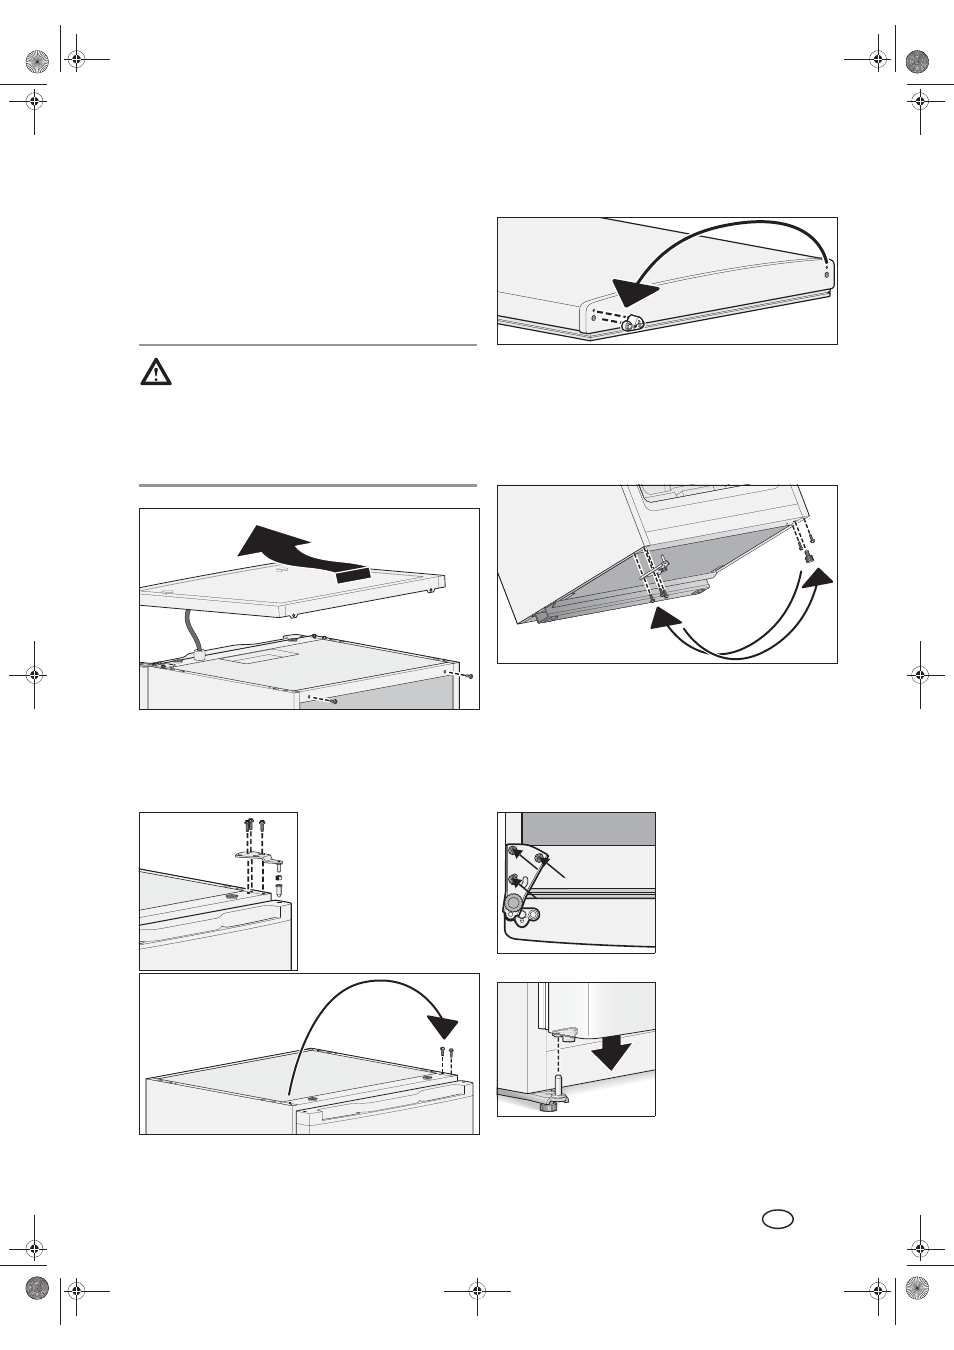
1. Unscrew the two screws on the rear panel that fasten the
upper cover plate.
2. Lift the cover plate slightly at the rear and push it forward
a short distance.
NOTE: Position the cover plate loosely on the device. It
cannot be removed.
3. The upper door hinge is
located on the front side at
the top right. Unscrew the
three screws.
4. Remove the upper door
hinge with the small plas-
tic ring.
5. Remove the plastic sleeve
(bearing) at the top right
from the door.
6. Unscrew the two screws at the top left and then screw
them into the outer holes on the right-hand side.
7. Open the door slightly and carefully lift it off. Place the
door with its inside on the freezer, so that you can see the
lower edge.
8. Unscrew the plastic part (bearing) on the right-hand side
of the door and screw it back into place on the left-hand
side. In the process, please ensure that the “lug” is point-
ing upwards (outside of the door) and that the left-hand
hole is positioned exactly over the large bore in the door.
The small pin on the underside of the plastic part
engages in the small bore.
9. Place the door to one side.
10. Ask your assistant to carefully tilt the freezer slightly
towards the rear (no more than 45°) and to hold it in posi-
tion. Mind the cover plate.
11. Unscrew the three screws with which the lower door
hinge is fastened and remove them.
12. Unscrew the left-hand foot and insert it into the large bore
on the right-hand side.
13. Unscrew the two screws at the bottom left and then
screw them into the outer holes on the right-hand side.
14. Fasten the lower door
hinge on the left-hand side
with the three screws.
15. Carefully tilt the freezer back towards the front.
16. Position the door precisely
on the lower hinge and
close it as straight as pos-
sible.
__RP71979_B6.book Seite 7 Freitag, 23. März 2012 2:21 14