Multi-Contact MA551 User Manual
Page 2
2/4
www.multi-contact.com
(ill.4)
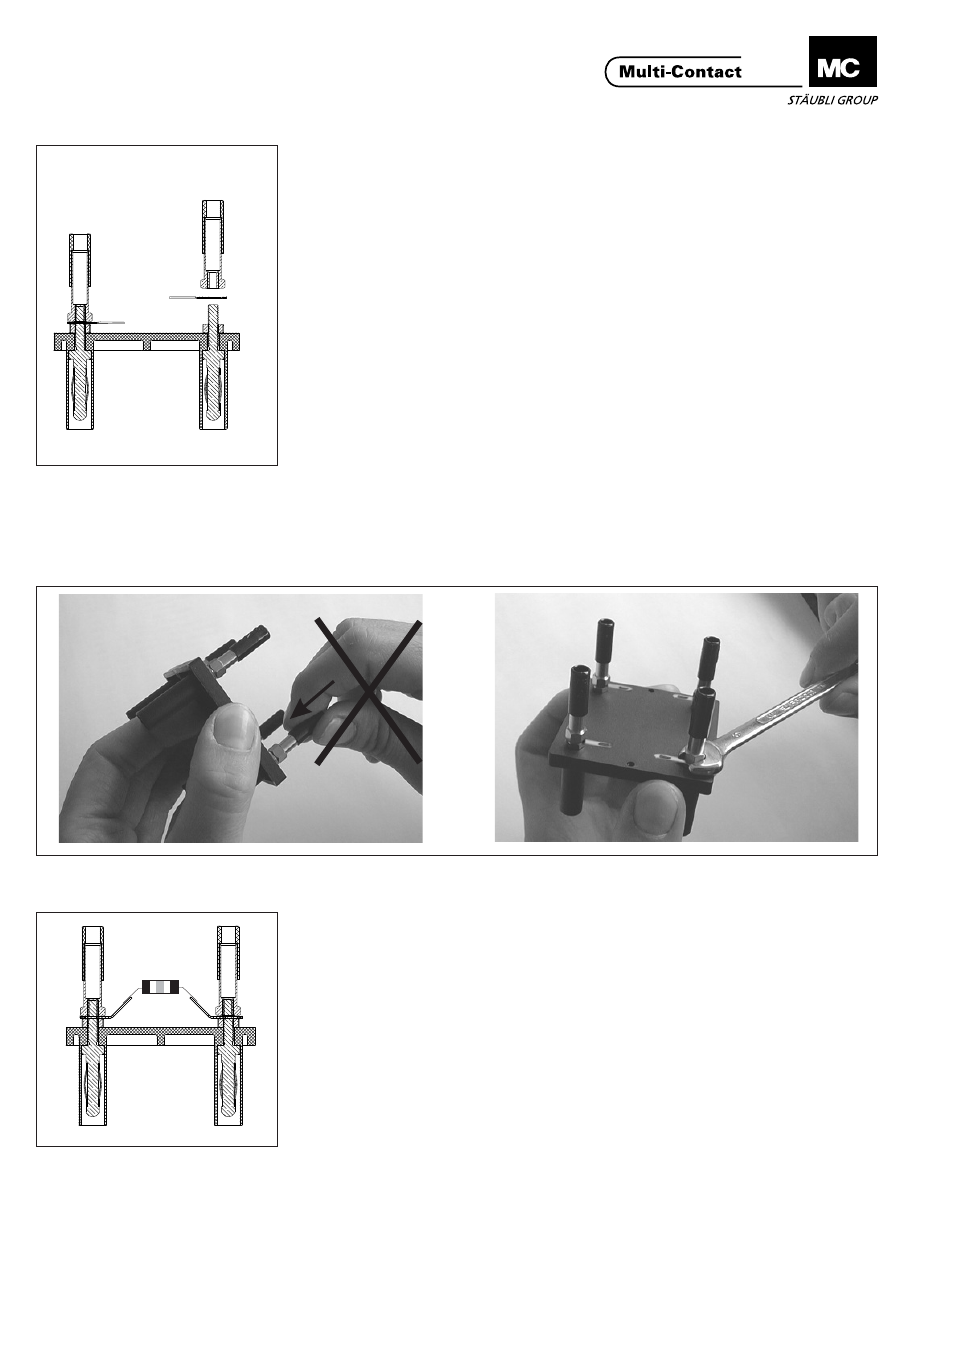
Die Lötlaschen ( ) auf die
Gewindestifte des Trägers
aufsetzen.
1
Montage
Mounting
Montage d’un composant
(ill.4)
Place the soldering tags ( )
on the threaded pins of the
mount.
1
(ill.4)
Passer les cosses à souder
( ) sur les tiges filetées du
support.
1
(ill.6)
Souder le ou les composants
de votre choix sur les cosses
à souder à l’aide d’un fer à
souder et l’étain.
Au besoin plier les cosses à
l’aide d’une pince plate.
ill.4
ill.6
(ill.6)
Mittels Lötkolben, die
Komponenten auf die
Lötlaschen löten. Wenn nötig
können die Lötlaschen mit
einer flachen Zange gebogen
werden.
(ill.6)
Using a soldering iron, solder
the components on the
soldering tags. If necessary,
the soldering tags can be
bent with flat-nosed pliers.
(ill.5)
Mittels Gabelschlüssel SW6, die Buchsen
anschrauben. Die Buchsen dürfen nicht
manuell mit Druck auf die Isolation
festgeschraubt werden.
Achtung:
(ill.5)
Screw on the sockets using an open-end
spanner SW6. The sockets must not be
screwed onto the insulator manually with
the application of pressure.
Caution:
(ill.5)
Visser les douilles et serrer à l’aide de la
clй а fourche de 6. Ne pas serrer
manuellement les douilles en appliquant
directement un effort sur l’isolant.
Attention:
ill.5
1
1
Advanced Contact Technology