Quick start guide – Rose Electronics ViewLink CATx User Manual
Page 6
QUICK START GUIDE
Quick Start guide
The ViewLink system consists of a transmitter unit that connects to the video,
keyboard, and mouse ports on a PC, server, or to a KVM switch and a receiver
unit that connects to a keyboard, monitor, and mouse. The transmitter and
receiver units are connected together with up to 1,000 feet of solid CATx cable
(Distance depends on the resolution used). The transmitter and receiver are
available for PS/2, USB, or PS/2-USB systems. This section briefly describes
the installation procedures. Refer to the following steps and diagram to install
your ViewLink Catx.
Step #1 –Connect the Receiver unit to the keyboard, monitor, and mouse
cables on your KVM station. Connect the provided power adapter to
the Receiver unit’s power input jack.
Step #2 –Connect the Transmitter unit to the keyboard, monitor, and mouse
ports on your PC. Depending on your ViewLink CATx model, connect
it to either the PS/2 (MiniDin6) or USB ports. If you are connecting to
a KVM switch using the DB25 model, connect it to the KVM port on
the switch.
Step #3 –Connect the Receiver and Transmitter units together using up to
1,000 feet of CATx cable (CAT5, 5e, or 6).
Step #4 –Apply power to the KVM monitor, the Receiver unit, and boot your PC
(turn on the KVM switch if using the DB25 model).
Note: All equipment should be tied to a common low resistance ground.
When you initialize the extender, it automatically senses the cable distance
between the transmitter and receiver unit, adjusts the compensation and sets
up everything for you. Refer to the manual instructions for additional
information.
(See Appendix C and D for grounding and video only models)
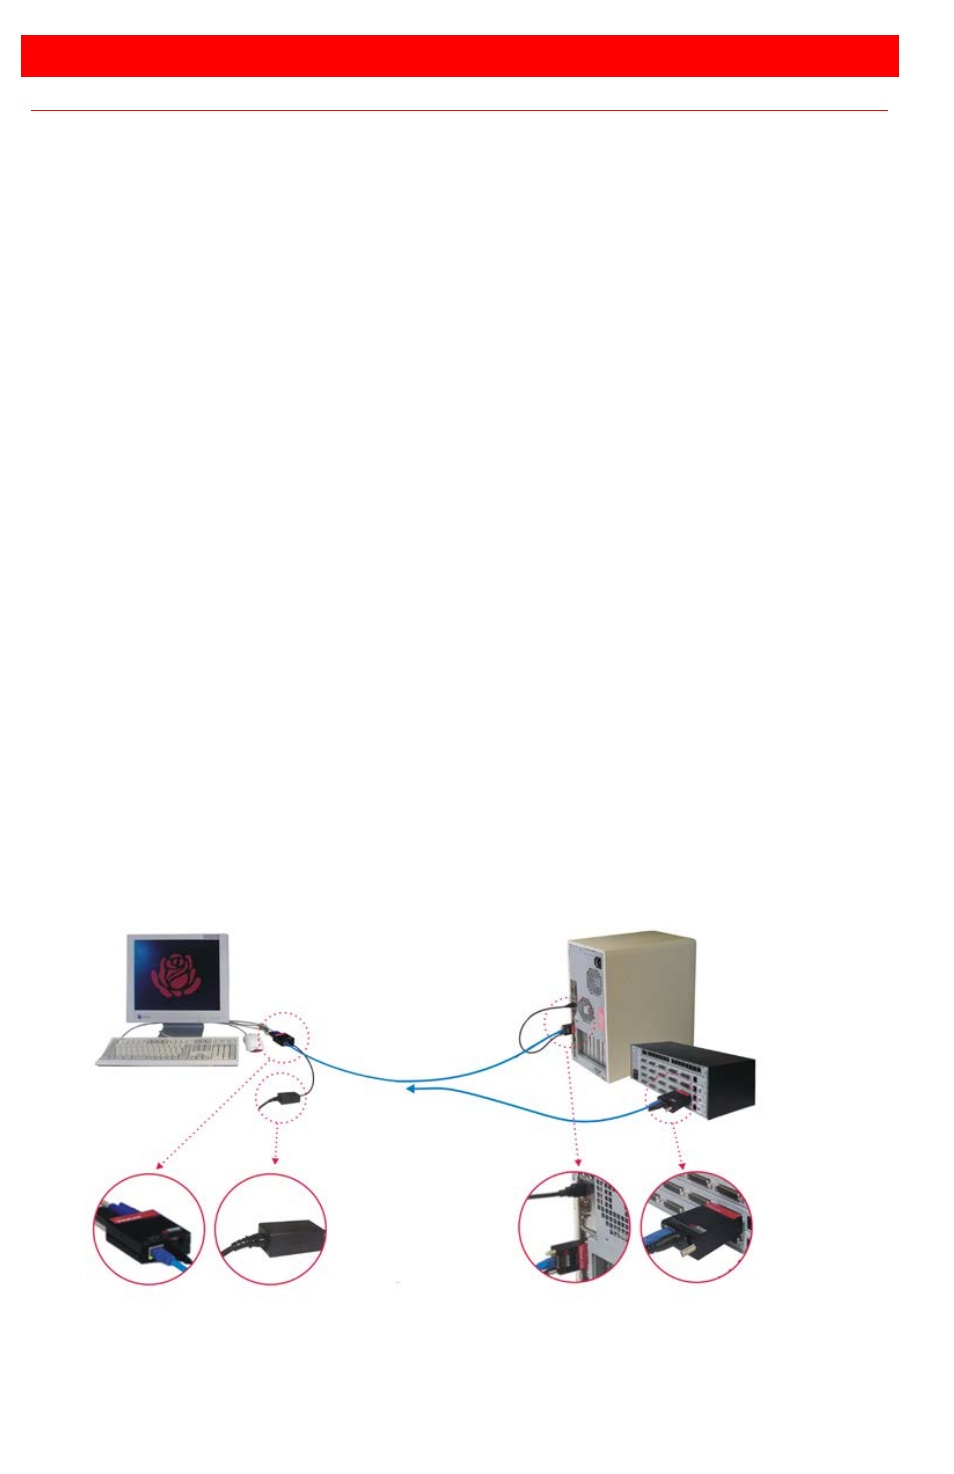
Figure 1. Quick Installation Diagram
#1 Connect Receiver #2 Connect Transmitter
#3 Connect CATx Cable
#4 Apply power
KVM Station
PC
or
Switch