Installation procedure – Rose Electronics CrystalLink USB 2.0 CATx User Manual
Page 8
Installation Procedure
Before you can install the CrystalLink extender, you need to prepare your site:
1. Determine where the computer is to be located and set up the computer.
2. Determine where you want to locate the USB device(s).
3. If you are using surface cabling, the extender supports a maximum distance of 100m.
Installation Using Premise Wiring
If you are using premise cabling, ensure CAT5e cabling is installed between the two locations, with
CAT5e information outlets located near both the computer and the USB device(s), and the total
length, including patch cords is no more than 100m.
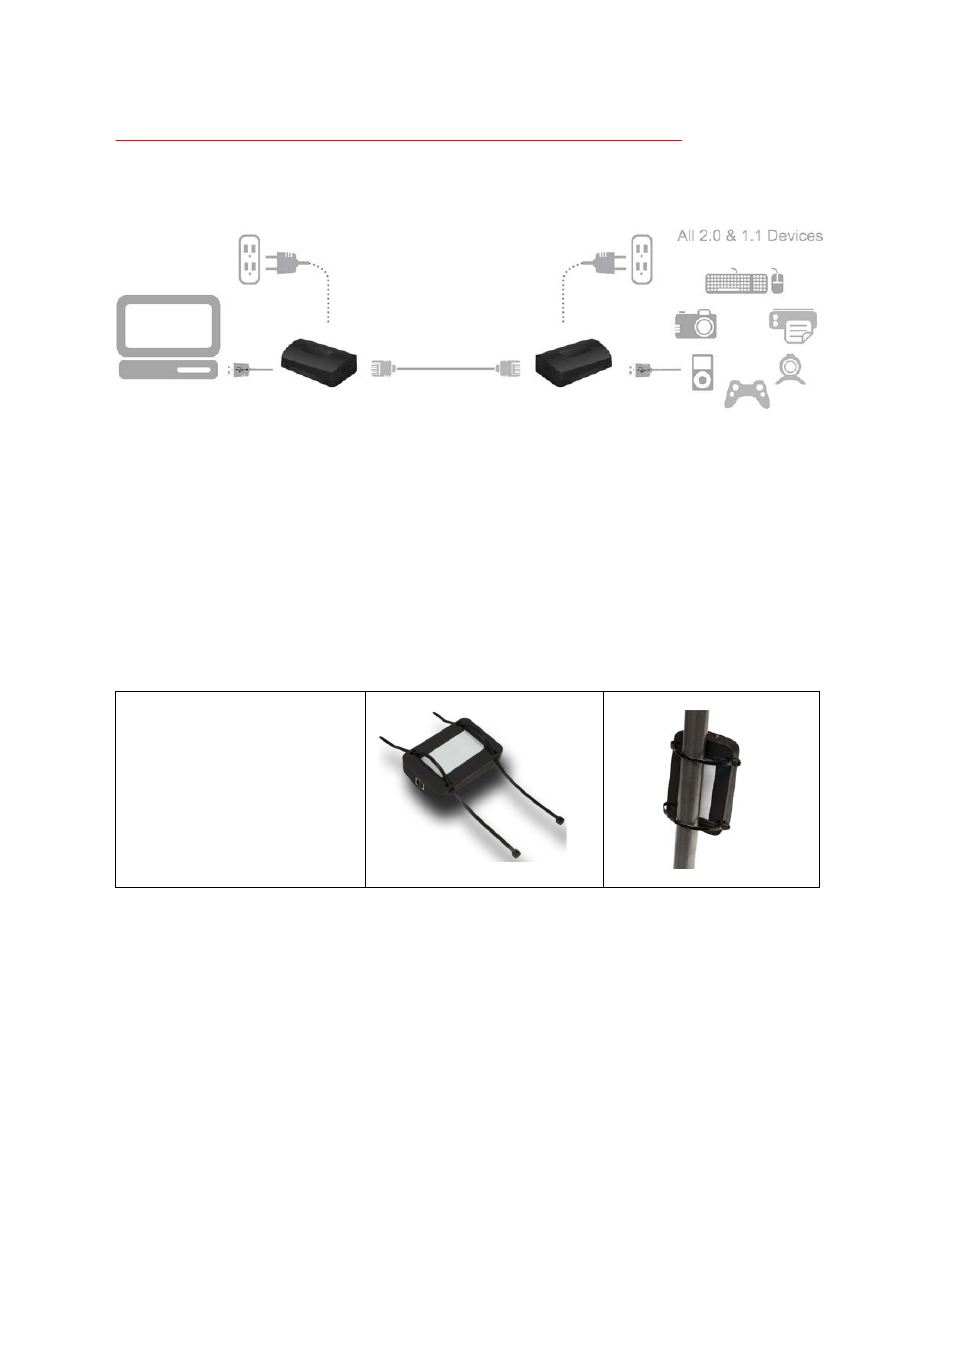
Mounting the Local Extender or Remote Extender
If mounting is required, the local
and remote extenders have two
mounting slots on each side for
use with tie/zip wraps (not
included).
Sample mounting using tie-wraps
Installing the Transmitter Unit
1. Place the transmitter unit near the computer.
2. Install the supplied USB cable between the transmitter and USB port on the host computer.
Installing the Receiver Unit
1. Place the receiver unit near the USB device(s) in the desired remote location.
Installing Flexible Power
1. Connect 24V, 1A supplied AC power adapter to the local or remote extender, based on
installation requirement.
Note: Use only the AC adapter supplied with the CrystalLink Extender. Use of substitute
adapters may cause permanent damage to the system and will void the warrantly.
NEVER plug a power adapter to BOTH local and remote extenders, as this may cause
permanent damage to the system and will void the warranty.