Balancing the z axis, Operation – DJI Ronin 4D 4-Axis Cinema Camera 8K Combo Kit User Manual
Page 7
EN
6
©
2021 DJI OSMO All Rights Reserved.
DJI Ronin 4D
Quick Start Guide
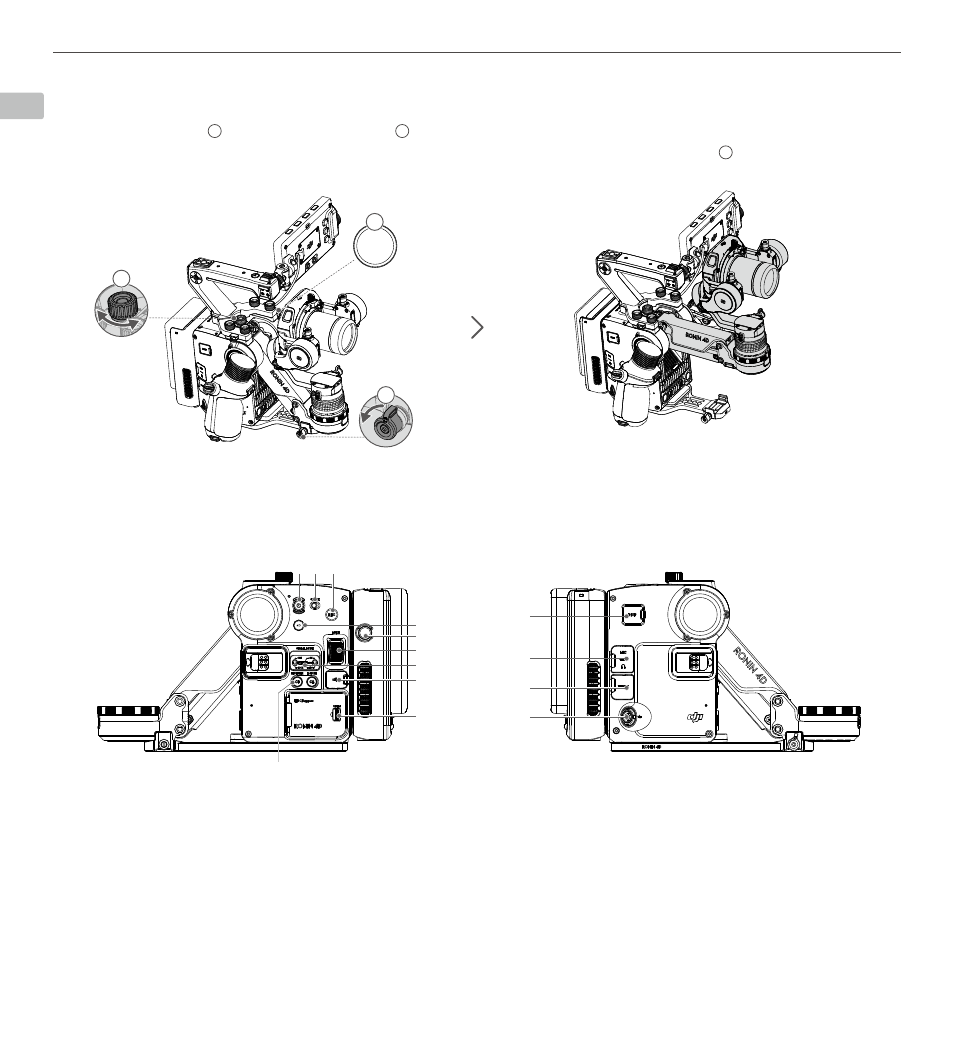
Balancing the Z Axis
Power on Ronin 4D and enable the Z axis before balancing the Z axis.
1. Loosen the Z axis lock
1
and press the Z Axis switch
2
to enable Z axis.
2. Follow the prompts on the high-bright main monitor to balance the Z axis by turning the adjustment knob
3
. The Z axis is balanced if it
remains horizontal.
Operation
Ronin 4D can be used once it has been activated, auto-tuned, and the Z axis has been balanced.
Main Body
1. Power Button
Press and hold for 1 second to power on. Press and hold for 3
seconds to power off.
2. Lock Button
Toggle the lock button to the left to disable Ronin 4D.
3. Record Button
Press once to start or stop recording.
4. Z Axis Switch
Press once to enable or disable the Z axis.
5. Battery Release Button
Press once and then remove the battery.
3
1
4D
2
1 2 3
4
5
7
8
9
11
12
13
14
10
6
6. Dial
Turn to adjust focus.
7. Gimbal Mode
OFF
:
Sleep mode.
FOLLOW: Follow mode (PF means the pan axis will follow the
handle movements. PT means the pan and tilt axes will follow
the handle movements. FPV means the three axes all follow the
handle movements).
LOCK: Lock mode (the gimbal will not follow the handle
movements).
Z Axis Switch