Recording moving images (clip), Basic operations – Panasonic AV-UHS500 12G-SDI/HDMI UHD 4K Compact Live Switcher User Manual
Page 82
82
Basic operations
Recording moving images (Clip)
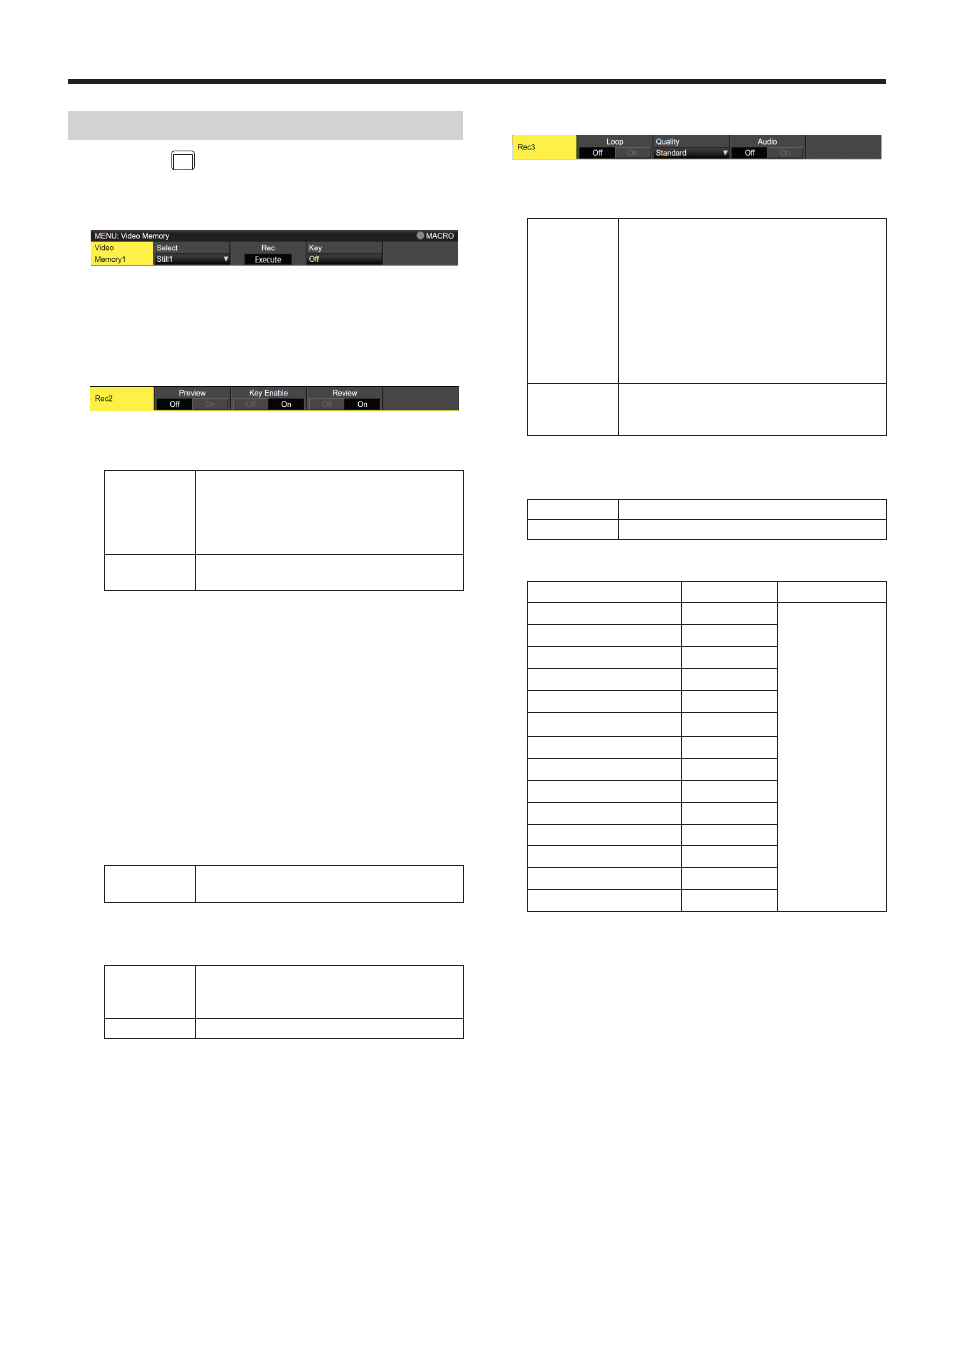
1
Press the
VMEM
MACRO
button to light its indicator, and display
the Video Memory menu.
2
Use [F1] to display the Video Memory1 sub menu.
3
Use [F2] to select “Clip1” or “Clip2” using the Select
item.
p
Only Clip1 can be selected in the 4K mode.
4
Use [F1] to display the Rec2 sub menu.
5
Use [F2] to set the images to appear on the built-in
display using the Preview item.
On
The image appearing on the built-in display is
forcibly switched to the image to be recorded
(AUX1 to AUX4 selected using the V Source
item) instead of the material selected by the
DISP bus.
Off
The image source selected by the DISP bus
is displayed as a preview.
When “On” is selected for the Preview item, be aware
that the following operations will occur:
p
The DISP button will link with the AUX bus selection
button (AUX BUS DELEGATION) of AUX1 to AUX4
selected in the V Source item, which will light or turn
off the buttons.
p
If the material of the DISP bus is changed, the
materials of the DISP bus and the selected AUX bus
change at the same time.
Similarly, if the material of the selected AUX bus is
changed, the material of the DISP bus changes at the
same time.
6
Use [F2] and [F3] of Rec1 to set the images to be
recorded in the video memory in the V Source item.
AUX1 to
AUX4
The output signals of the AUX buses (AUX1
to AUX4) are recorded as the material.
7
Use [F4] of Rec2 to set the review display in the Review
item.
On
After the images have been recorded, the
images of the video memory recorded in the
AUX bus are displayed (up to 4 seconds).
Off
The review display is not shown.
8
Use [F1] to display the Rec3 sub menu.
9
Use [F2] to select the recording repeat setting using the
Loop item.
On
The recording of the images is continued until
the stop operation is performed.
If either of the following operations is
performed while recording is in progress, the
images are recorded up to the last frame,
after which recording stops.
p
When “Off” is selected as the Loop item
setting.
p
When [Stop] ([F5] of Video Memory sub
menu) is pressed.
Off
Images are recorded up to the maximum
recording time (set using the Limit items),
after which recording stops automatically.
Use [F3] to set the quality of the images to be recorded
using the Quality item.
Standard
Standard image quality
High
High image quality
Image quality depends on the video format.
Standard
High
2160/59.94p
15 seconds
High mode
will be half the
Standard mode.
2160/50p
18 seconds
2160/29.97p
(
*
)
30 seconds
2160/25p
(
*
)
36 seconds
2160/23.98p
,
24p
(
*
)
37.5 seconds
1080/59.94p
60 seconds
1080/50p
72 seconds
1080/29.97psf
120 seconds
1080/25psf
144 seconds
1080/23.98psf
,
24psf
150 seconds
1080/59.94i
120 seconds
1080/50i
144 seconds
720/59.94p
120 seconds
720/50p
144 seconds
*: Planned support with a firmware update