Replacement parts – Nexen DFC-1650 964161 User Manual
Page 8
8
FORM NO. L-20272-E-1199
REPLACEMENT PARTS
The item or balloon number for all Nexen products is used
for part identification on all product parts lists, product price
lists, unit assembly drawings, bills of materials, and
instruction manuals.
When ordering replacement parts, specify model
designation, item number, part description, and quantity.
Purchase replacement parts through your local Nexen
Distributor.
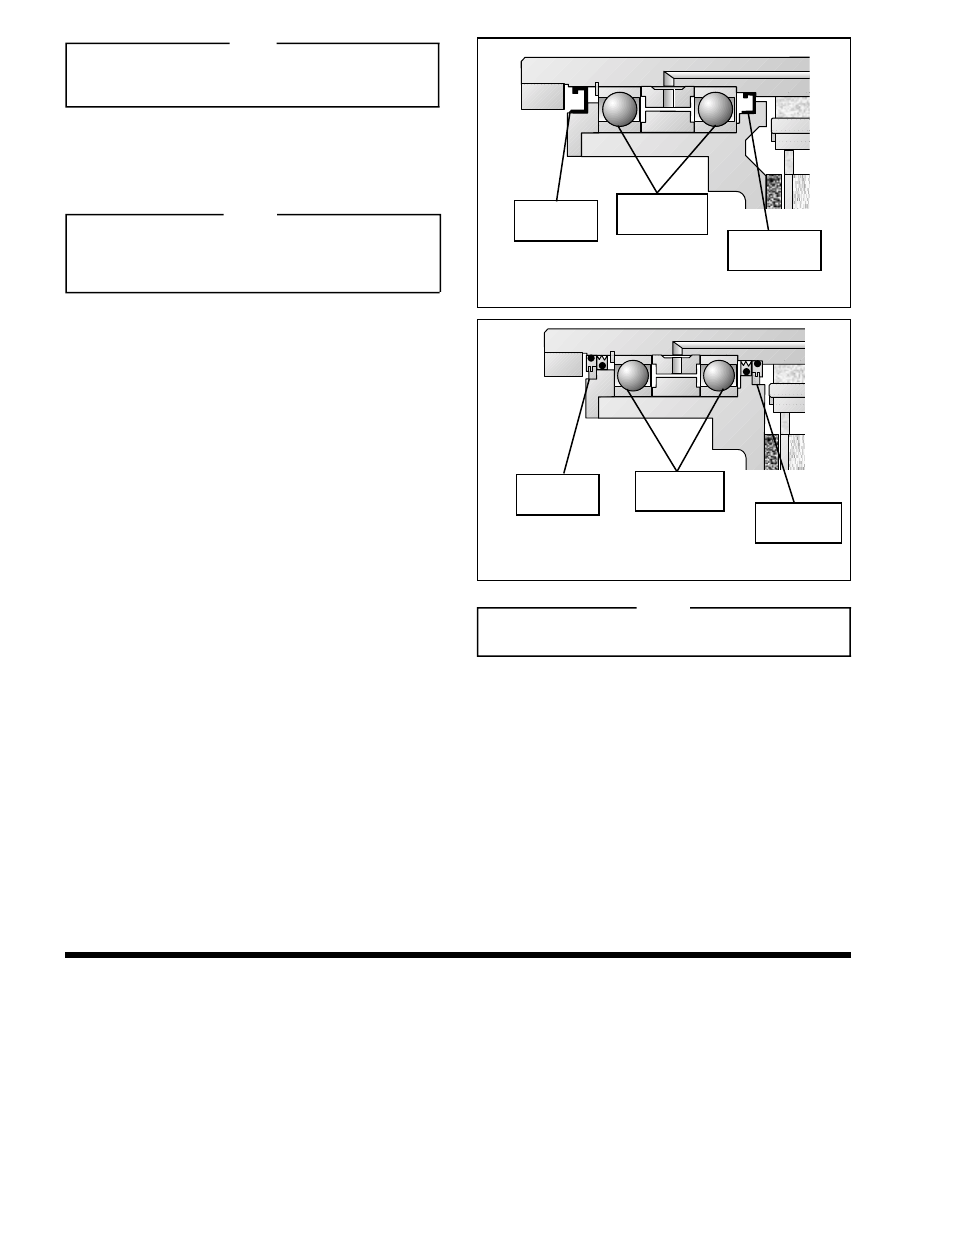
FIGURE 12
CLUTCH WITH "LIP" ROTARY SEAL ALIGNMENT
Rotary Seal
(Item 27)
NOTE
The Pilot Housing bore must be 7.8740
+0.0012
/
-0.000
''
for NECO 1650 and 9.0551
+0.0012
/
-0.0000
''
for NECO
2200. The Hub diameter must be 5.1189
+0.0000
/
-0.0007
''.
10. Clean the bore of the Pilot Housing (Item 2) with fresh
safety solvent, making sure all old Loctite
®
residue is
removed; then, check the diameter of the bore of the
Pilot Housing (Item 2) and the Hub (Item 1).
NOTE
The clutch may have different styles of Rotary Seals
(Items 7 and 27). Refer to Figures 12 and 13 for
correct positioning of the Rotary Seals for the clutch
you are working on.
11. Press a new Rotary Seal (Item 27) into the Pilot Housing
(Item 2) (See Figures 11, 12, and 13).
12. Apply an adequate amount of Loctite
®
680 to coat the
outer race of the first new Ball Bearing (Item 12) and
press it into the Pilot Housing (Item 2) (See Figure 11).
13. Reinstall the Spacers (Item 16 and 34) (See Figure 11).
14. Apply an adequate amount of Loctite
®
680 to coat
the outer race of the second new Ball Bearing
(Item 12) and press it into the Pilot Housing (Item 2)
(See Figure 11).
15. Support the inner and outer races of the Ball Bearings
(Item 12) and press the Hub (Item 1) back into the
Ball Bearings (Item 12) and Pilot Housing (Item 2)
(See Figure 11).
16. Reinstall the Retaining Ring (Item 21) (See Figure 11).
17. Reinstall the Seal Seat (Item 22) (See Figure 11).
18. Apply a drop of Loctite
®
242 to the threads of the Socket
Head Cap Screw (Item 26); then, install the Socket Head
Cap Screw (Item 26) (See Figure 11).
19. Tighten the Socket Head Cap Screw (Item 26) to
12 Ft. Lbs. [16.19 N•m] torque (See Figure 11).
20. Press a new Rotary Seal (Item 7) into the Seal Seat
(Item 22) (See Figures 11 and 12).
FIGURE 13
CLUTCH WITH "CLIPPER" ROTARY SEAL ALLIGNMENT
Rotary Seal
(Item 7)
Rotary Seal
(Item 7)
Rotary Seal
(Item 27)
NOTE
Nexen recommends the use of Chevron SRI #2 or
equivalent.
21. Lubricate the Ball Bearings (Item 12) until grease weeps
past Rotary Seal (Item 7) (See Figures 12 and 13).
22. Secure the Sheave to the clutch (See INSTALLATION,
Page 2).
23. Reinstall the Hub Locking Collar (Item 23) and Set
Screws (Items 24 and 33).
24. Proceed with Steps 6-20 for FRICTION FACING and
O-RING SEAL REPLACEMENT, Page 6.
Ball Bearings
(Item 12)
Ball Bearings
(Item 12)