Dual channel receiver, Receiver operating procedures, Switchable channels functions – MIPRO act707de(2ce143d) User Manual
Page 5: Change channel when, Caution while changing channels, Functions: 2. how to select a frequency
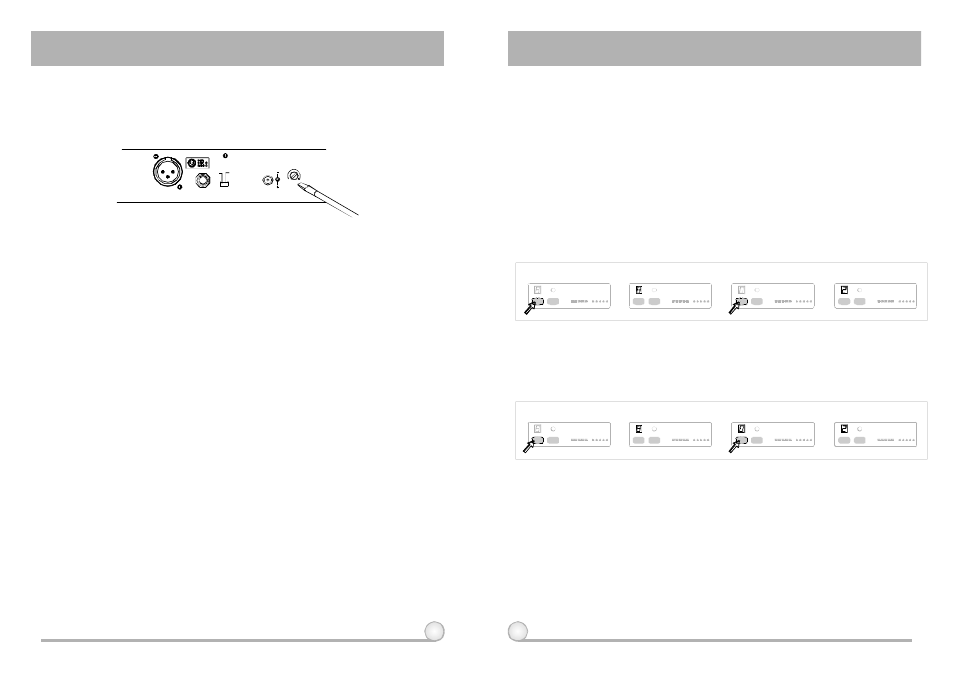
S Q B
D C I N ( 1 2 ~ 1 5 V )
LEVEL
M I X O U T
B A L A N C E D O U T B
MIC
LINE
6
7
4. RECEIVER OPERATING PROCEDURES
1.
Set the volume o f the mixer to its minimum before turning on the receiver
or transmitters.
2.
If SIGNAL LED indicators (3)(9) of the receiver light on before switching
on the microphone or transmitter, it indicates the receiver is under
interference of noises. The more LEDs light on the more severity of
interference. This system has Pitlotone and NoiseLock dual-squelch
features and no sudden noise burst out will occur. If multiple channels
are used and b o t h SIGNAL a n d AUDIO LEDs g l o w and interference
noisesappear, simply adjust the Squelch controls (19)(21) clockwise until
AUDIO signal indicators to extinguish. (Fig. 9). However, by adjusting the
squelch controls, it affects the sensitivity level of the receiver, therefore,
shorten the operating distance and decreases the stability.
3.
Under normal circumstances, the SIGNAL indicator lights up when a
microphone or transmitter is turned on near the receiver to indicate the
receiver is ready for normal operation. Once speak into the microphone
and theAUDIO LED indicators (2)(8) will glow according to the strength
of sound level. If no LED glows or no soundoutputs, the system is not
function properly, thus it must bechecked.
4.
The microphone output level needs to be adjusted at the amplifier or
mixer. No need to adjust at the receiver itself.
(Fig.9)
5. SWITCHABLE CHANNELS FUNCTIONS
DUAL CHANNEL RECEIVER
DUAL CHANNEL RECEIVER
3. Change channel when:
(a)
When multiple channels are utilized do not change channel to avoid exiting
channel interference.
(b)
When numeric knob reaches "_" it indicates an empty channel. Proceed until
a numeric number appears.
4. Caution while changing channels:
(a)
Existing channel is being interfered or channel is malfunction.
(b)
Select channel for multiple non-interference usage.
(a)
This system incorporates advanced PLL synthesized oscillator design.
Preprogrammed with 16 switchable frequencies. Allow the user to freely
select any of the preprogrammed frequencies.
1. Functions:
2. How To Select a Frequency:
(a)
Holding down the SCAN button (5)(11)
for 1 second. Release the button when numeric LED (7)(13) flashes. It will
flash a total of 6 times. To activate the AutoScan function, press the SCAN
button once within these 6 times. An open frequency will automatically be
scanned and saved/locked. *Note AutoScan function works only during
numeric LED flashing and within 6 times.
Auto Scanning Frequency Set-up:
(b)
Holding down the SCAN button (5)(11) for 1
second. Release the button when numeric LED (7)(13) flashes. It will flash a
total of 6 times. To select any of the 16 frequencies in orderly format, press
the SCAN button and hold until the desired frequency is selected. This
frequency will automatically be saved/locked.
Manual Frequency Set-up:
a)
b)
c)
d)
SCAN
A C T
RF
AUDIO
SIGNAL
SCAN
A C T
RF
AUDIO
SIGNAL
SCAN
A C T
RF
AUDIO
SIGNAL
SCAN
A C T
RF
AUDIO
SIGNAL
Whendoneitwillautosaved/locked.
LEDdisplayflashes.
Press andhold"SCAN"button
for1second.
Press"SCAN"buttonagainandrelease
willautoscanforanopenfrequency.
a)
b)
c)
d)
SCAN
A C T
RF
AUDIO
SIGNAL
SCAN
A C T
RF
AUDIO
SIGNAL
SCAN
A C T
RF
AUDIO
SIGNAL
SCAN
A C T
RF
AUDIO
SIGNAL
Press"SCAN"buttonandhold,
frequencywillchangeeverytwoflashes.
Whendoneitwillautosaved/locked.
LEDdisplayflashes.
Press andhold"SCAN"button
for1second.